The Top Ten Must-Photograph Locations in Singapore
- Singapore Photography Workshops

- Mar 29
- 17 min read
Updated: Apr 1
If you’re a photographer visiting Singapore for the first time or looking to build a portfolio that captures the city's iconic skyline, rich culture, and stunning architecture, here are the top 10 must-photograph locations.
These spots are numbered strategically, making it easy for you to input them into Google Maps and create an efficient route that can be covered over at least three full days of daytime to night photography without rushing through. If you’re an early riser, you might want to revisit some of your favourite locations to capture stunning sunrise shots.
Each location presents unique photography opportunities depending on the time of day and your photography interest. The recommended best times are for you to capture the most striking and visually impactful shots. This is to help you make the most of each location.
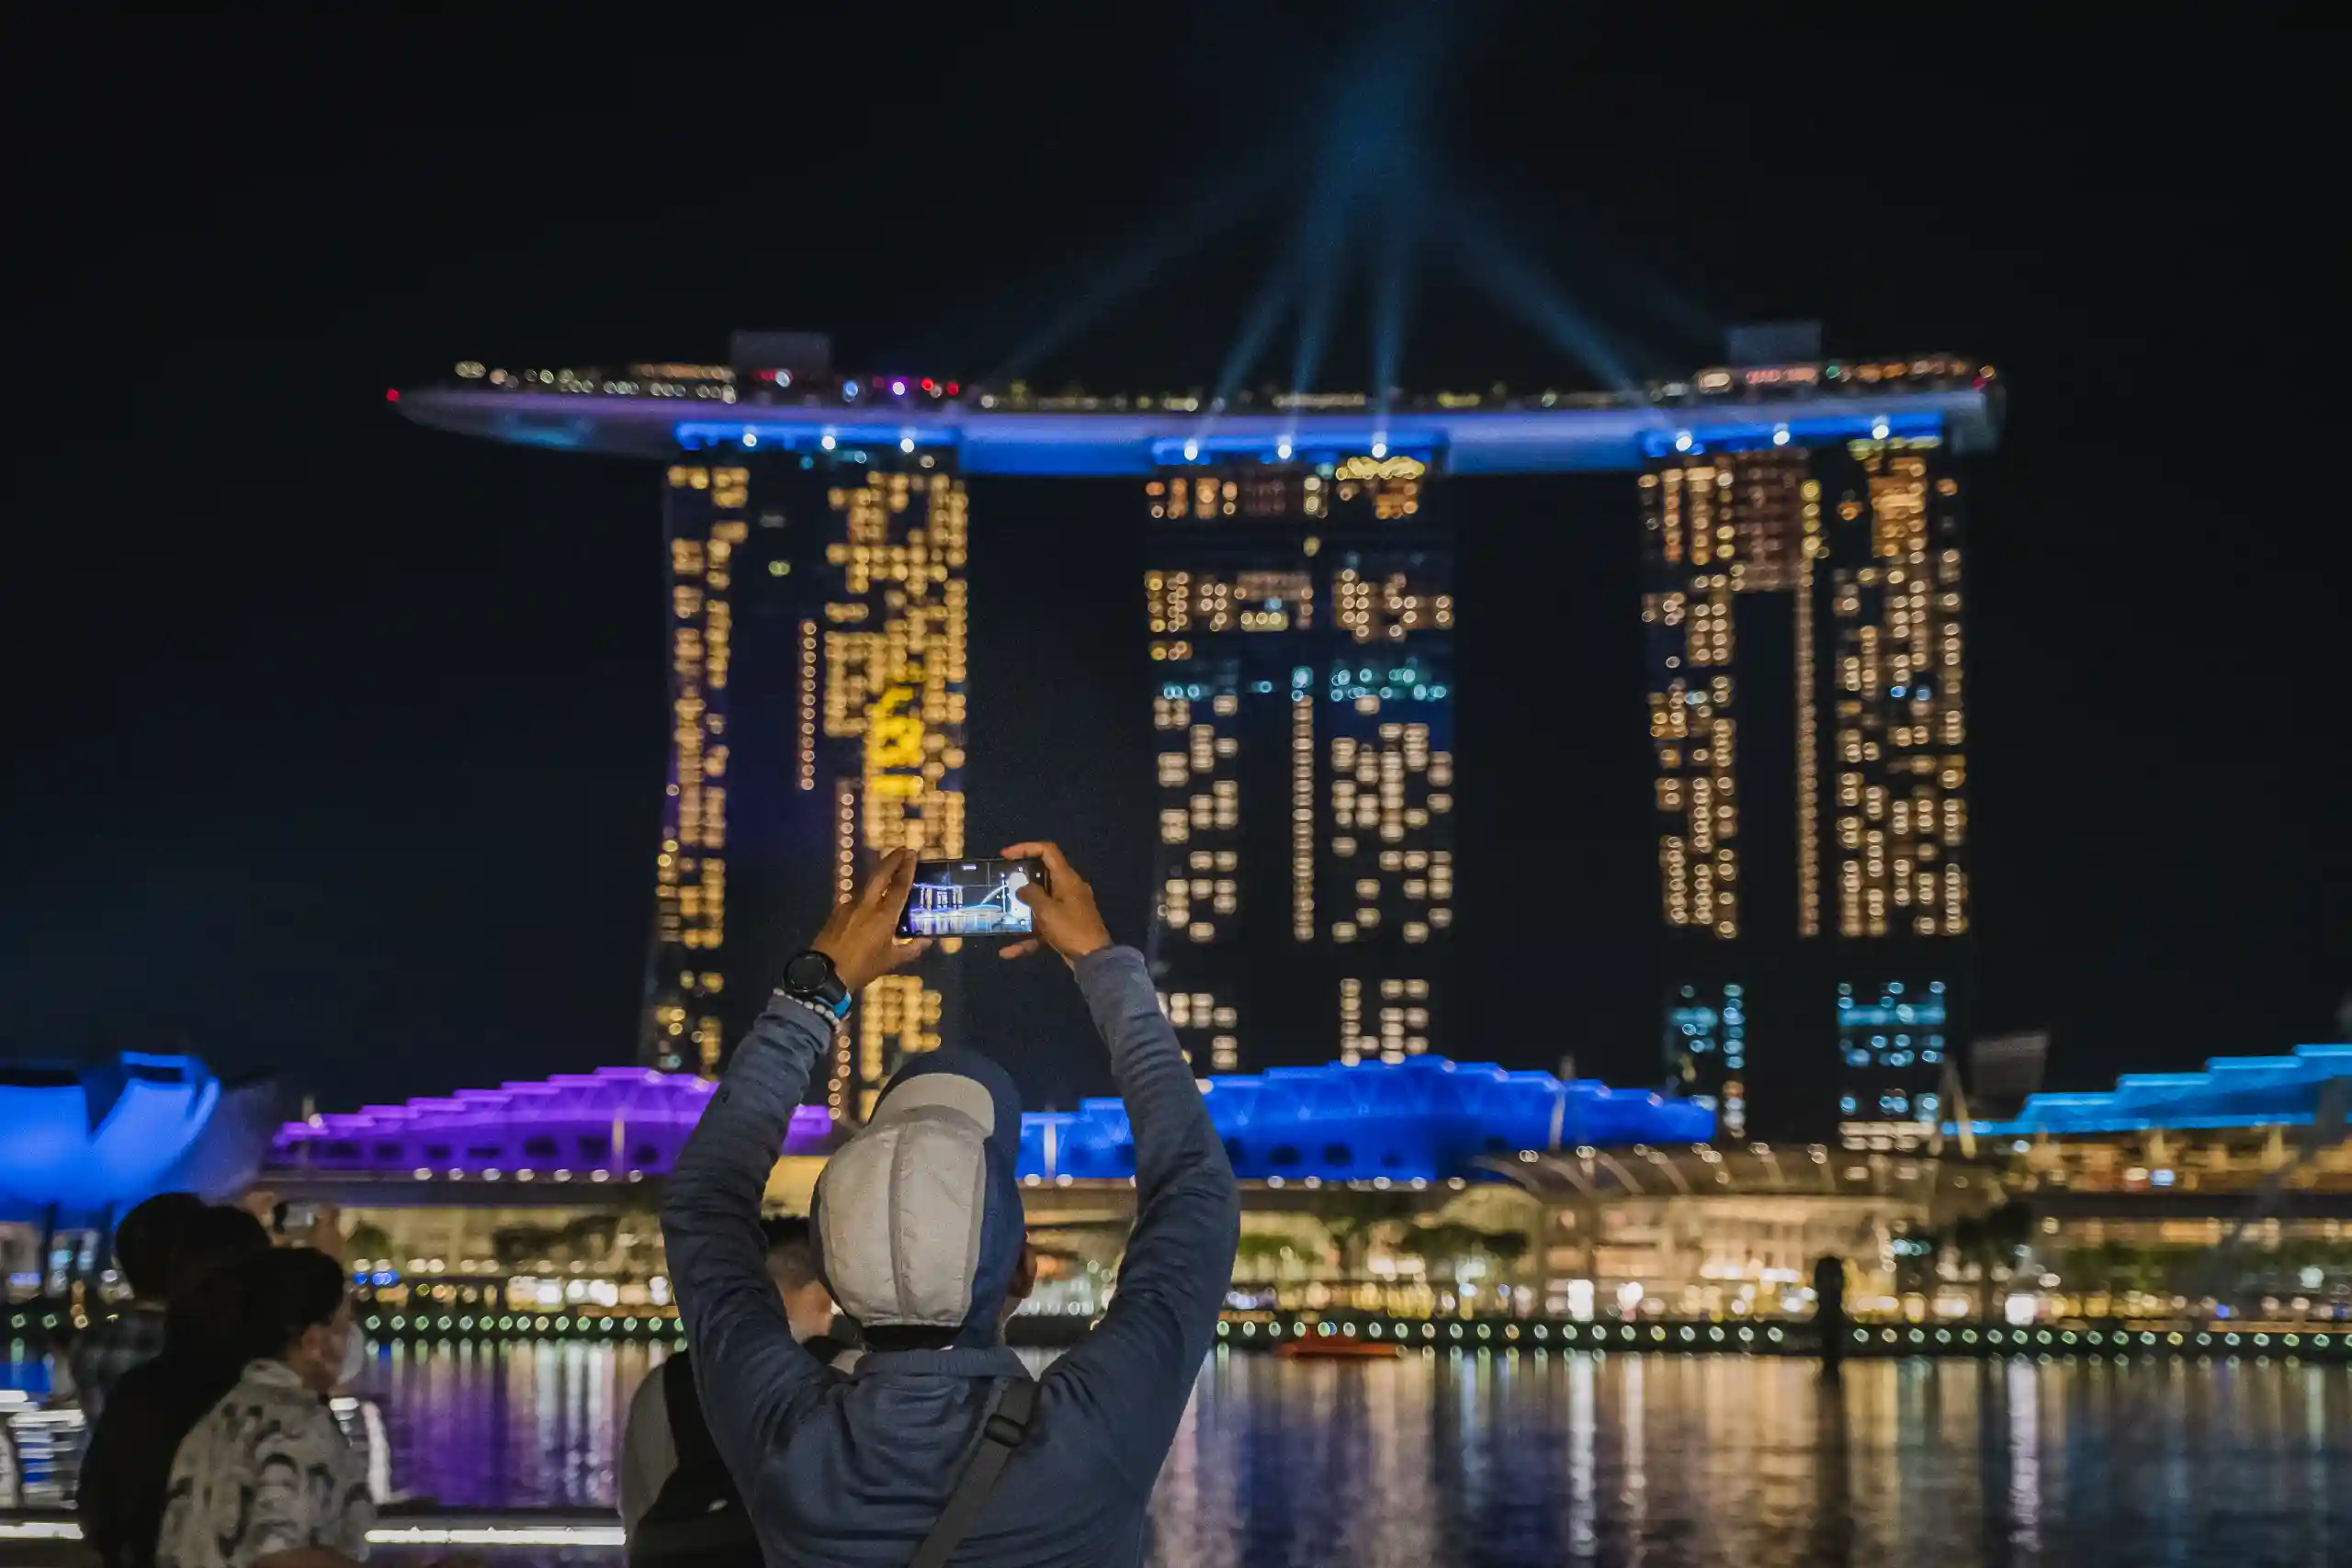
📍1. Marina Bay Sands (MBS) & Helix Bridge.
✅ Best for: City skyline, futuristic architecture, reflections and night photography is especially impressive when illuminated at night and the light show.

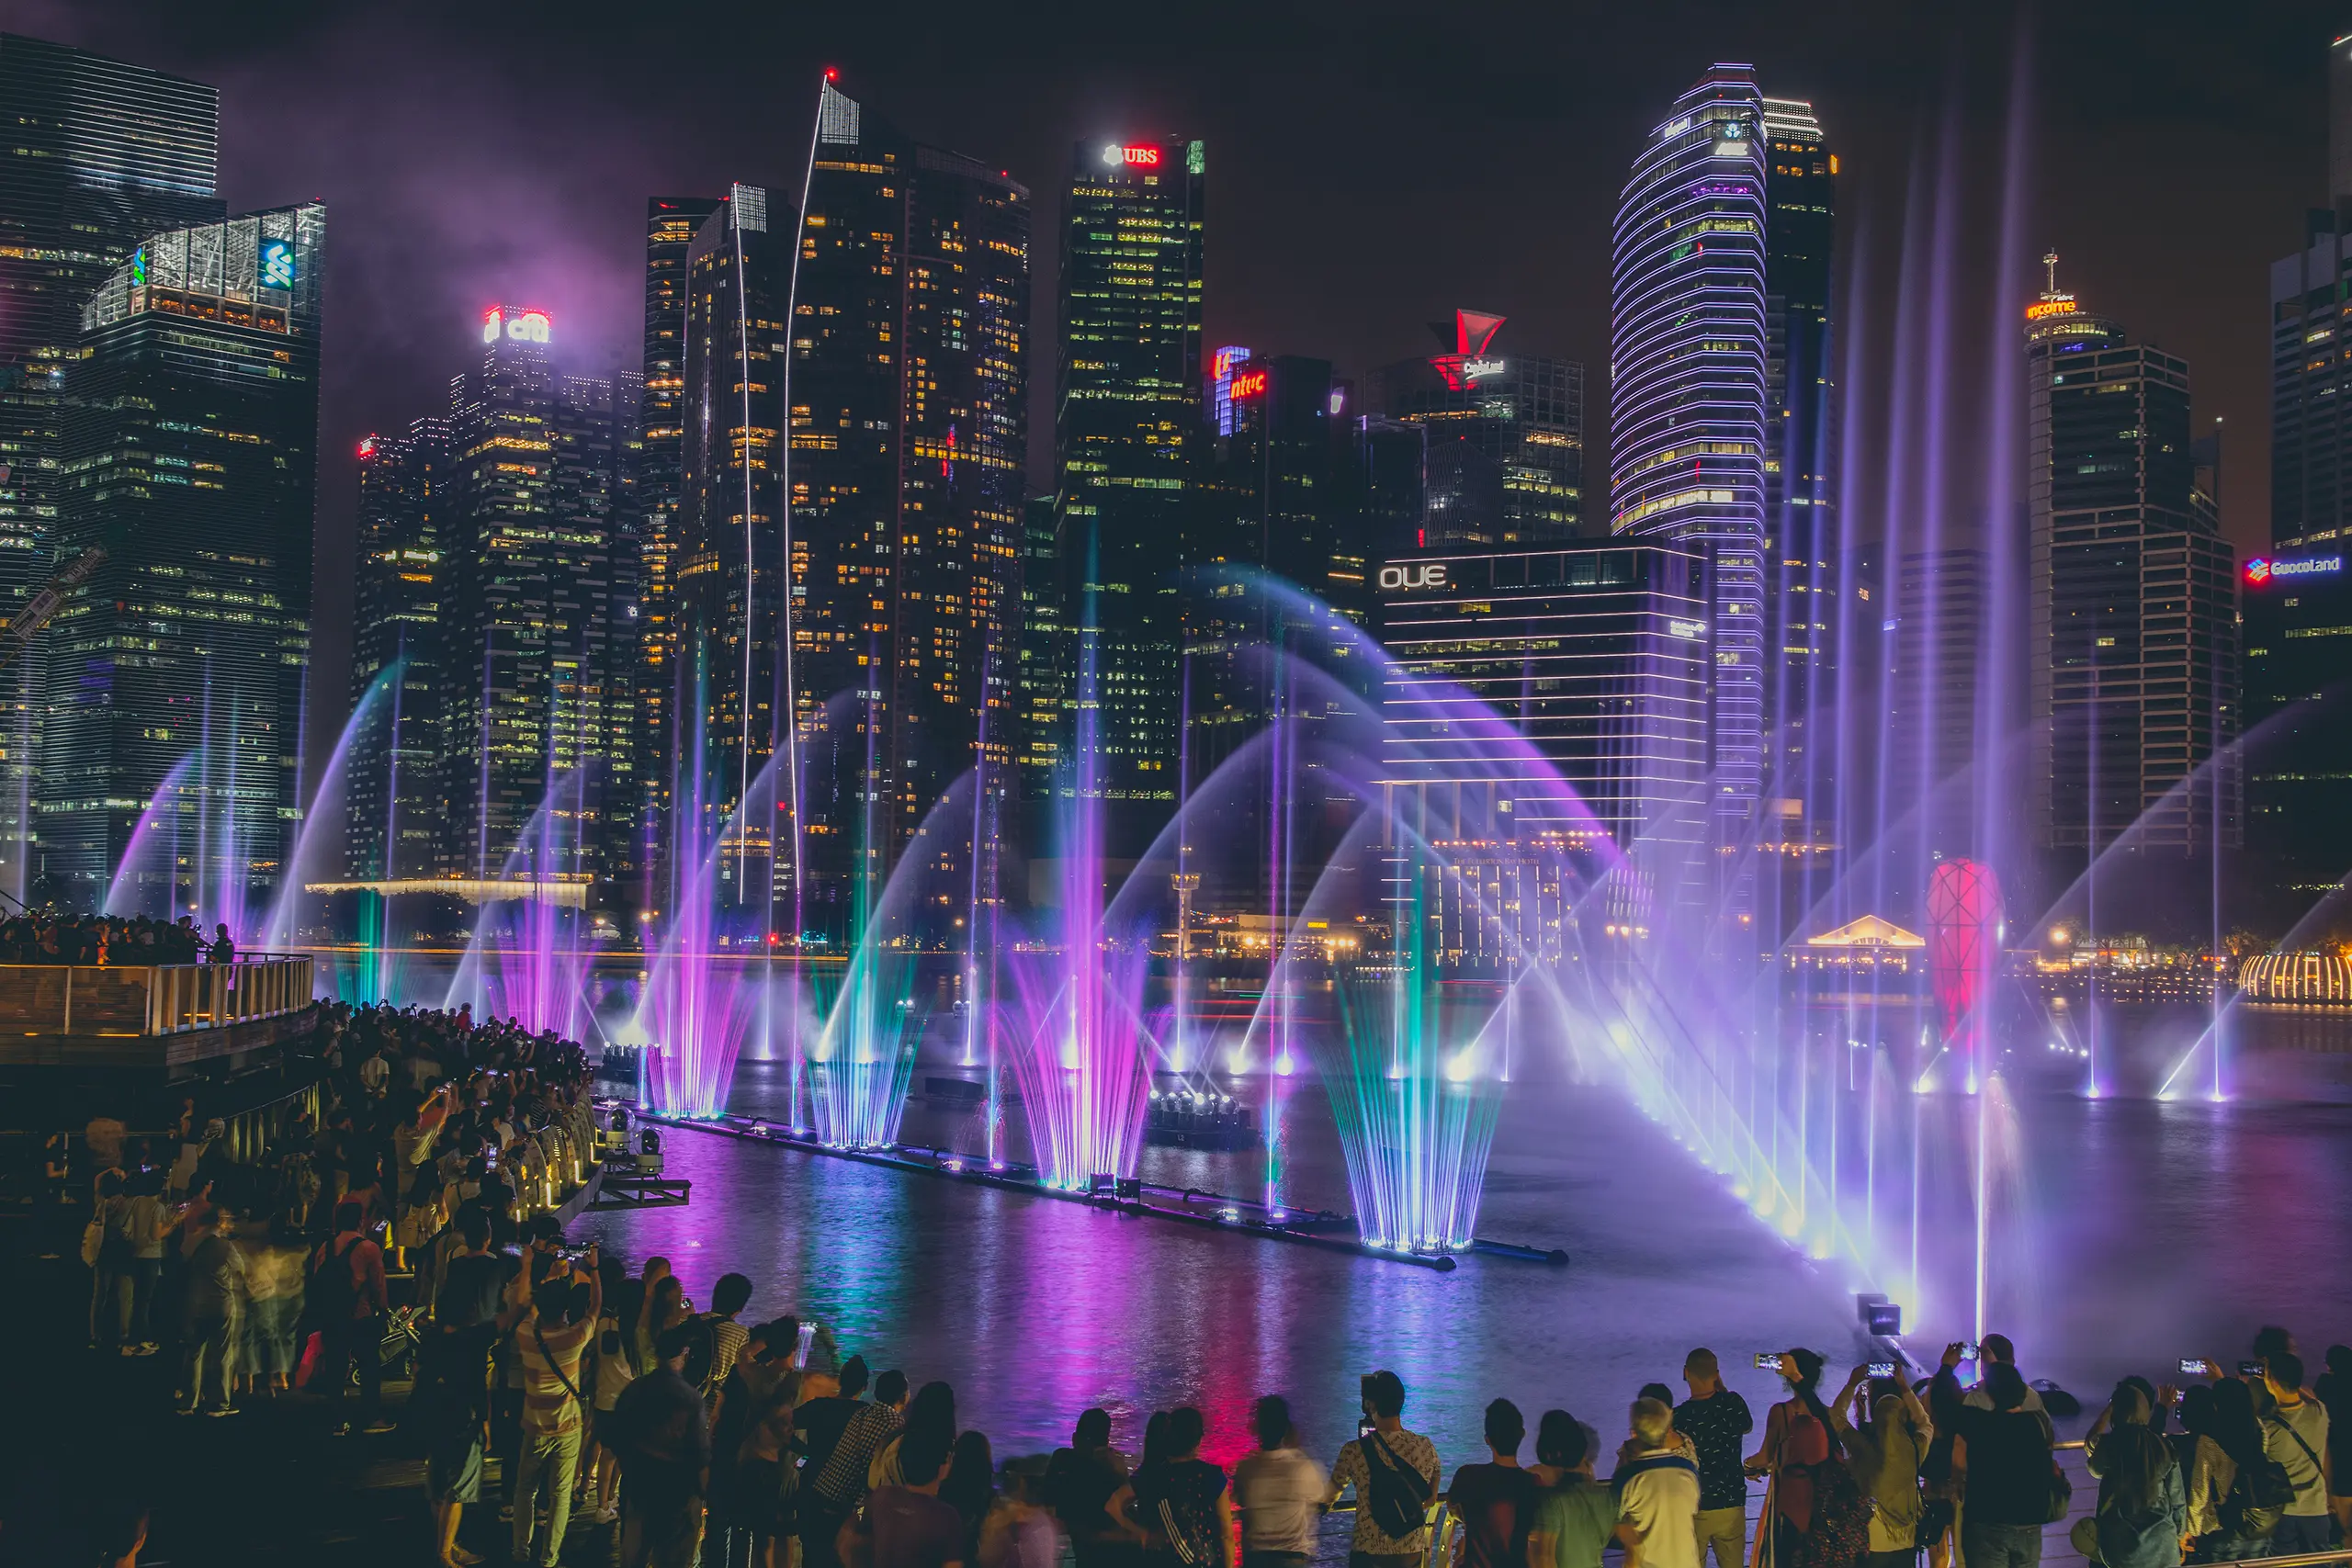

⏰ Best Time: Early morning with no crowd. Sunset into the blue hour (6.30 PM onwards) for softer hues and night (8 PM onwards) to create great photos including stunning reflections and city lights. At night, catch the Light and Water Show (Spectra, free admission) 8:00 PM & 9:00 PM daily (with an extra 10:00 PM show on weekends). Check the Marina Bay Sands website to confirm the timing.
📷 Shooting Tips:
Shoot the Light and Water Show, Spectra from the boardwalk towards Louis Vuitton Maison to capture light beams and water reflections against the city skyline. For an elevated view which overlooks the CBD skyline and away from the crowd, get onto the viewing platform (facing Louis Vuitton). Suggested camera settings to get that silky colourful water, perhaps some light trails from moving boats and nice light burst would be ISO 100-400, f/11 - f/16, 10-20s. Tripod is a must.
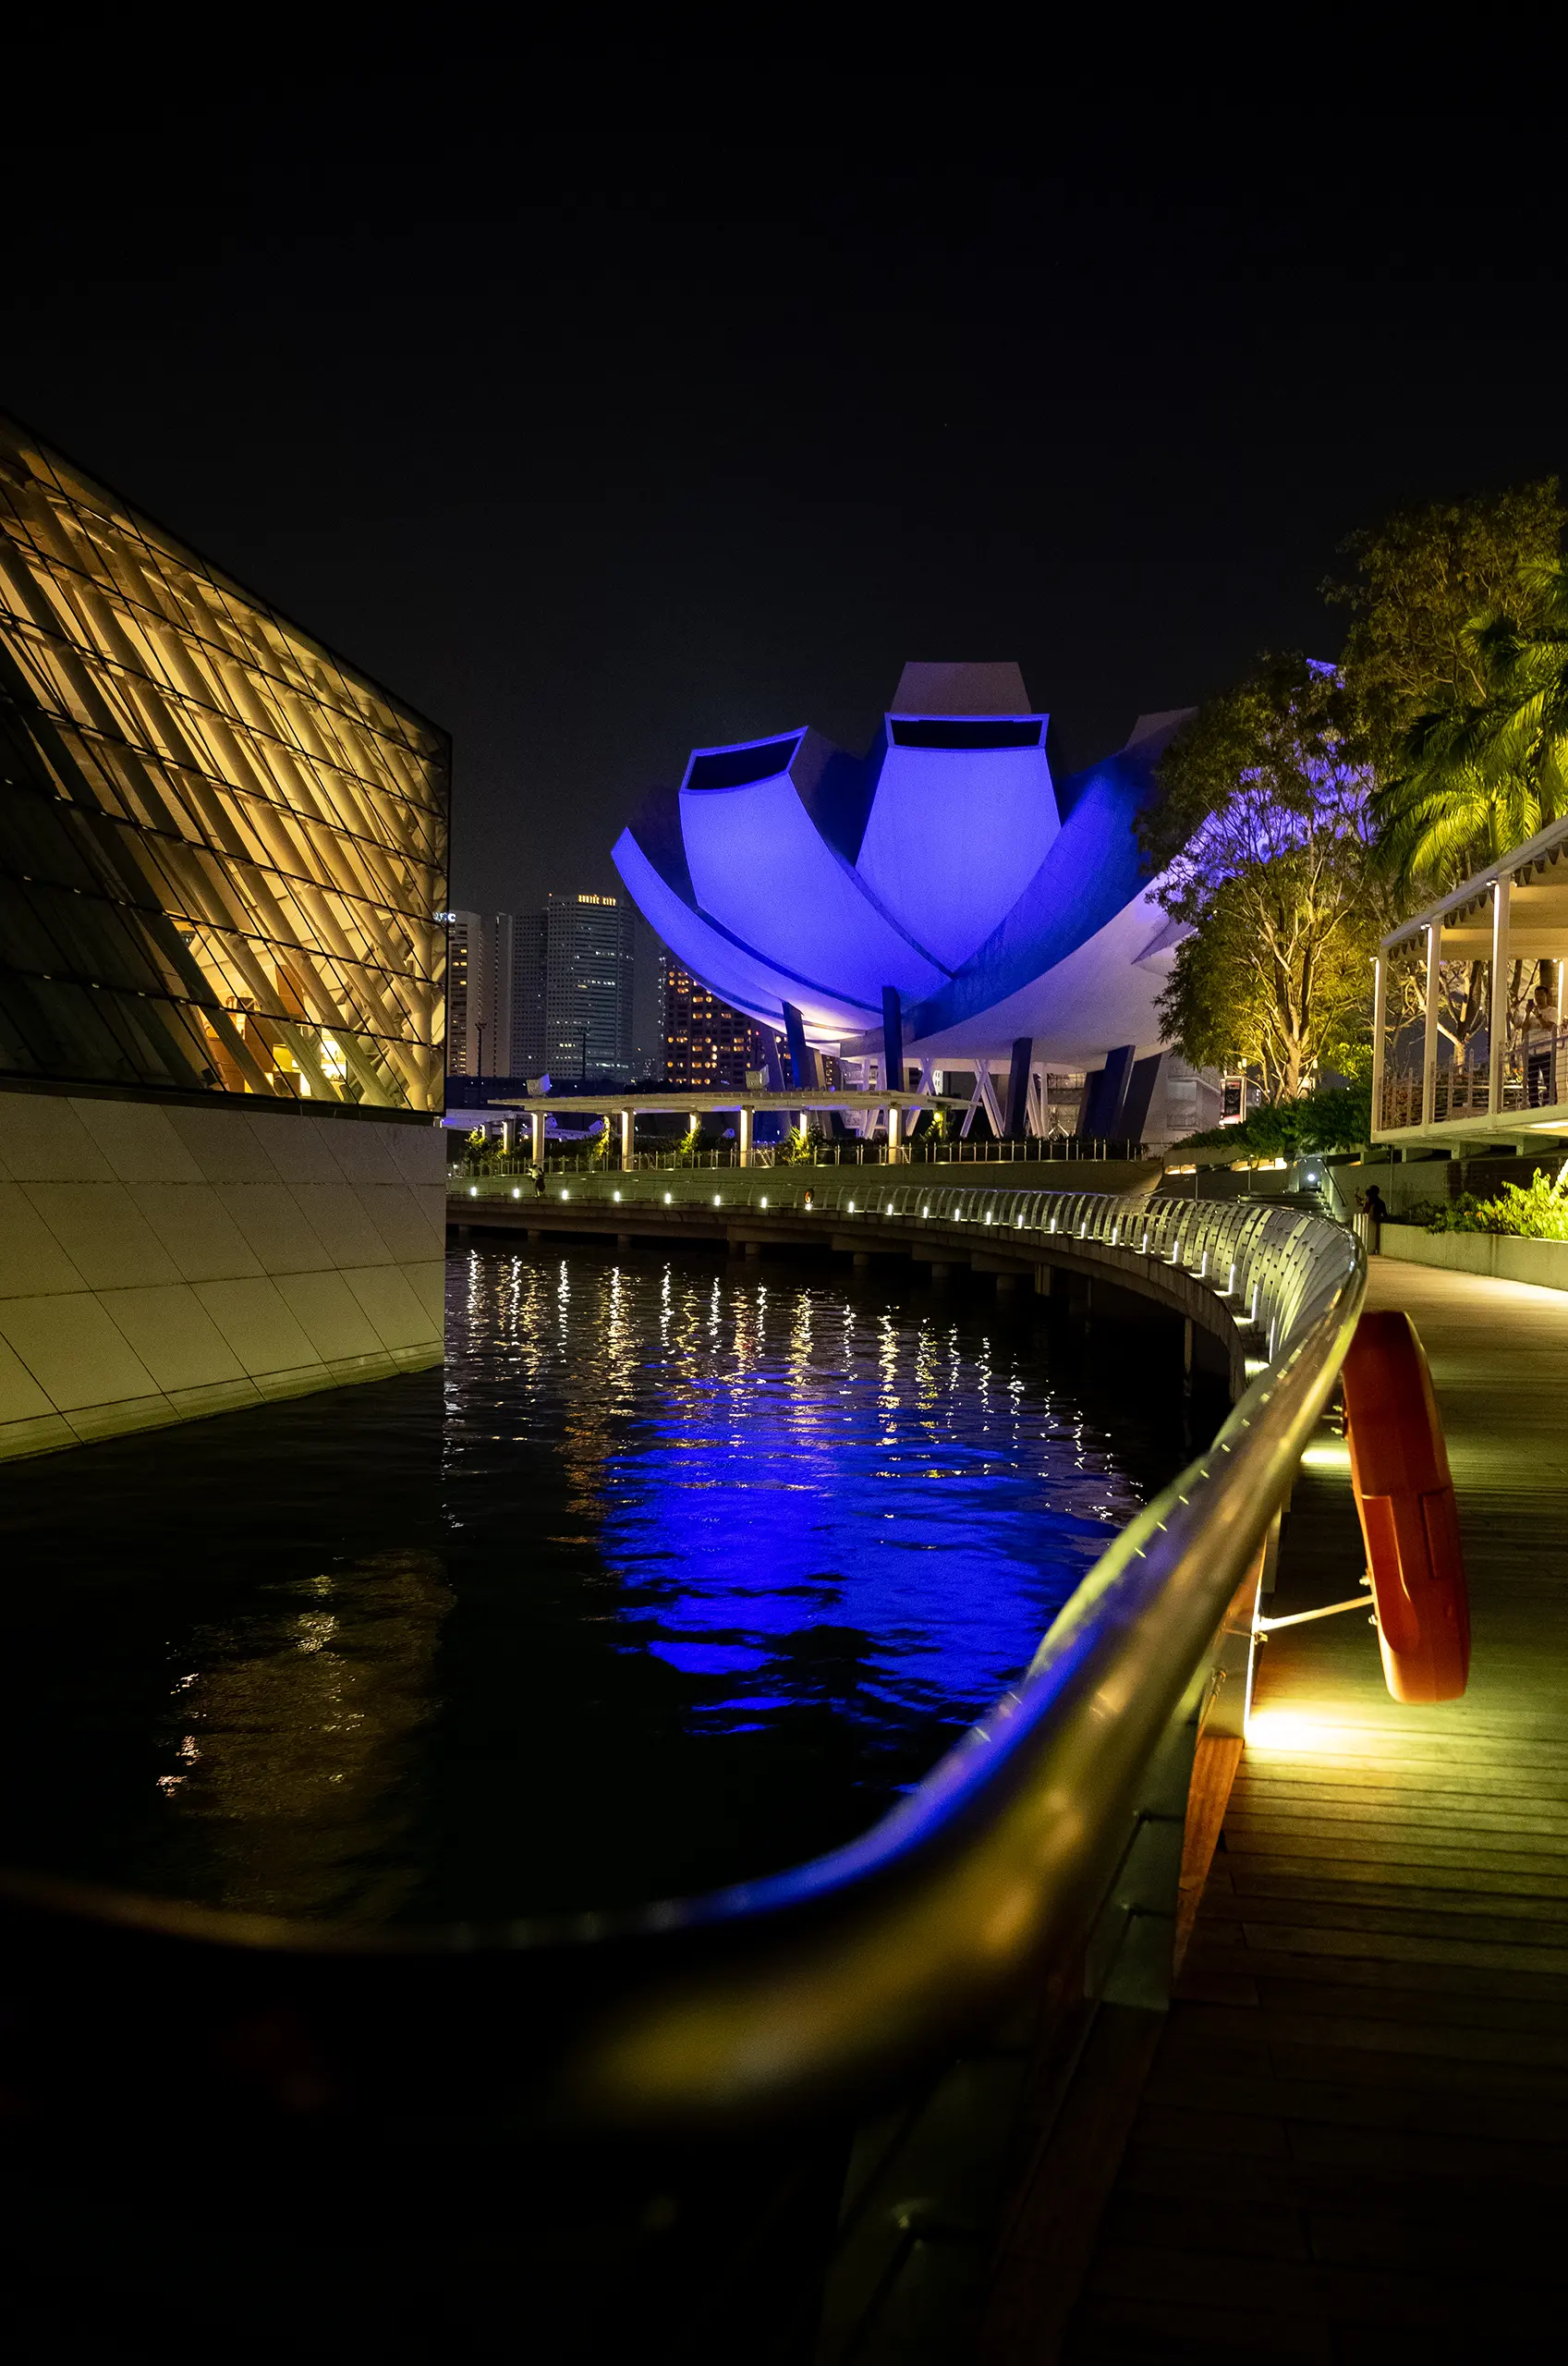
Use the waterfront railing to frame the leading line towards the lotus-shaped ArtScience Museum.
Shoot the Apple Marina Bay Sands (Floating Apple Store) from the boardwalk in front of MBS. The glass dome reflects beautifully on the water, especially at night.
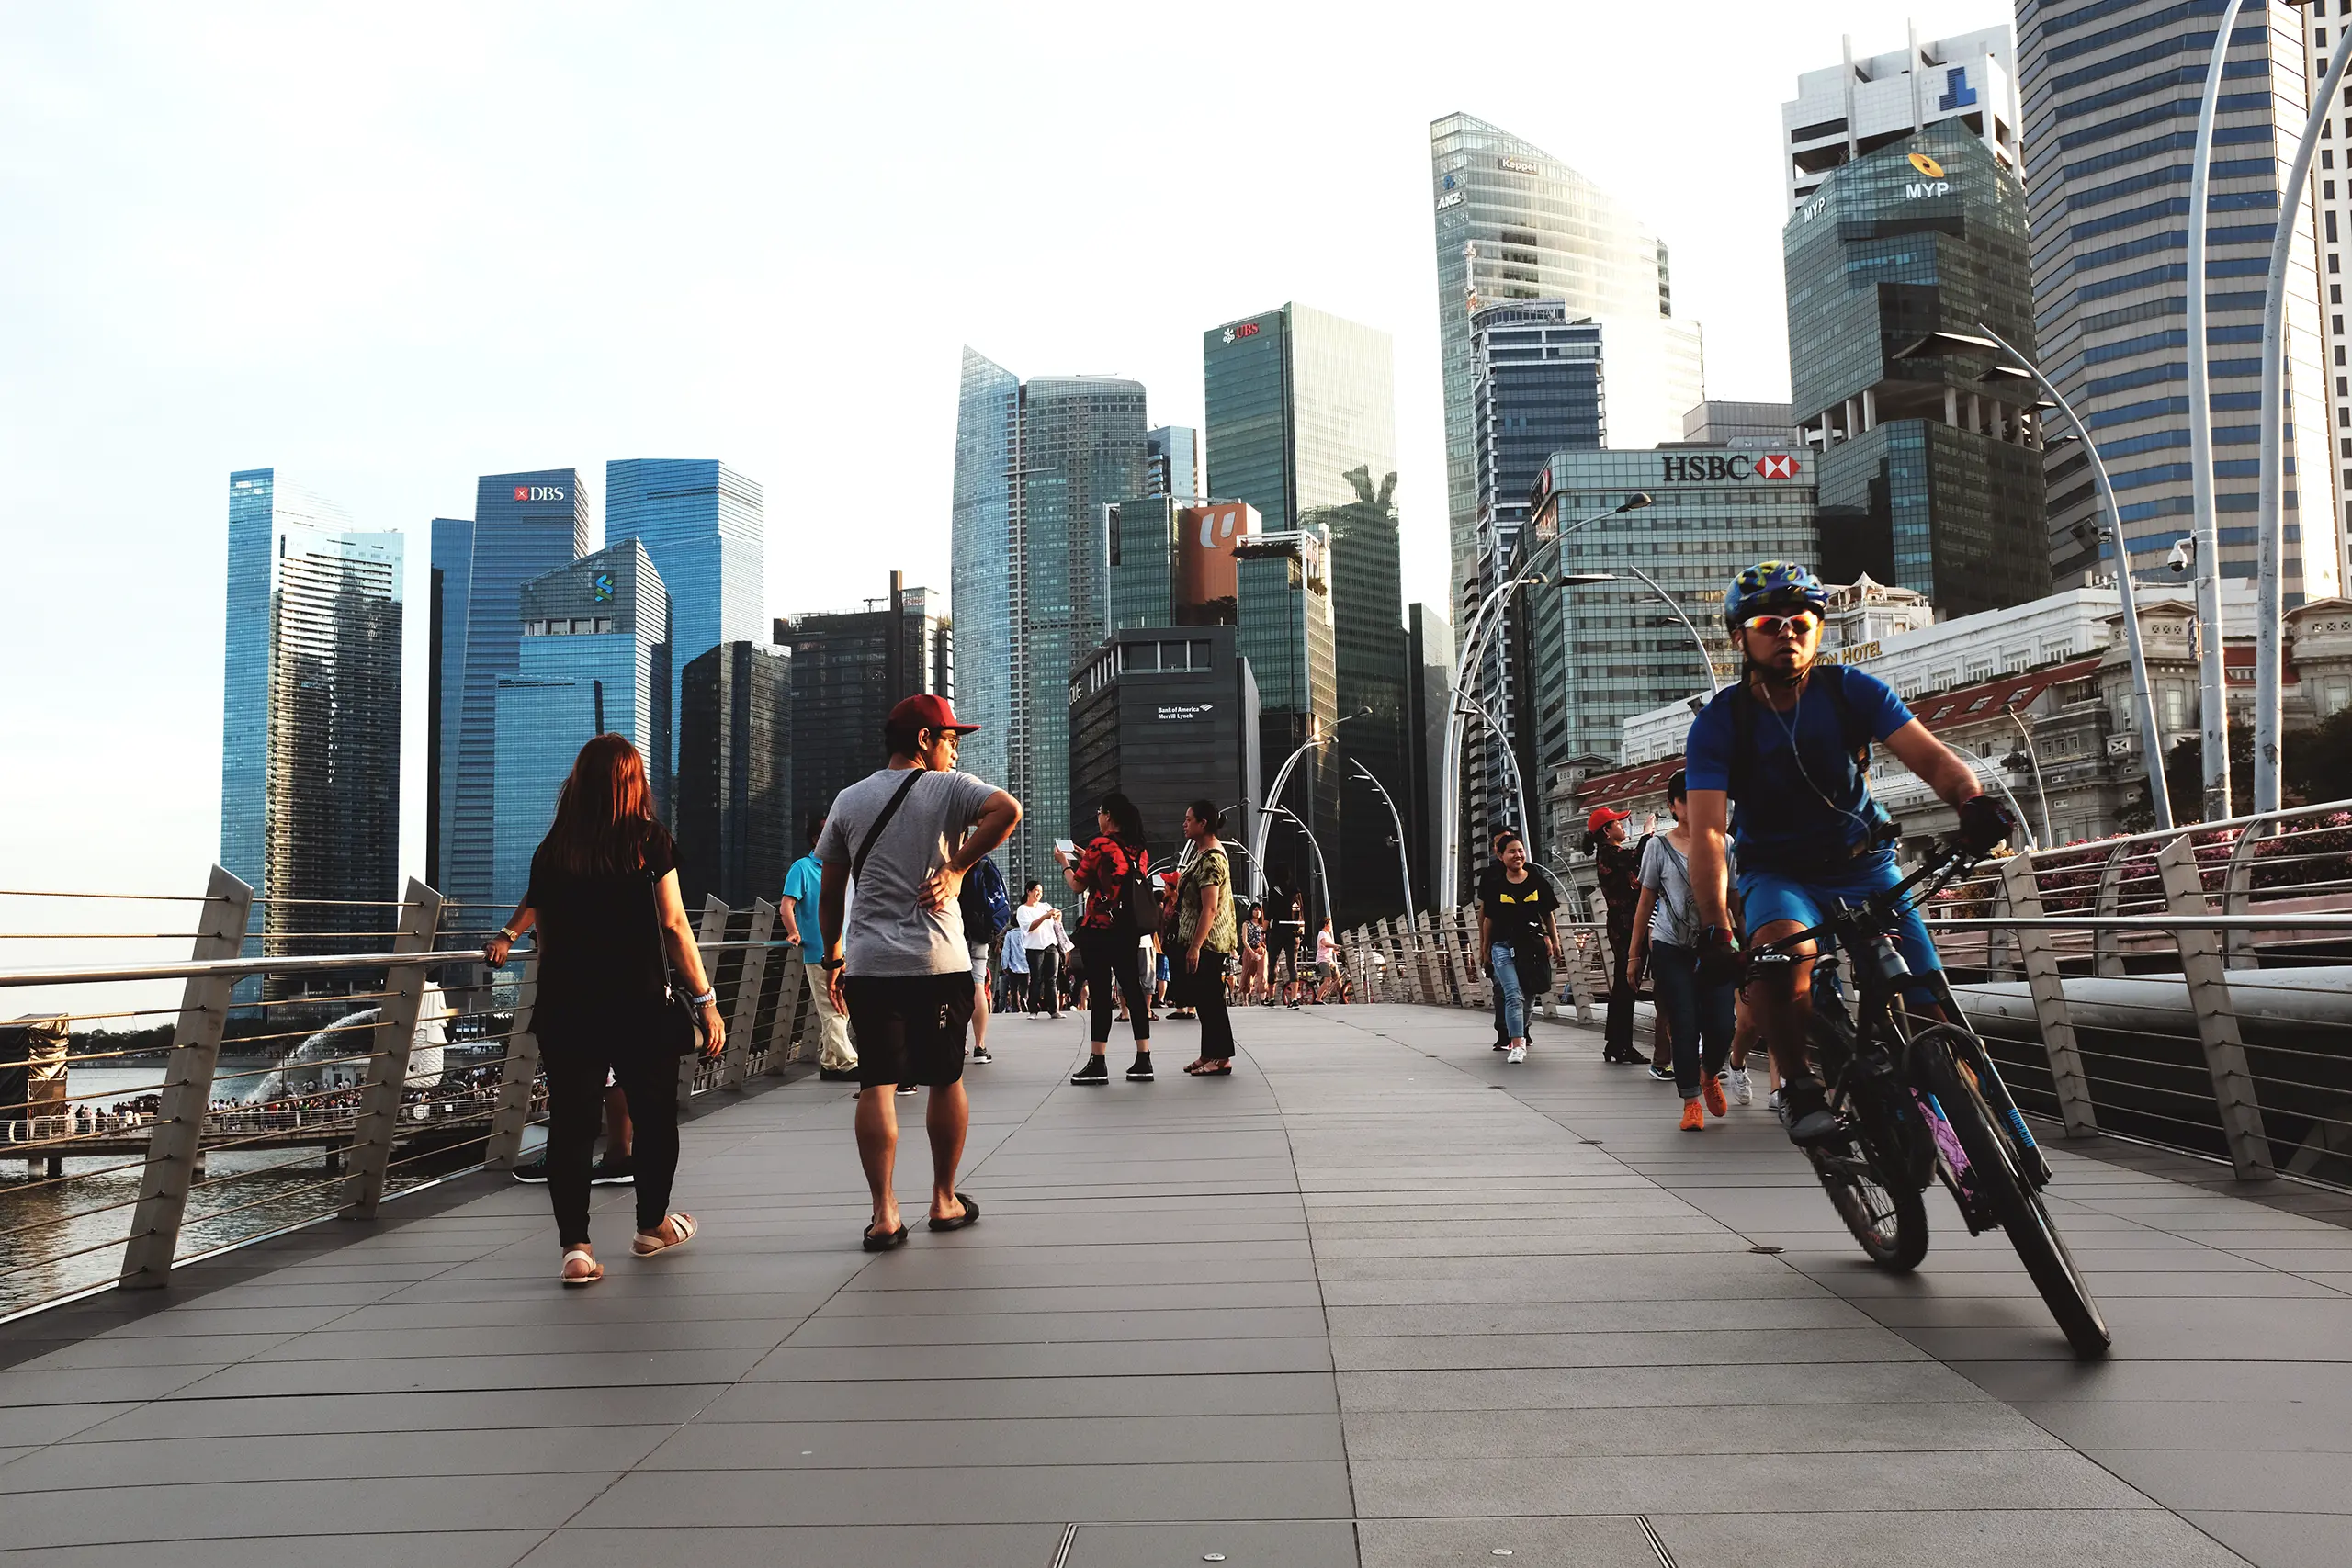
Walk along the boardwalk towards the Marina Bay Financial Centre (MBFC) to get an unobstructed panoramic shot of the Central Business District.
Shoot the Singapore Flyer and Marina Bay skyline from a hidden outdoor rooftop terrace at MBS Shoppes. Take the single escalator located above the digital light canvas and the food court. It will lead you to the rooftop. No admission fee. The rooftop terrace also links to the Marina Bay Sands (hotel) and to the Gardens By The Bay.
Shoot along the Helix Bridge, illuminated with colourful LED lights, creating a sci-fi aesthetic.
From the Helix Bridge, shoot the stunning scenery and unique architectural compositions of the ArtScience Museum, the lotus-shaped building and Marina Bay skyline. One of the most iconic shots from the bridge is MBS with the double-helix as the leading line. Singapore Flyer is visible from the Helix Bridge. Long exposure shots at night capture the wheel’s motion.
Use a wide-angle lens to capture the full skyline.
Use long exposure to capture light trails from passing boats and to create silky colourful water light show.
🌐 Website: https://www.marinabaysands.com
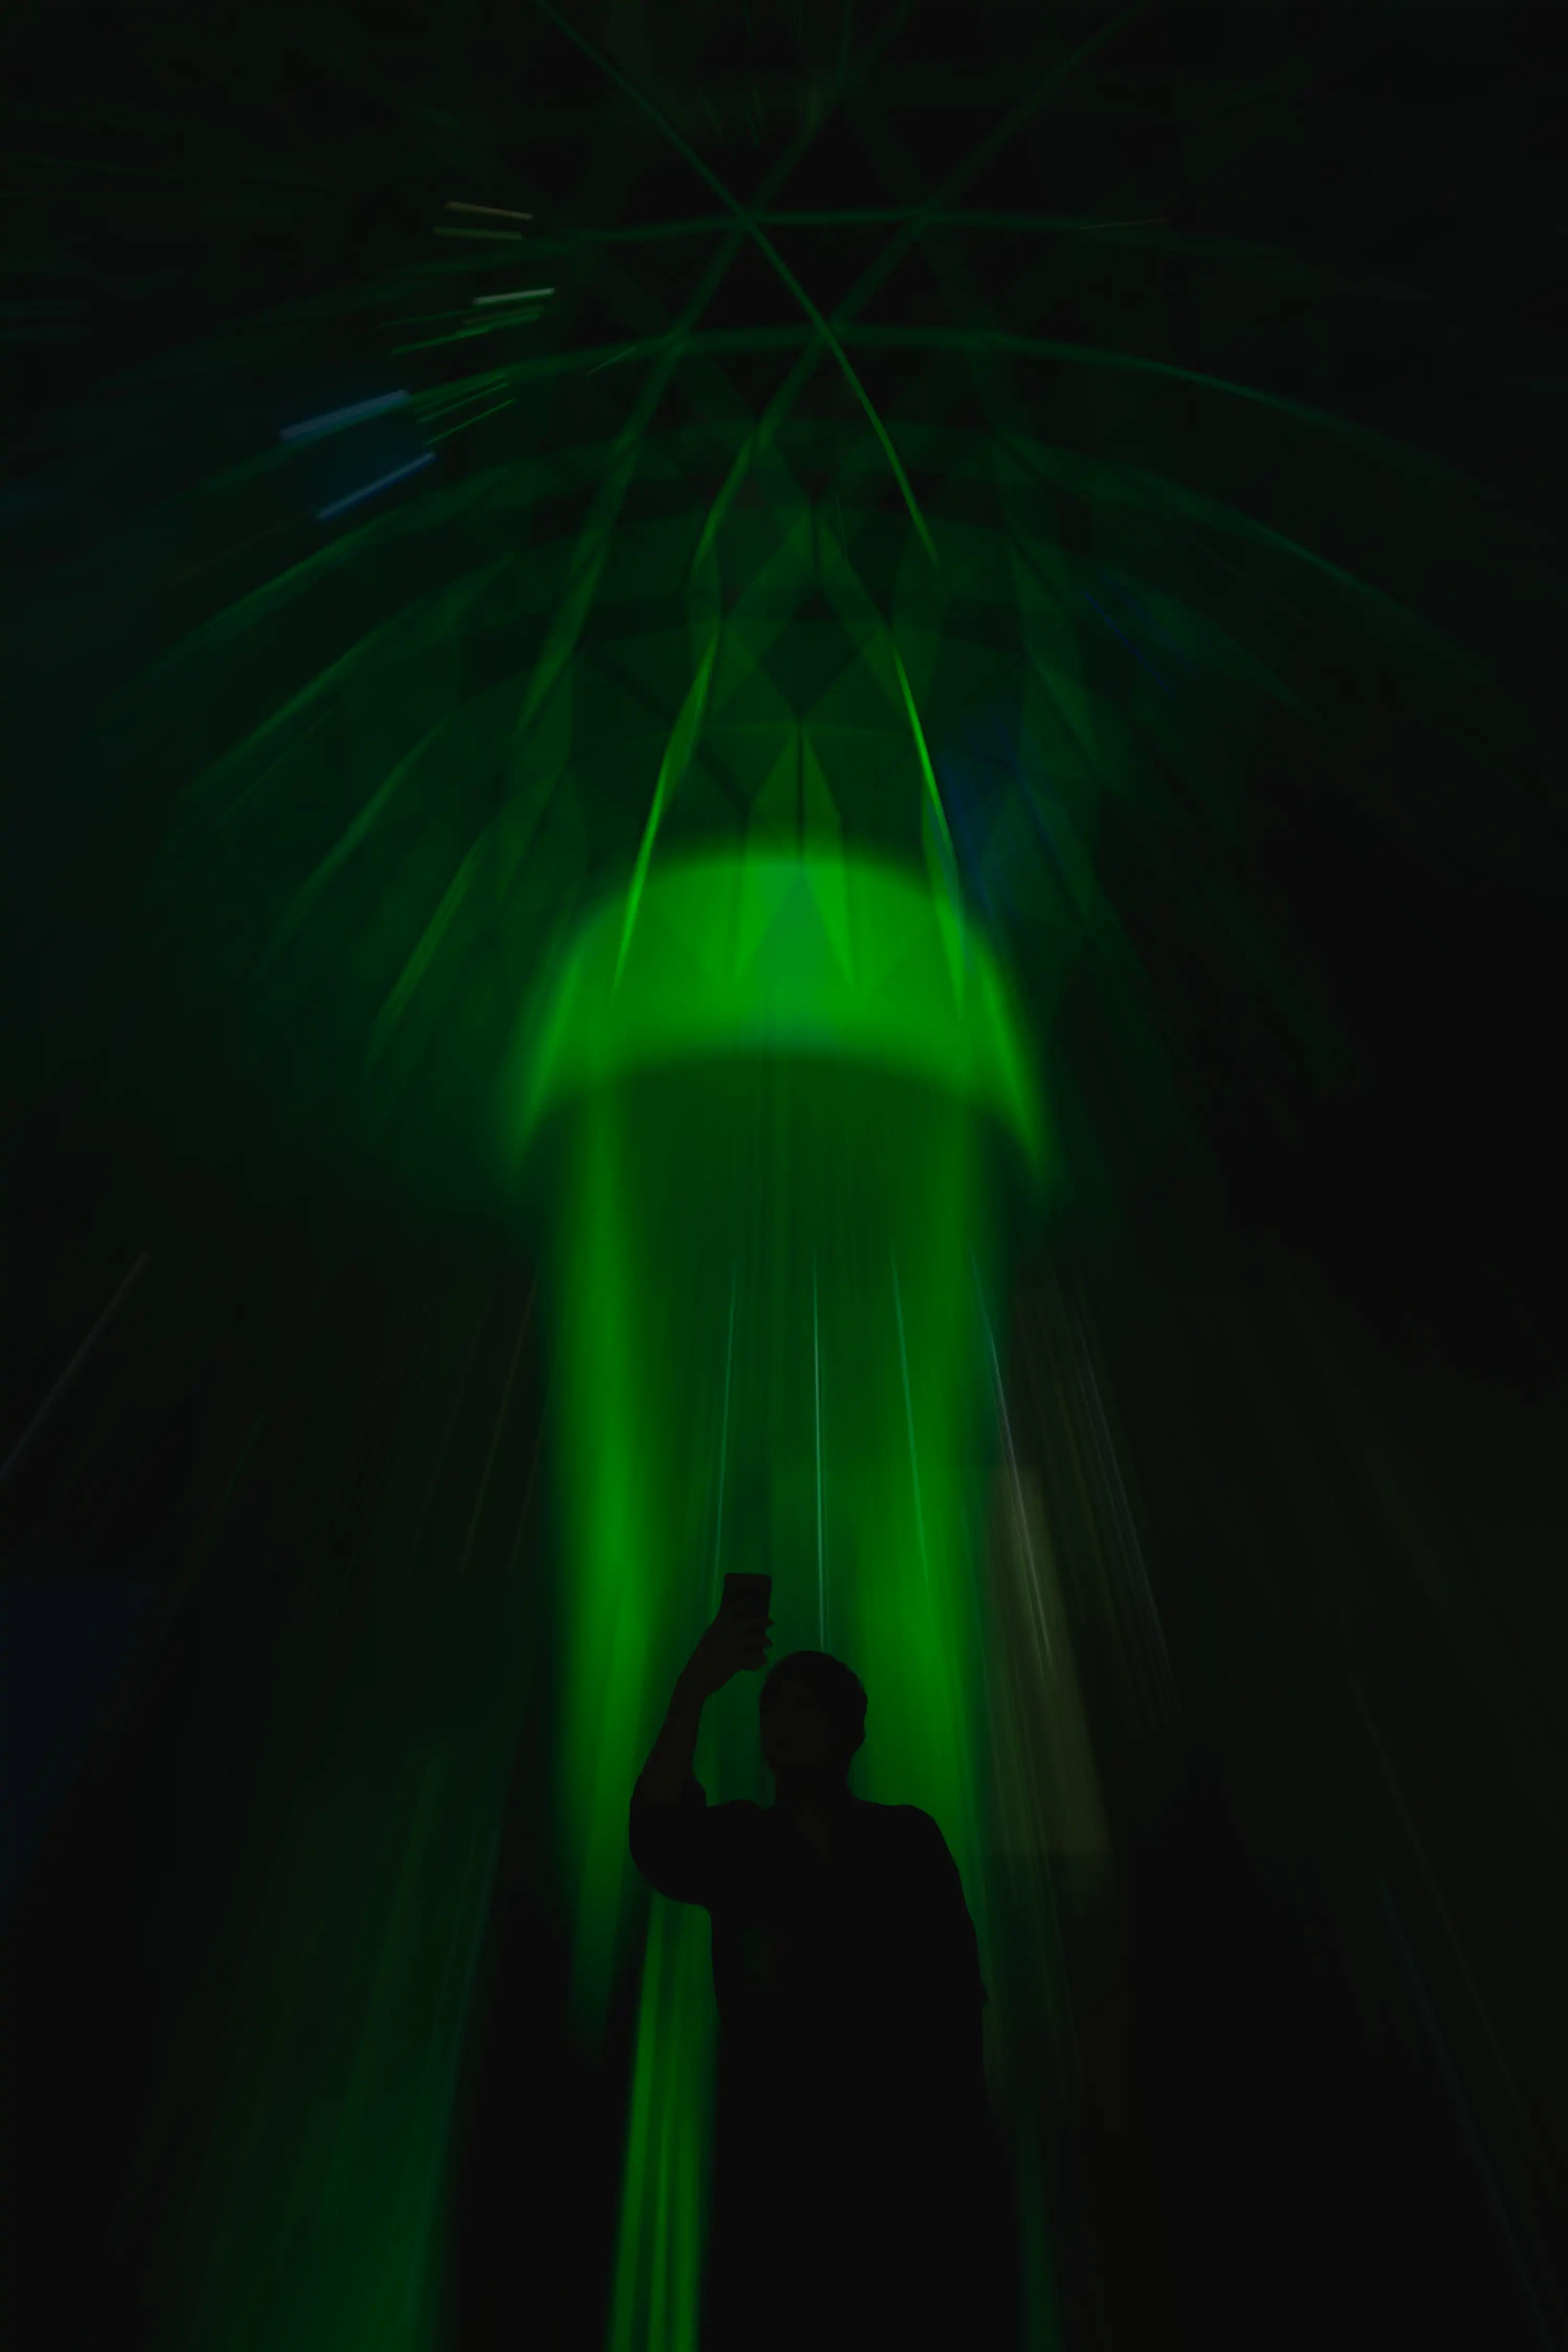
📍2. Gardens by the Bay & Supertree Grove
✅ Best for: Garden landscape, architecture, reflections and night photography especially impressive when illuminated at night and the light show.

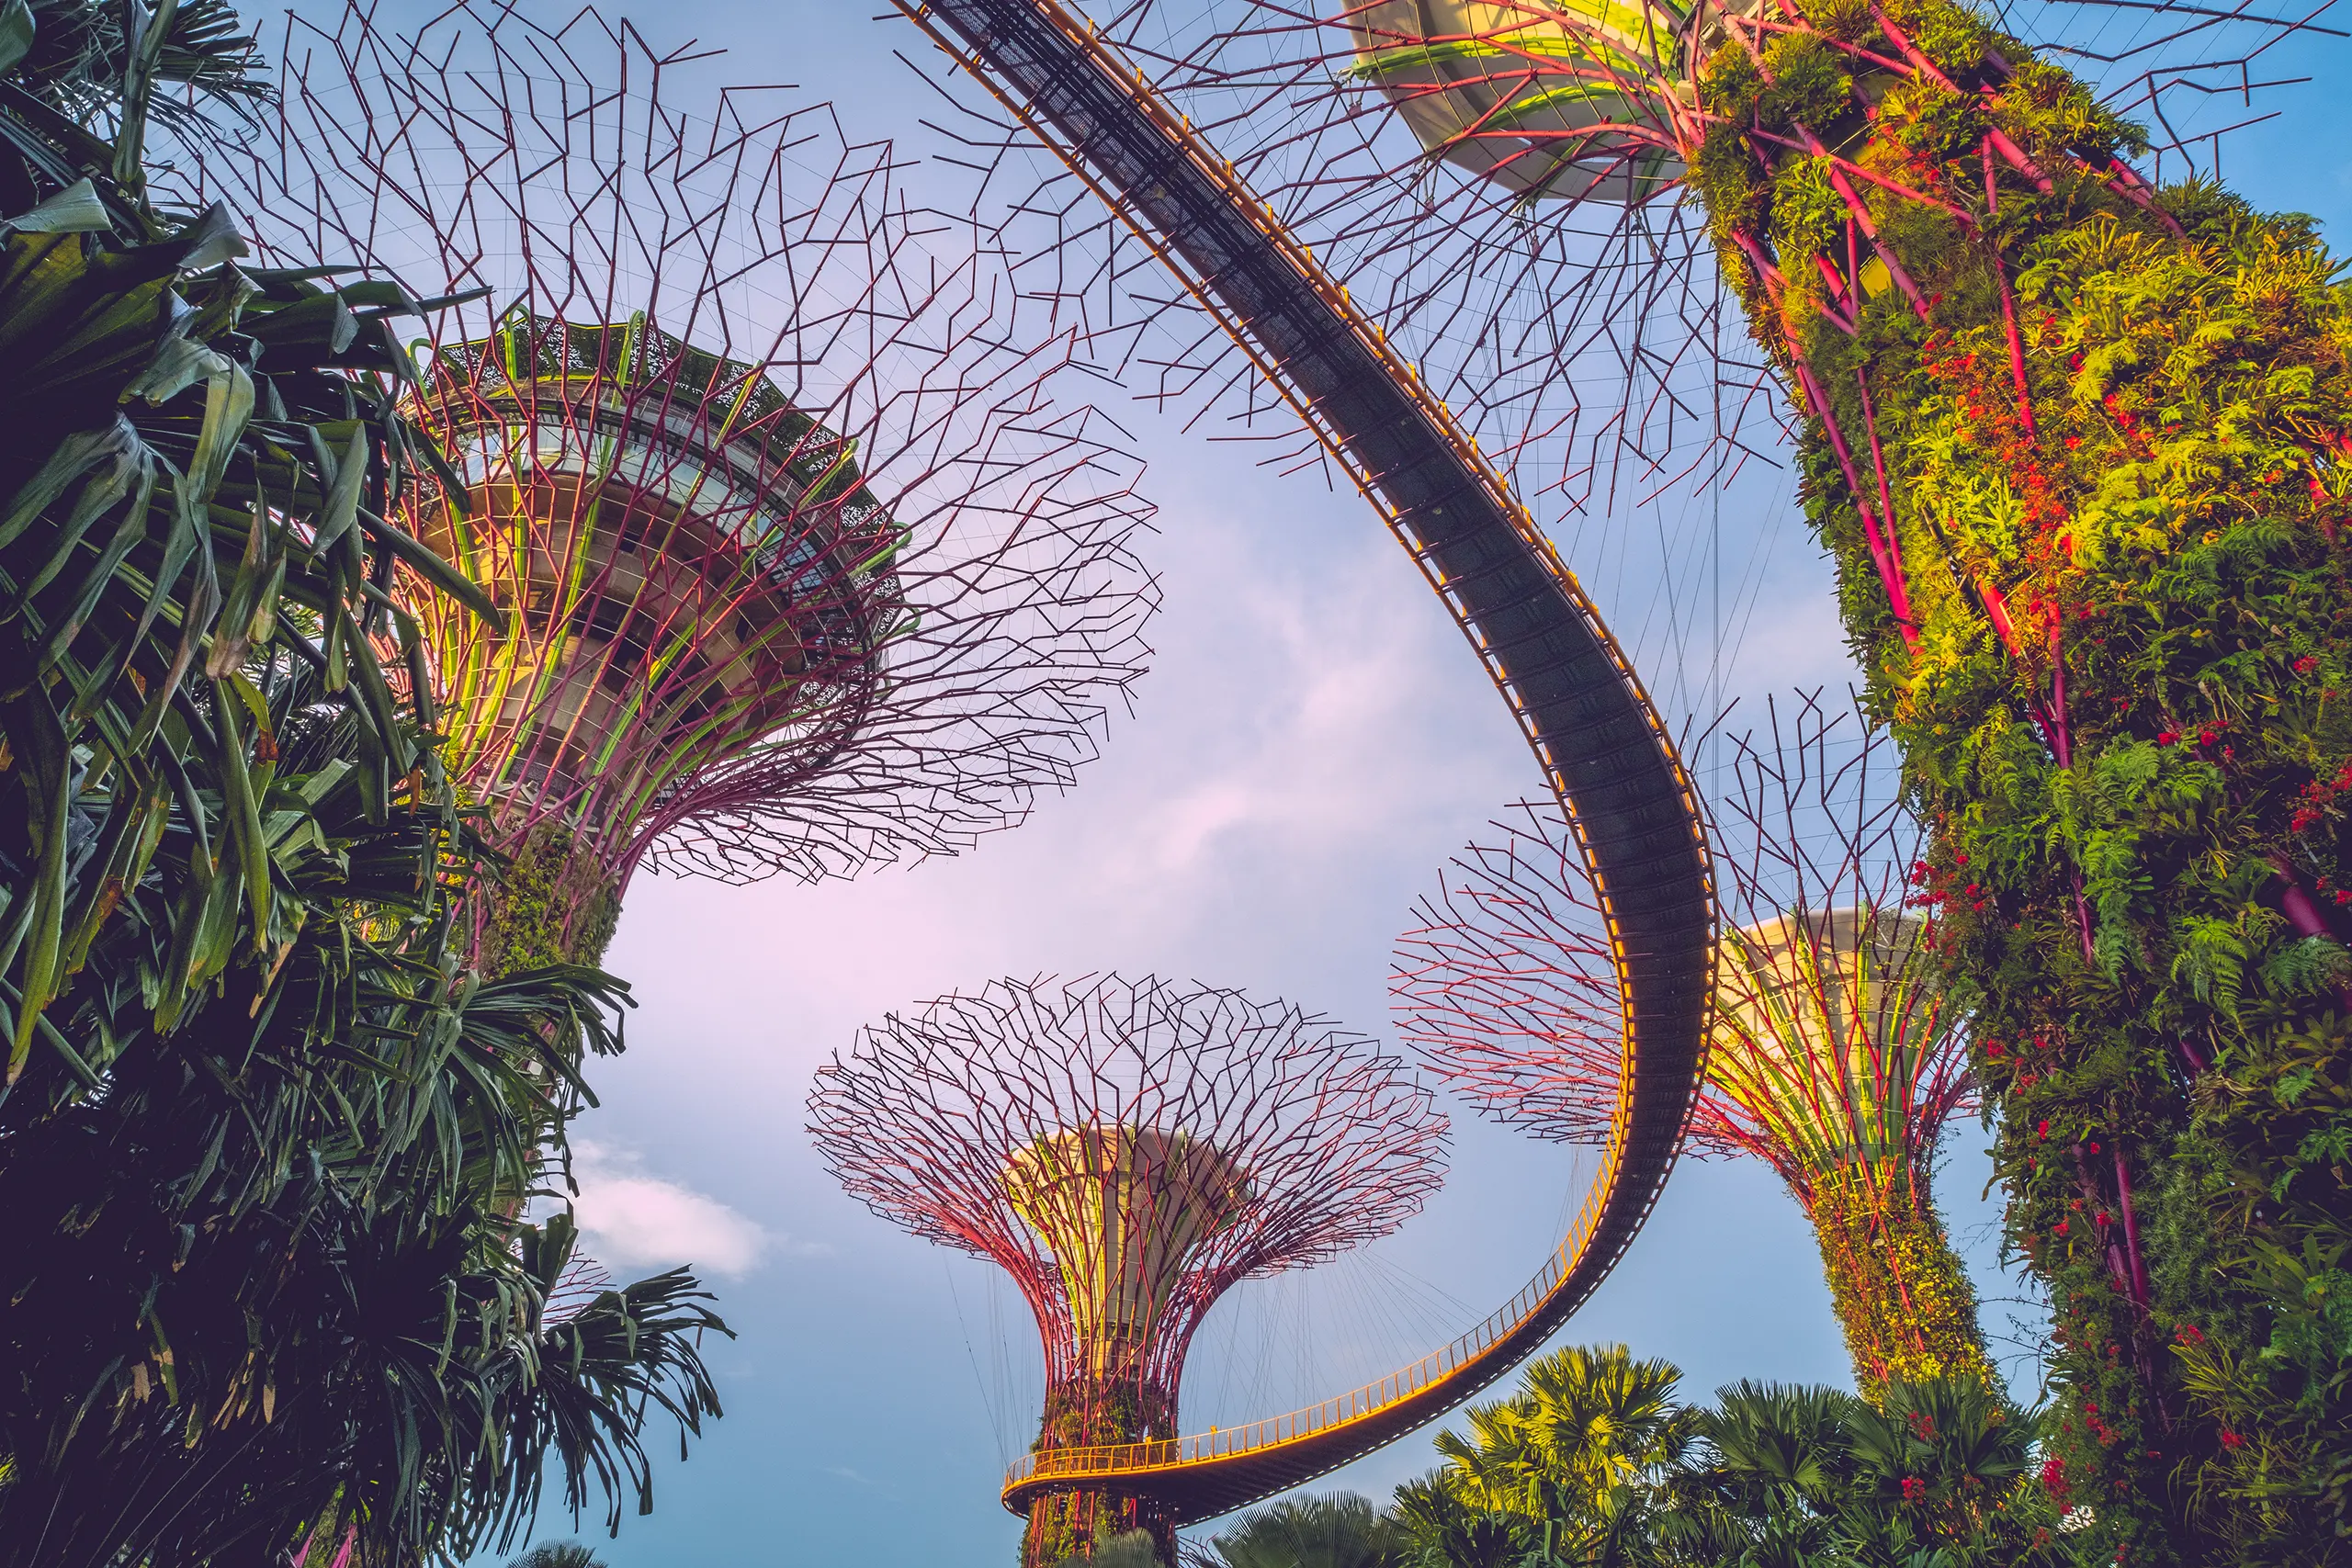
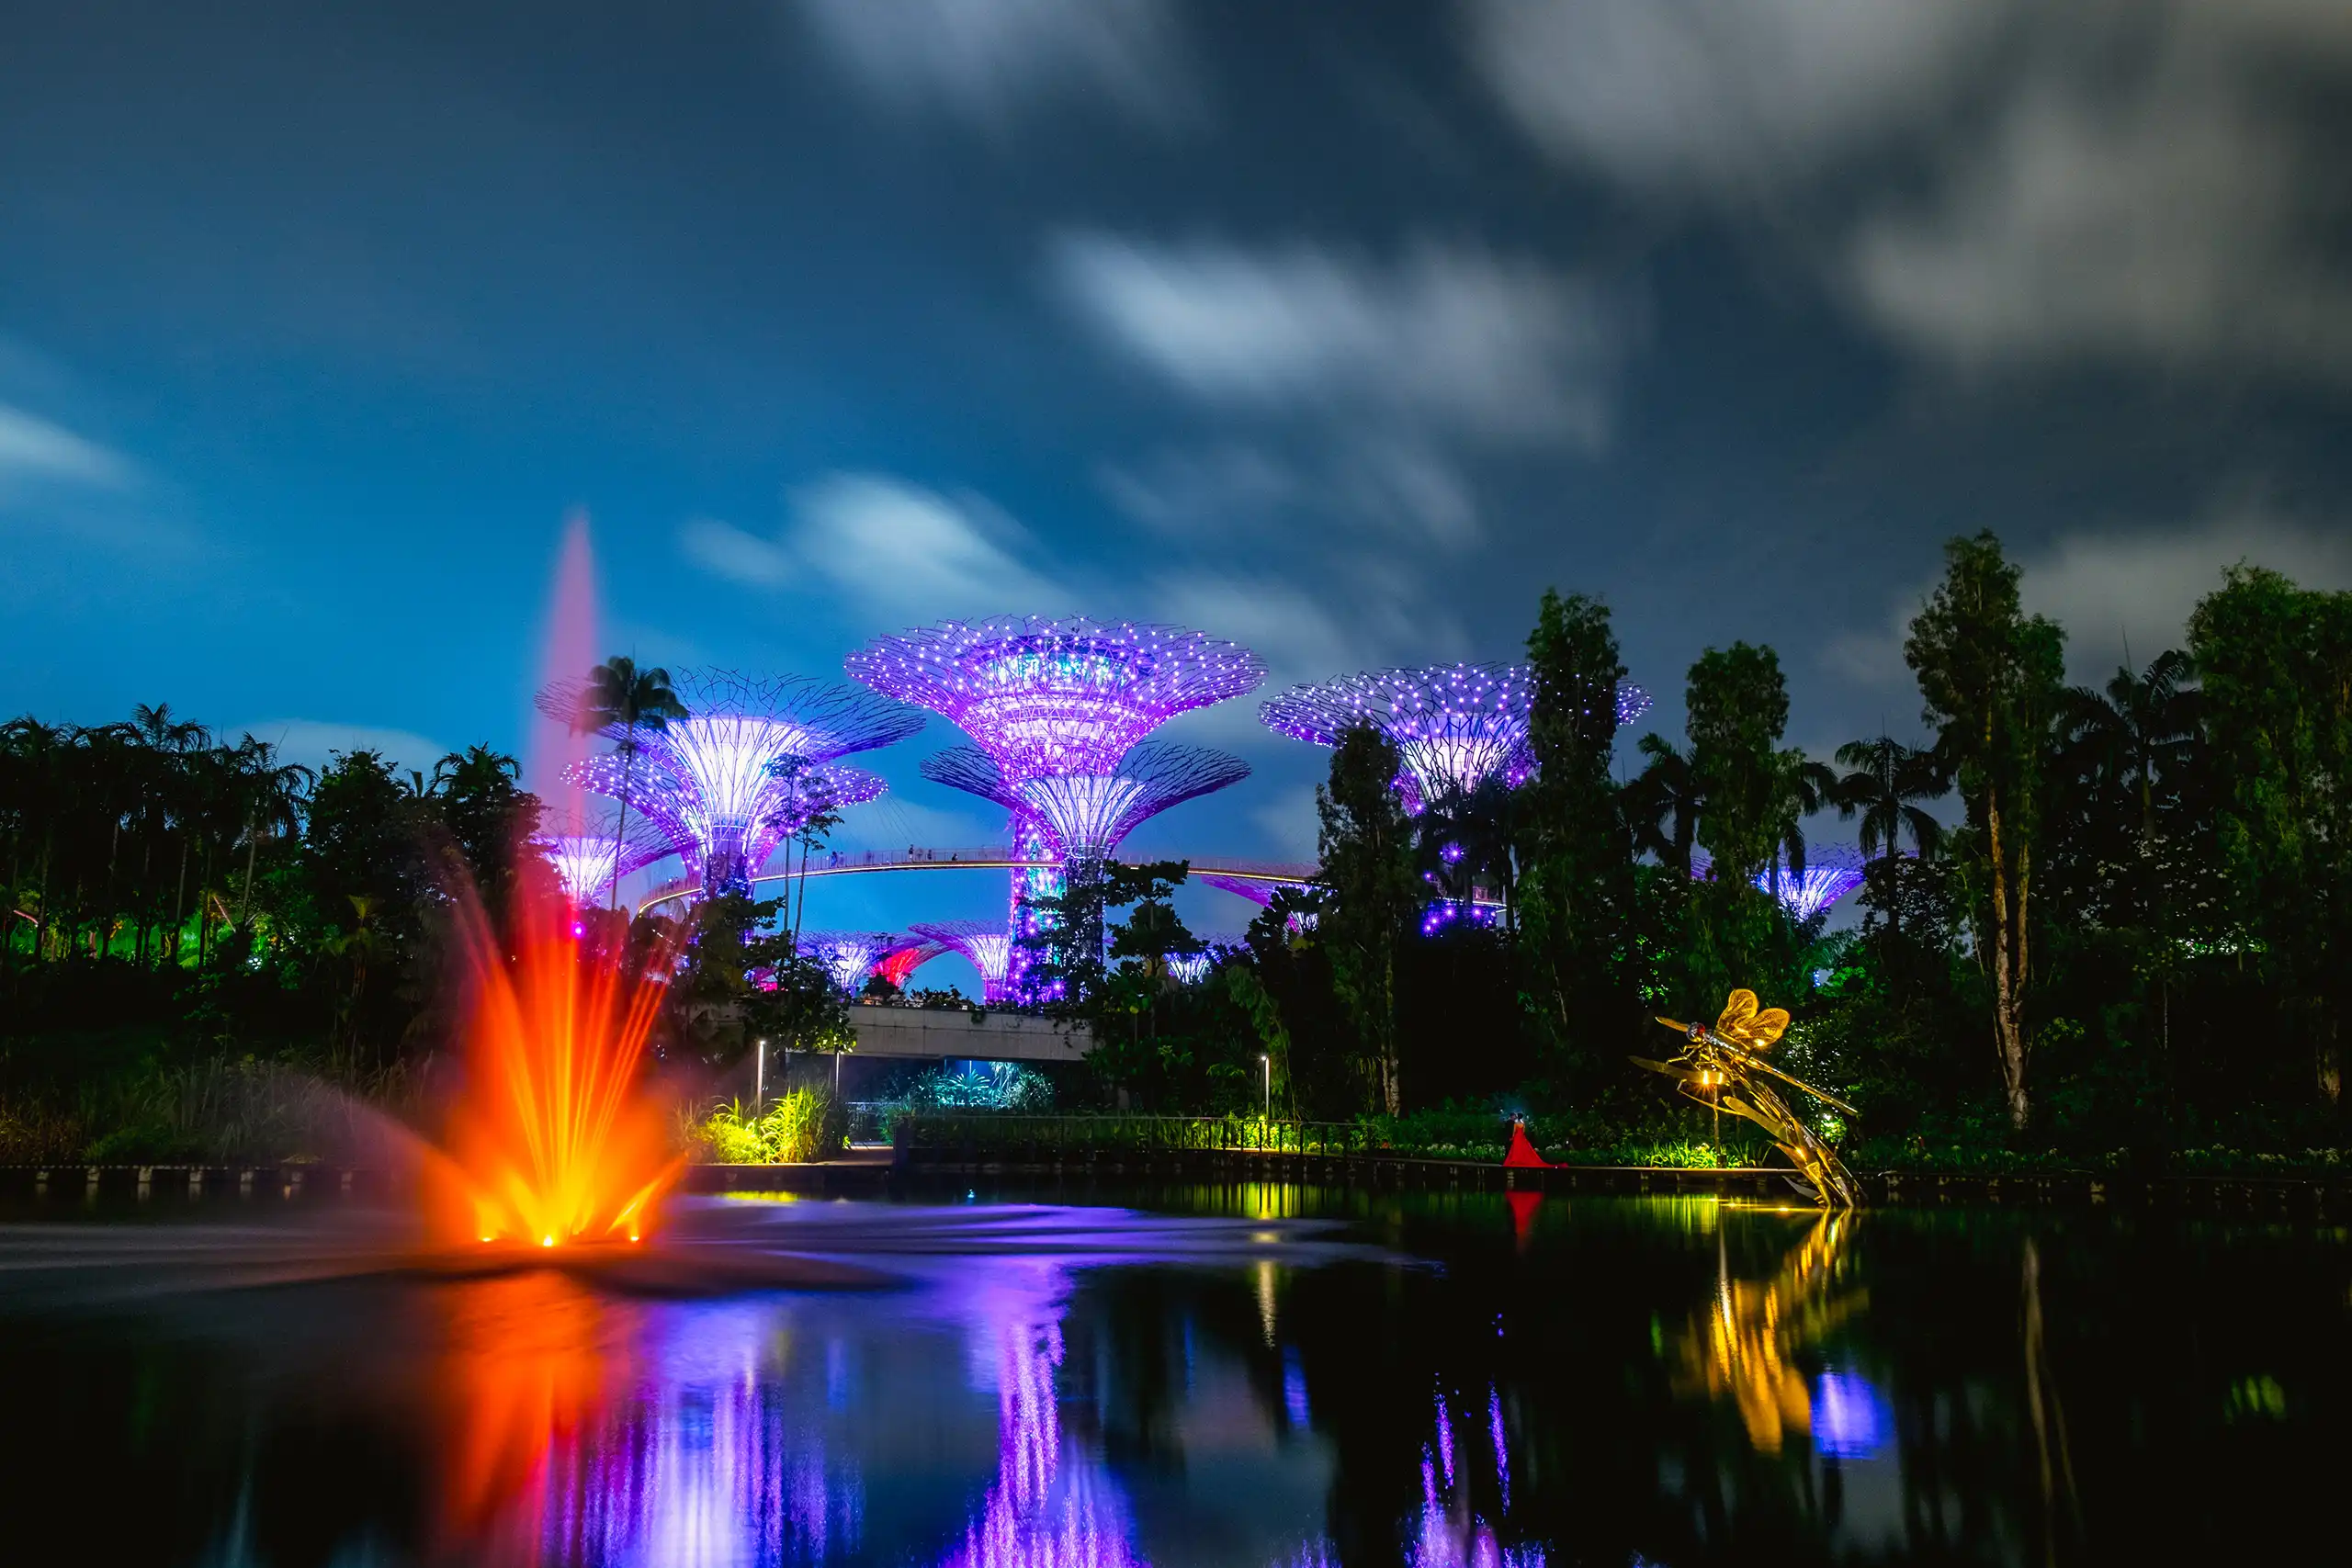
⏰ Best Time: Sunrise for best golden glow (6:30 AM – 7:30 AM). Late afternoon (4 PM onwards) till sunset into the night. Catch the Garden Rhapsody an outdoor light show (free admission, 7:45 PM & 8:45 PM).
📷 Shooting Tips:
Lay on the sitting areas beneath the Supertree Grove and shoot straight up for a surreal perspective and capture the magical light show at dusk.
Best to combine photography and videography of the Supertree light show to capture the dramatic lighting synchronised to music that creates stunning visual effects.
Suggested camera setting for the Supertree nighttime light show - ISO 200, f/2.8 - f/4, shutter speed 1-2s. Tripod required and allowed in the open space.
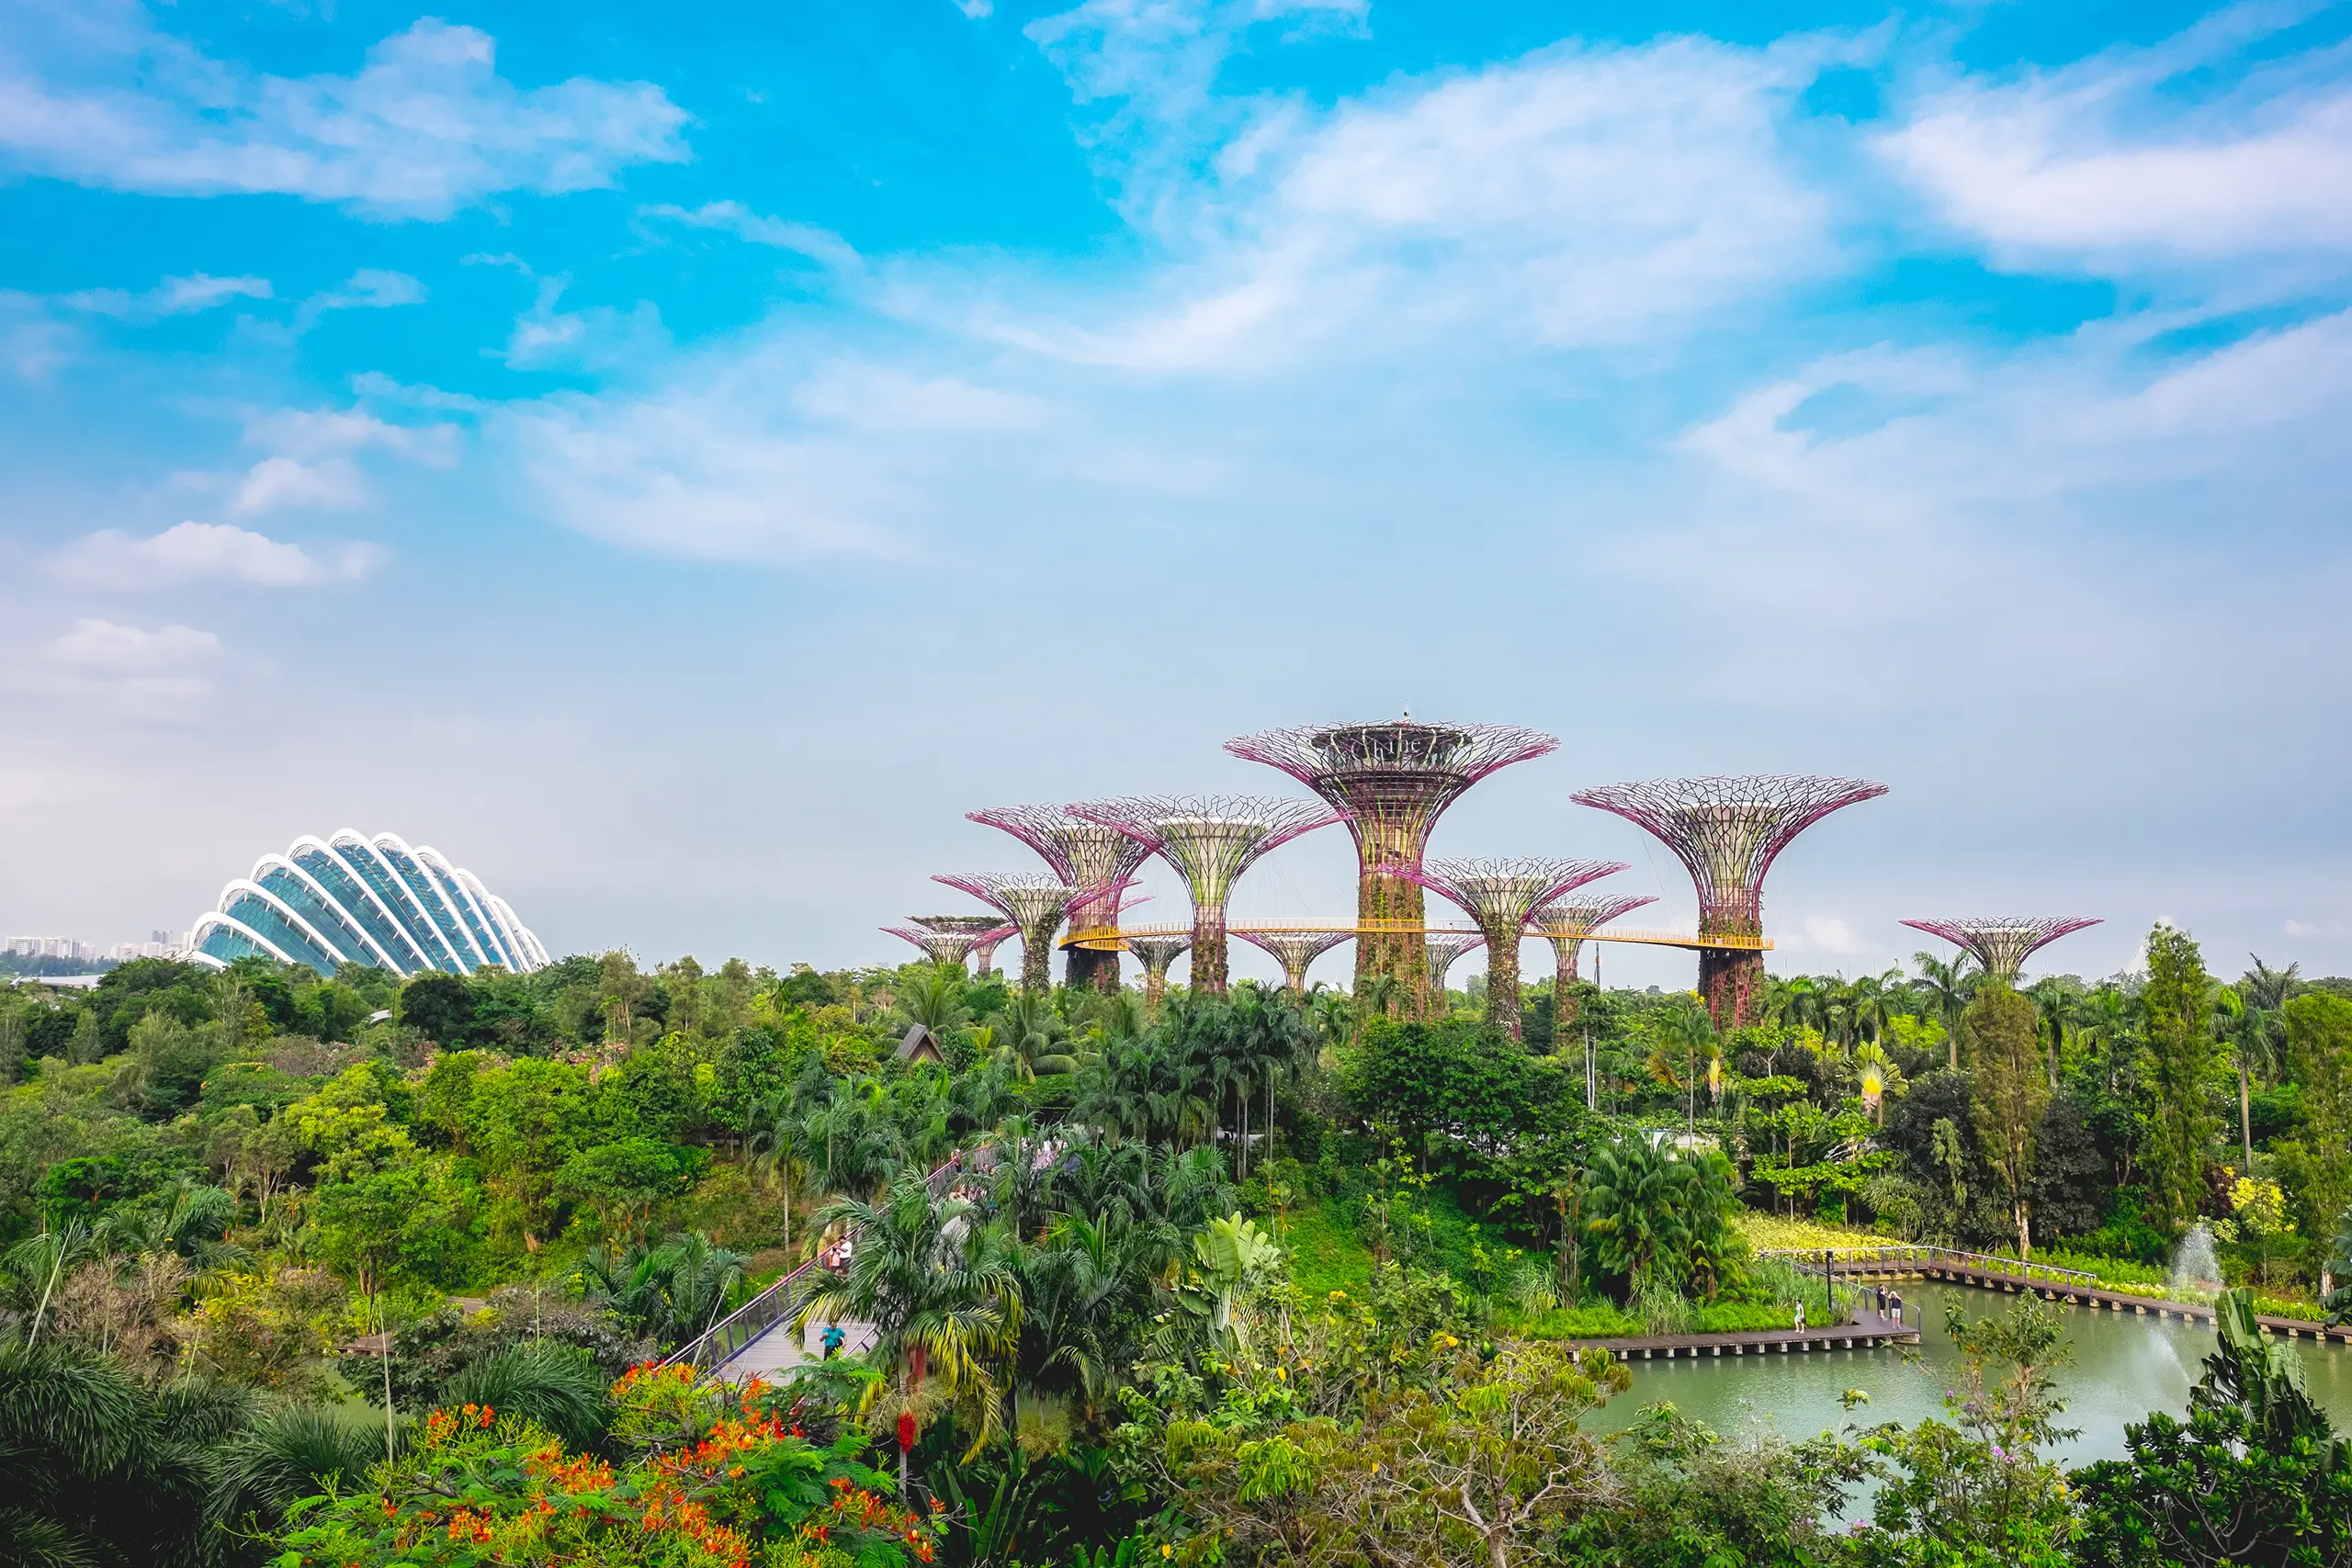
Capture an unobstructed view to frame Supertree Grove perfectly against Marina Bay Sands from a higher angle. Locate the lift at ground level. Take the lift to Level 1. Then walk behind the lift to find an open viewing space along the railing with an elevated angle of the Supertrees with Marina Bay Sands in the backdrop.
Macro photography for some seasonal flower exhibitions at the Flower Dome and around the Garden.
Capture fine details in the Cloud Forest or Flower Dome. Entrance fees apply for these two places.
Capture an unobstructed view of Singapore Flyer against the city skyline. Walk towards the waterfront pathway behind the conservatories (Cloud Forest and Flower Dome) that runs along Marina Reservoir. The side trail offers a clear skyline view with the Singapore Flyer as the focal point. The calm waters in the morning or evening create beautiful reflections of the Flyer and cityscape. Soft lighting at sunrise (6:45 AM – 7:30 AM) or sunset (6:30 PM – 7:30 PM) casts a stunning glow on the skyline.
Best wide shot shoot from the OCBC Skyway (Entrance fee applicable) for a wide angle view of Marina Bay Sands, partial view of the city skyline, top down of the Supertree Grove and elevated angle of the Gardens By The Bay.
Use a wide-angle lens for futuristic landscapes and lush nature photography.
🌐 Website: https://www.gardensbythebay.com.sg
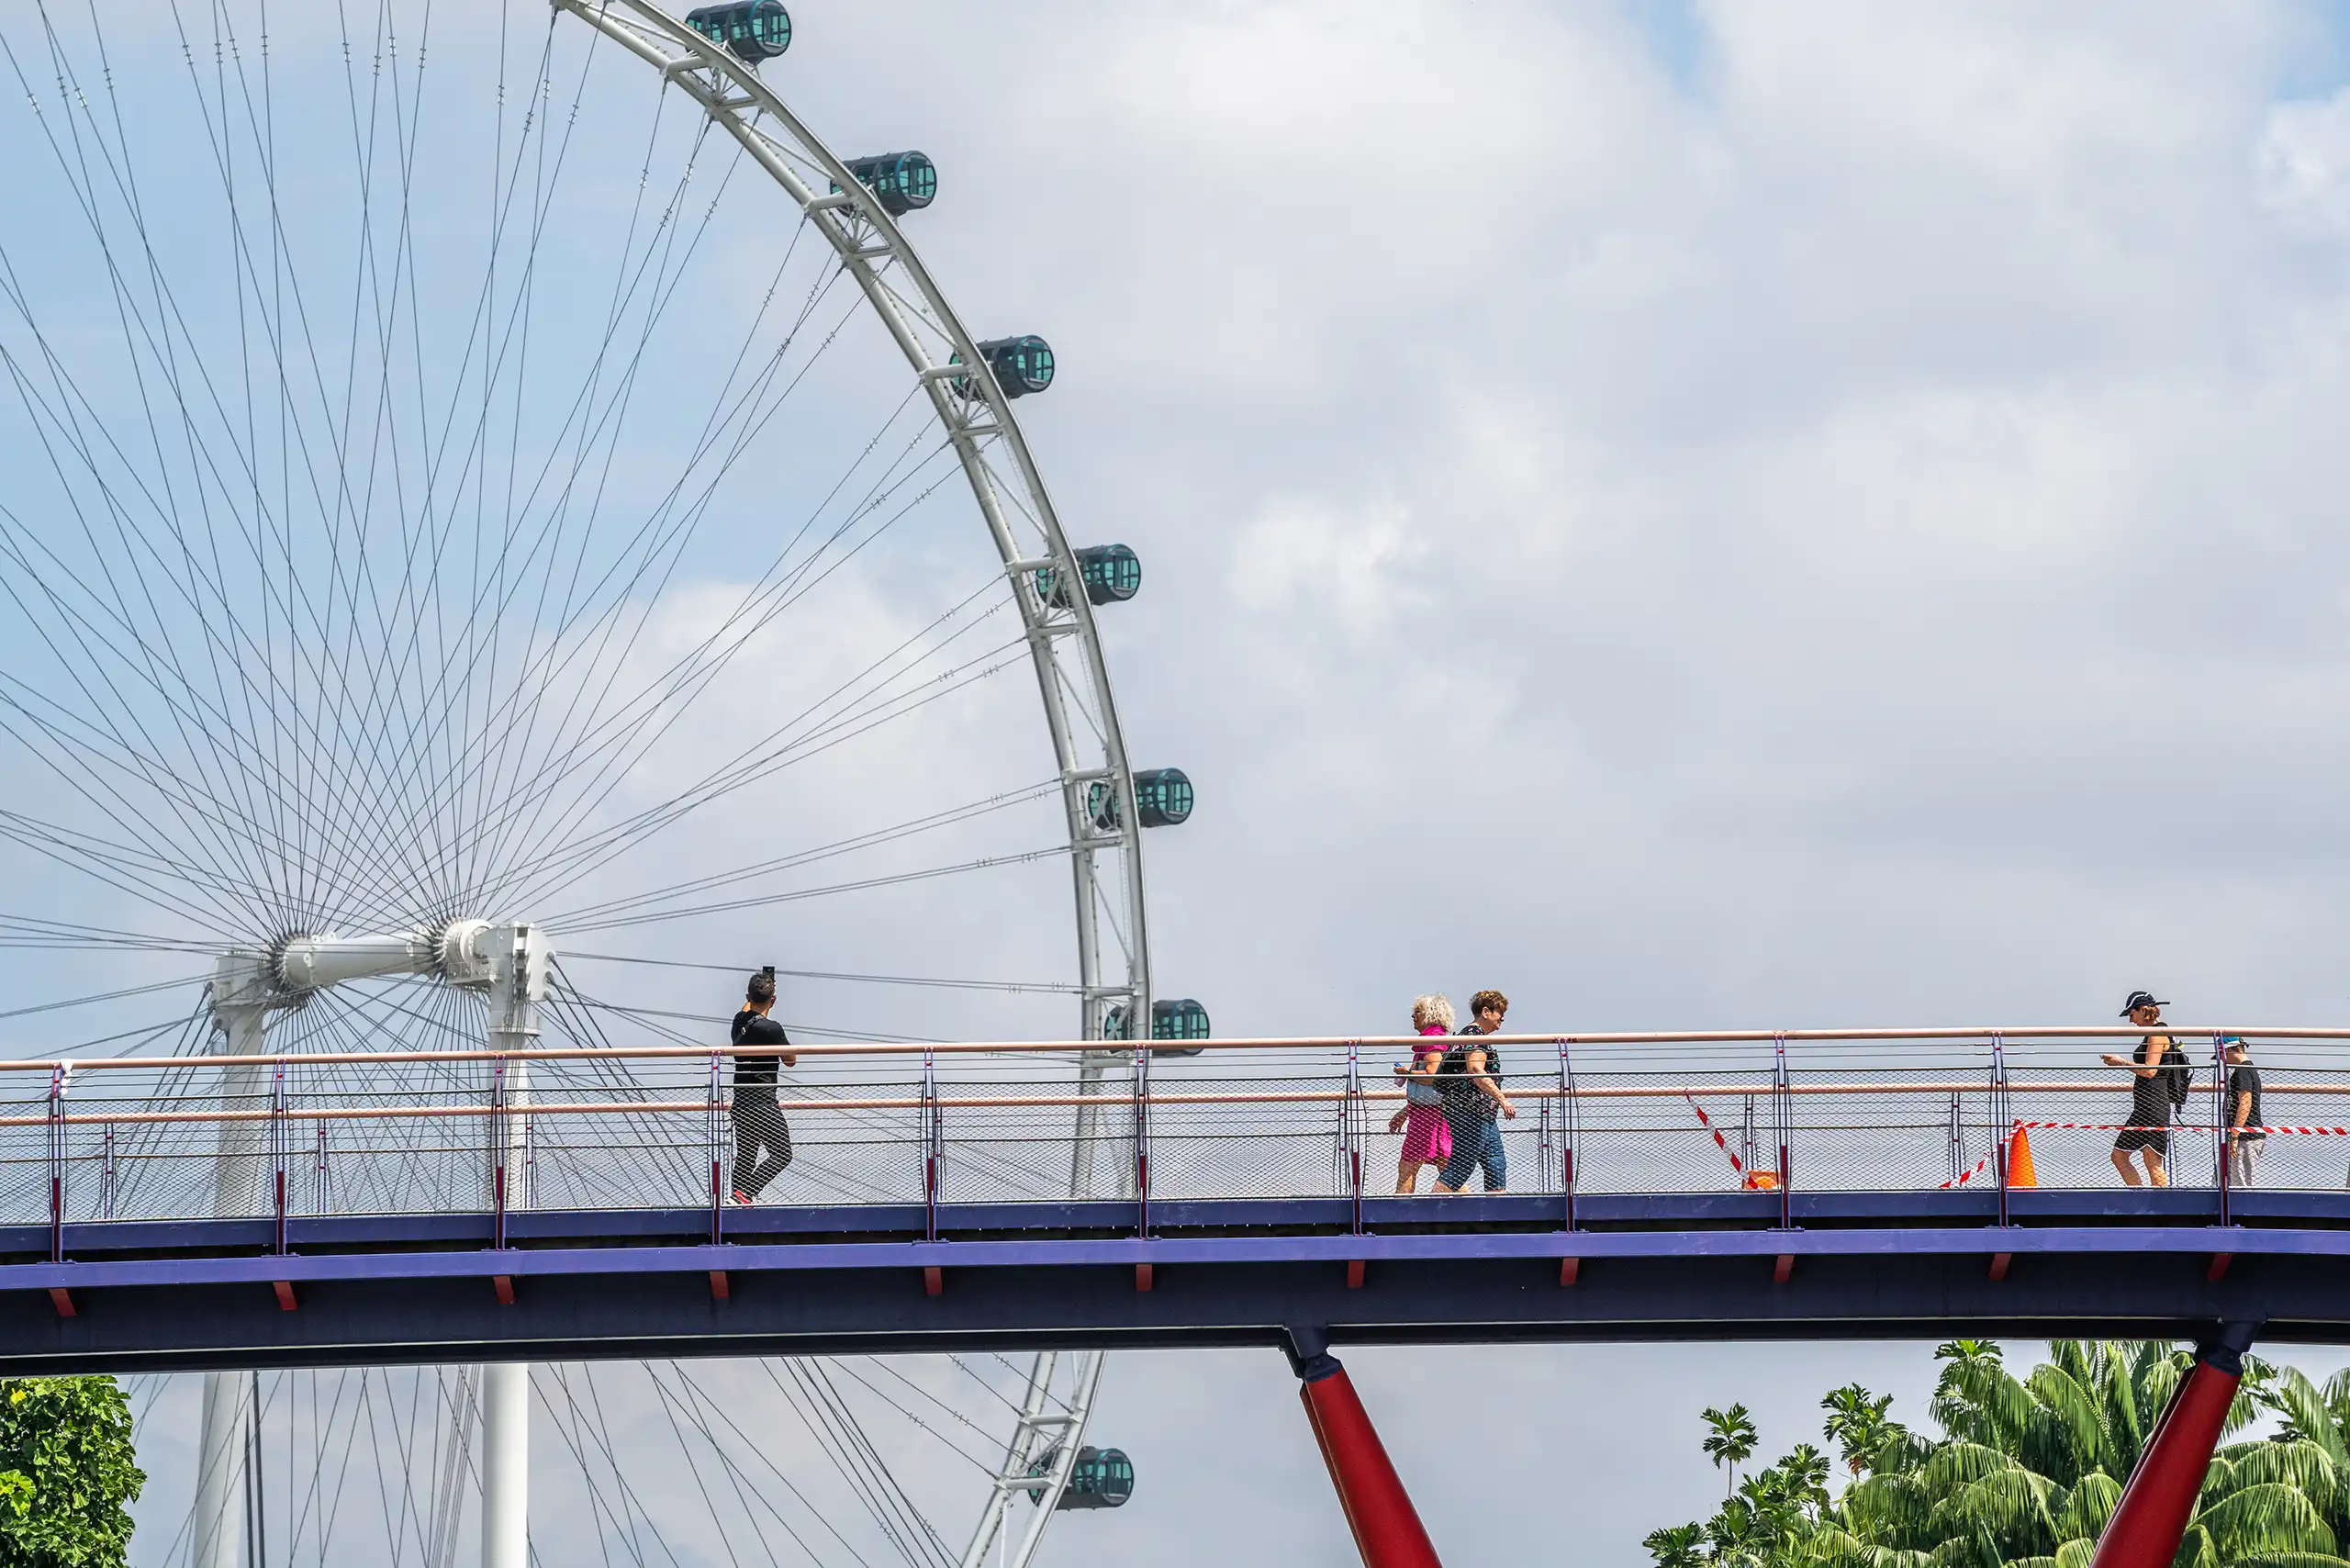
📍3. Singapore Flyer
✅ Best for: Shooting from inside the capsule offers spectacular panoramic city skyline and urban views with a unique rotating perspective of Singapore. Admission fee applies to board the Singapore Flyers.

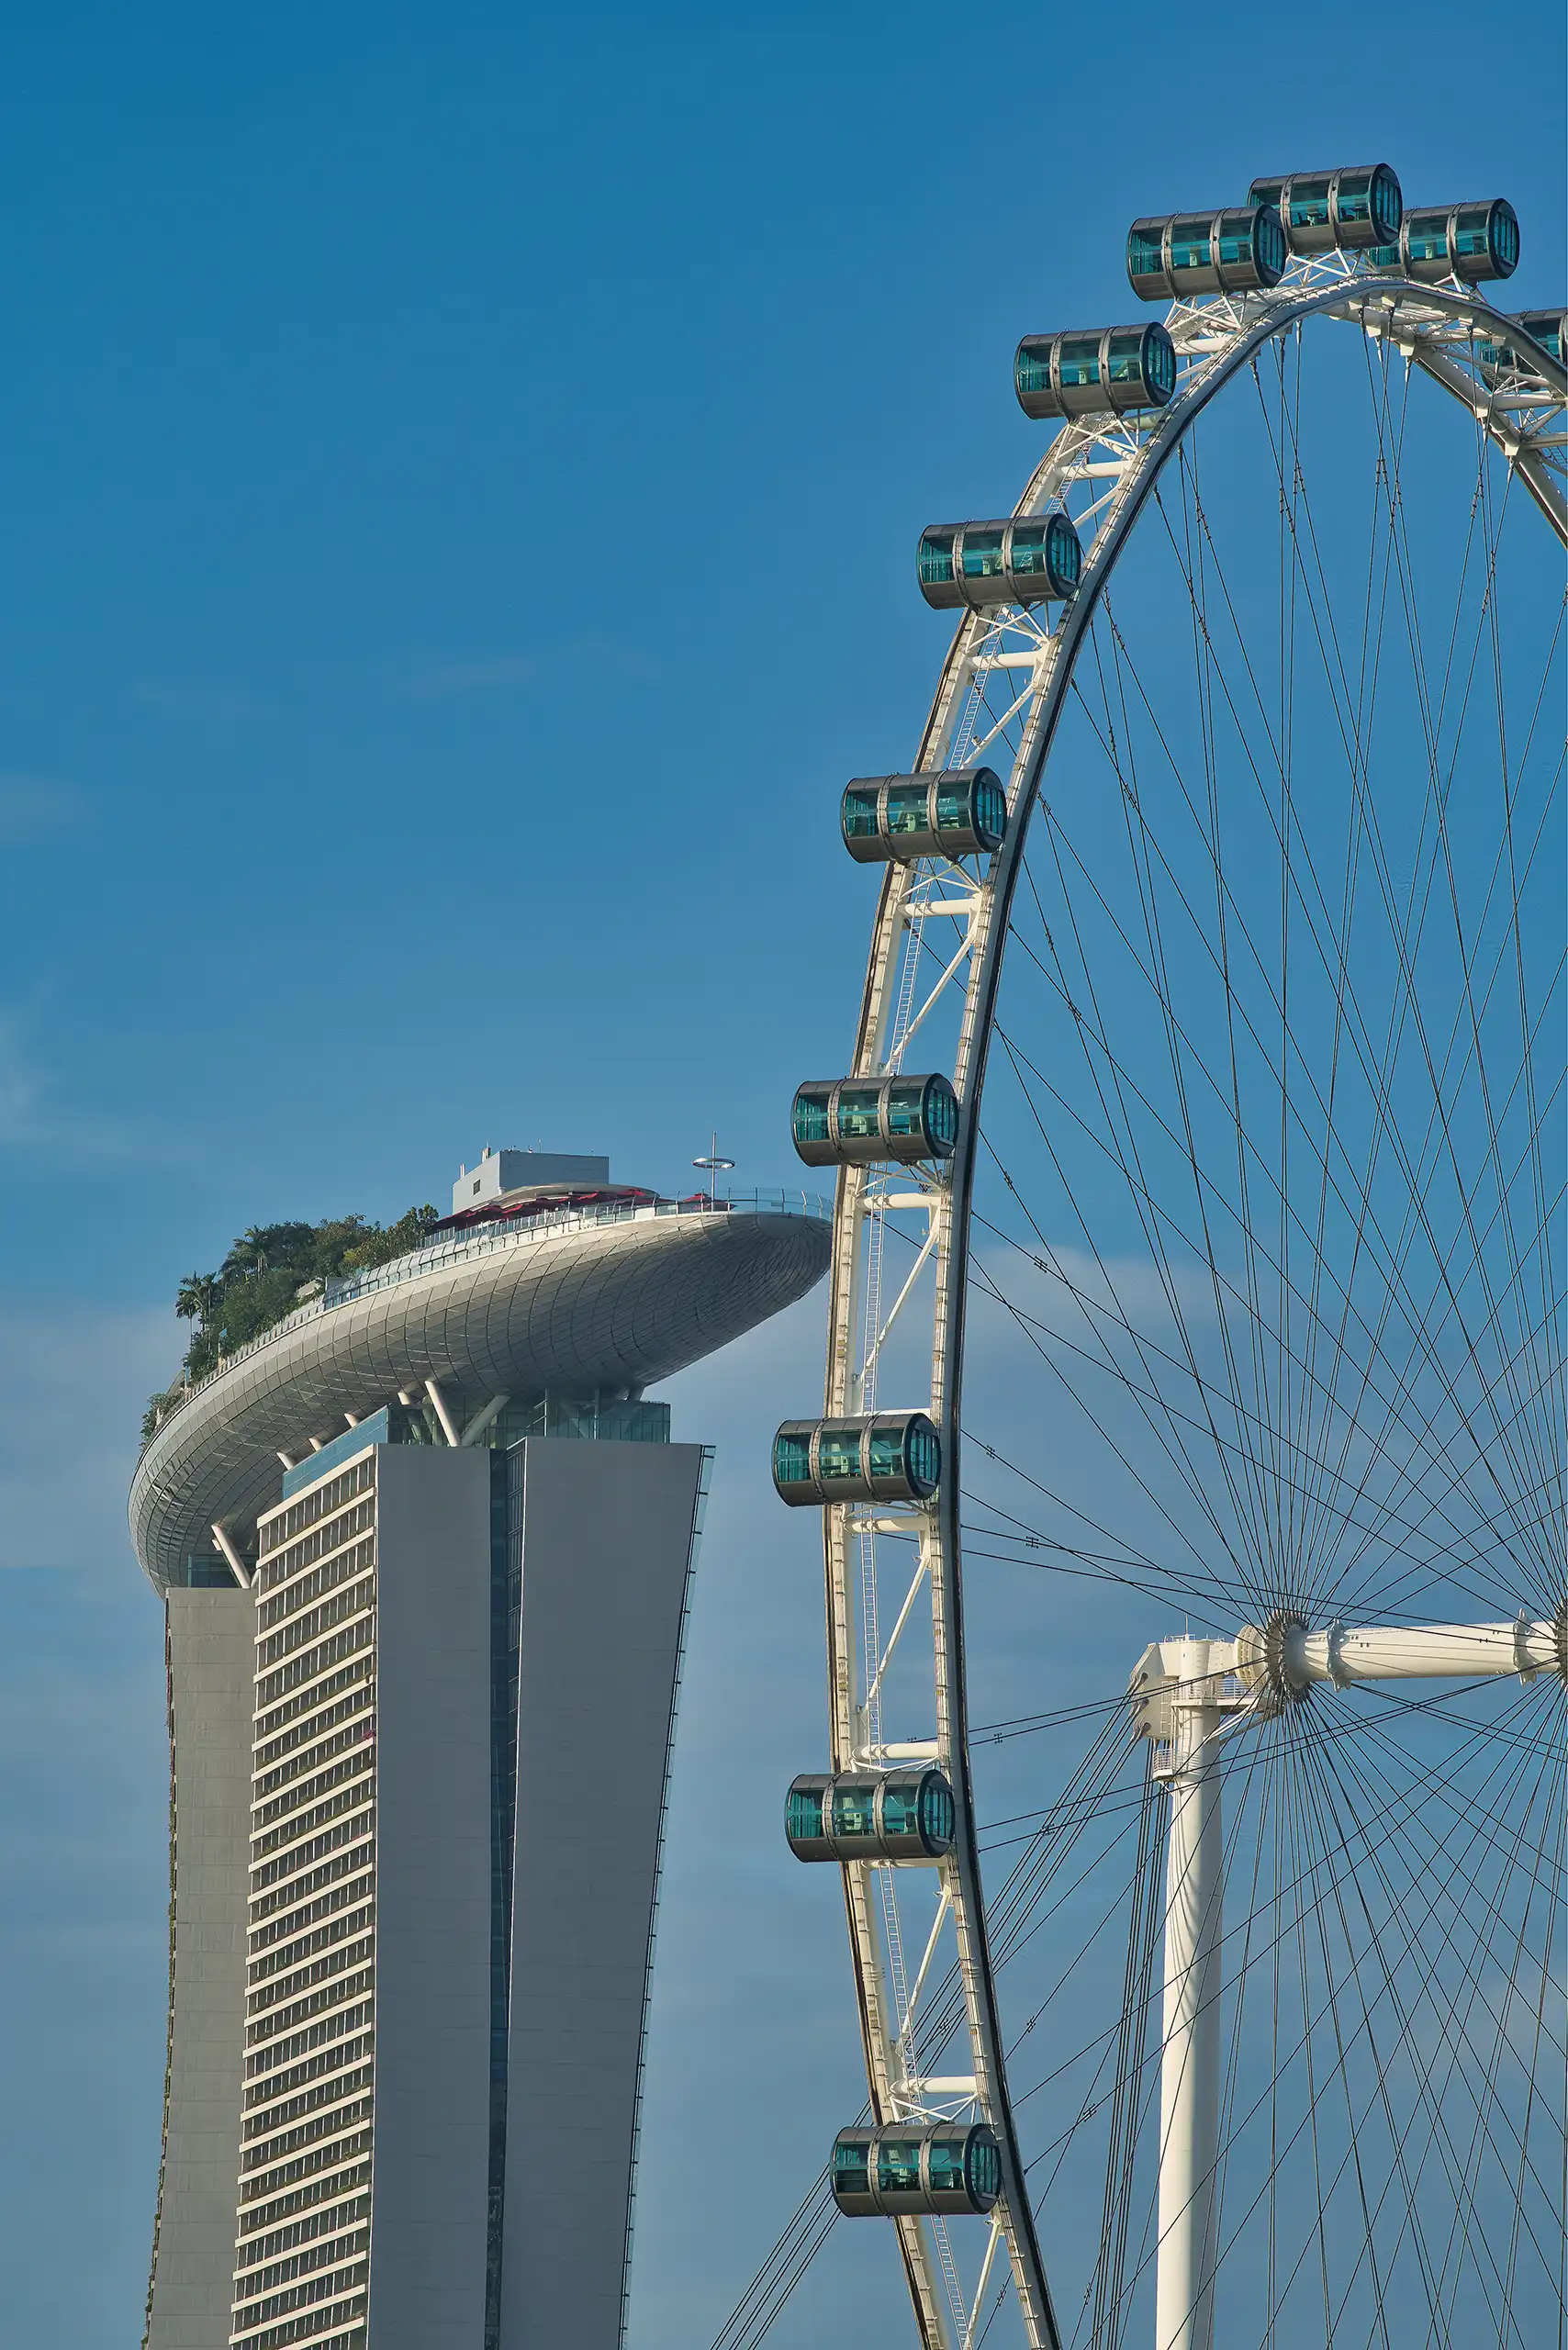
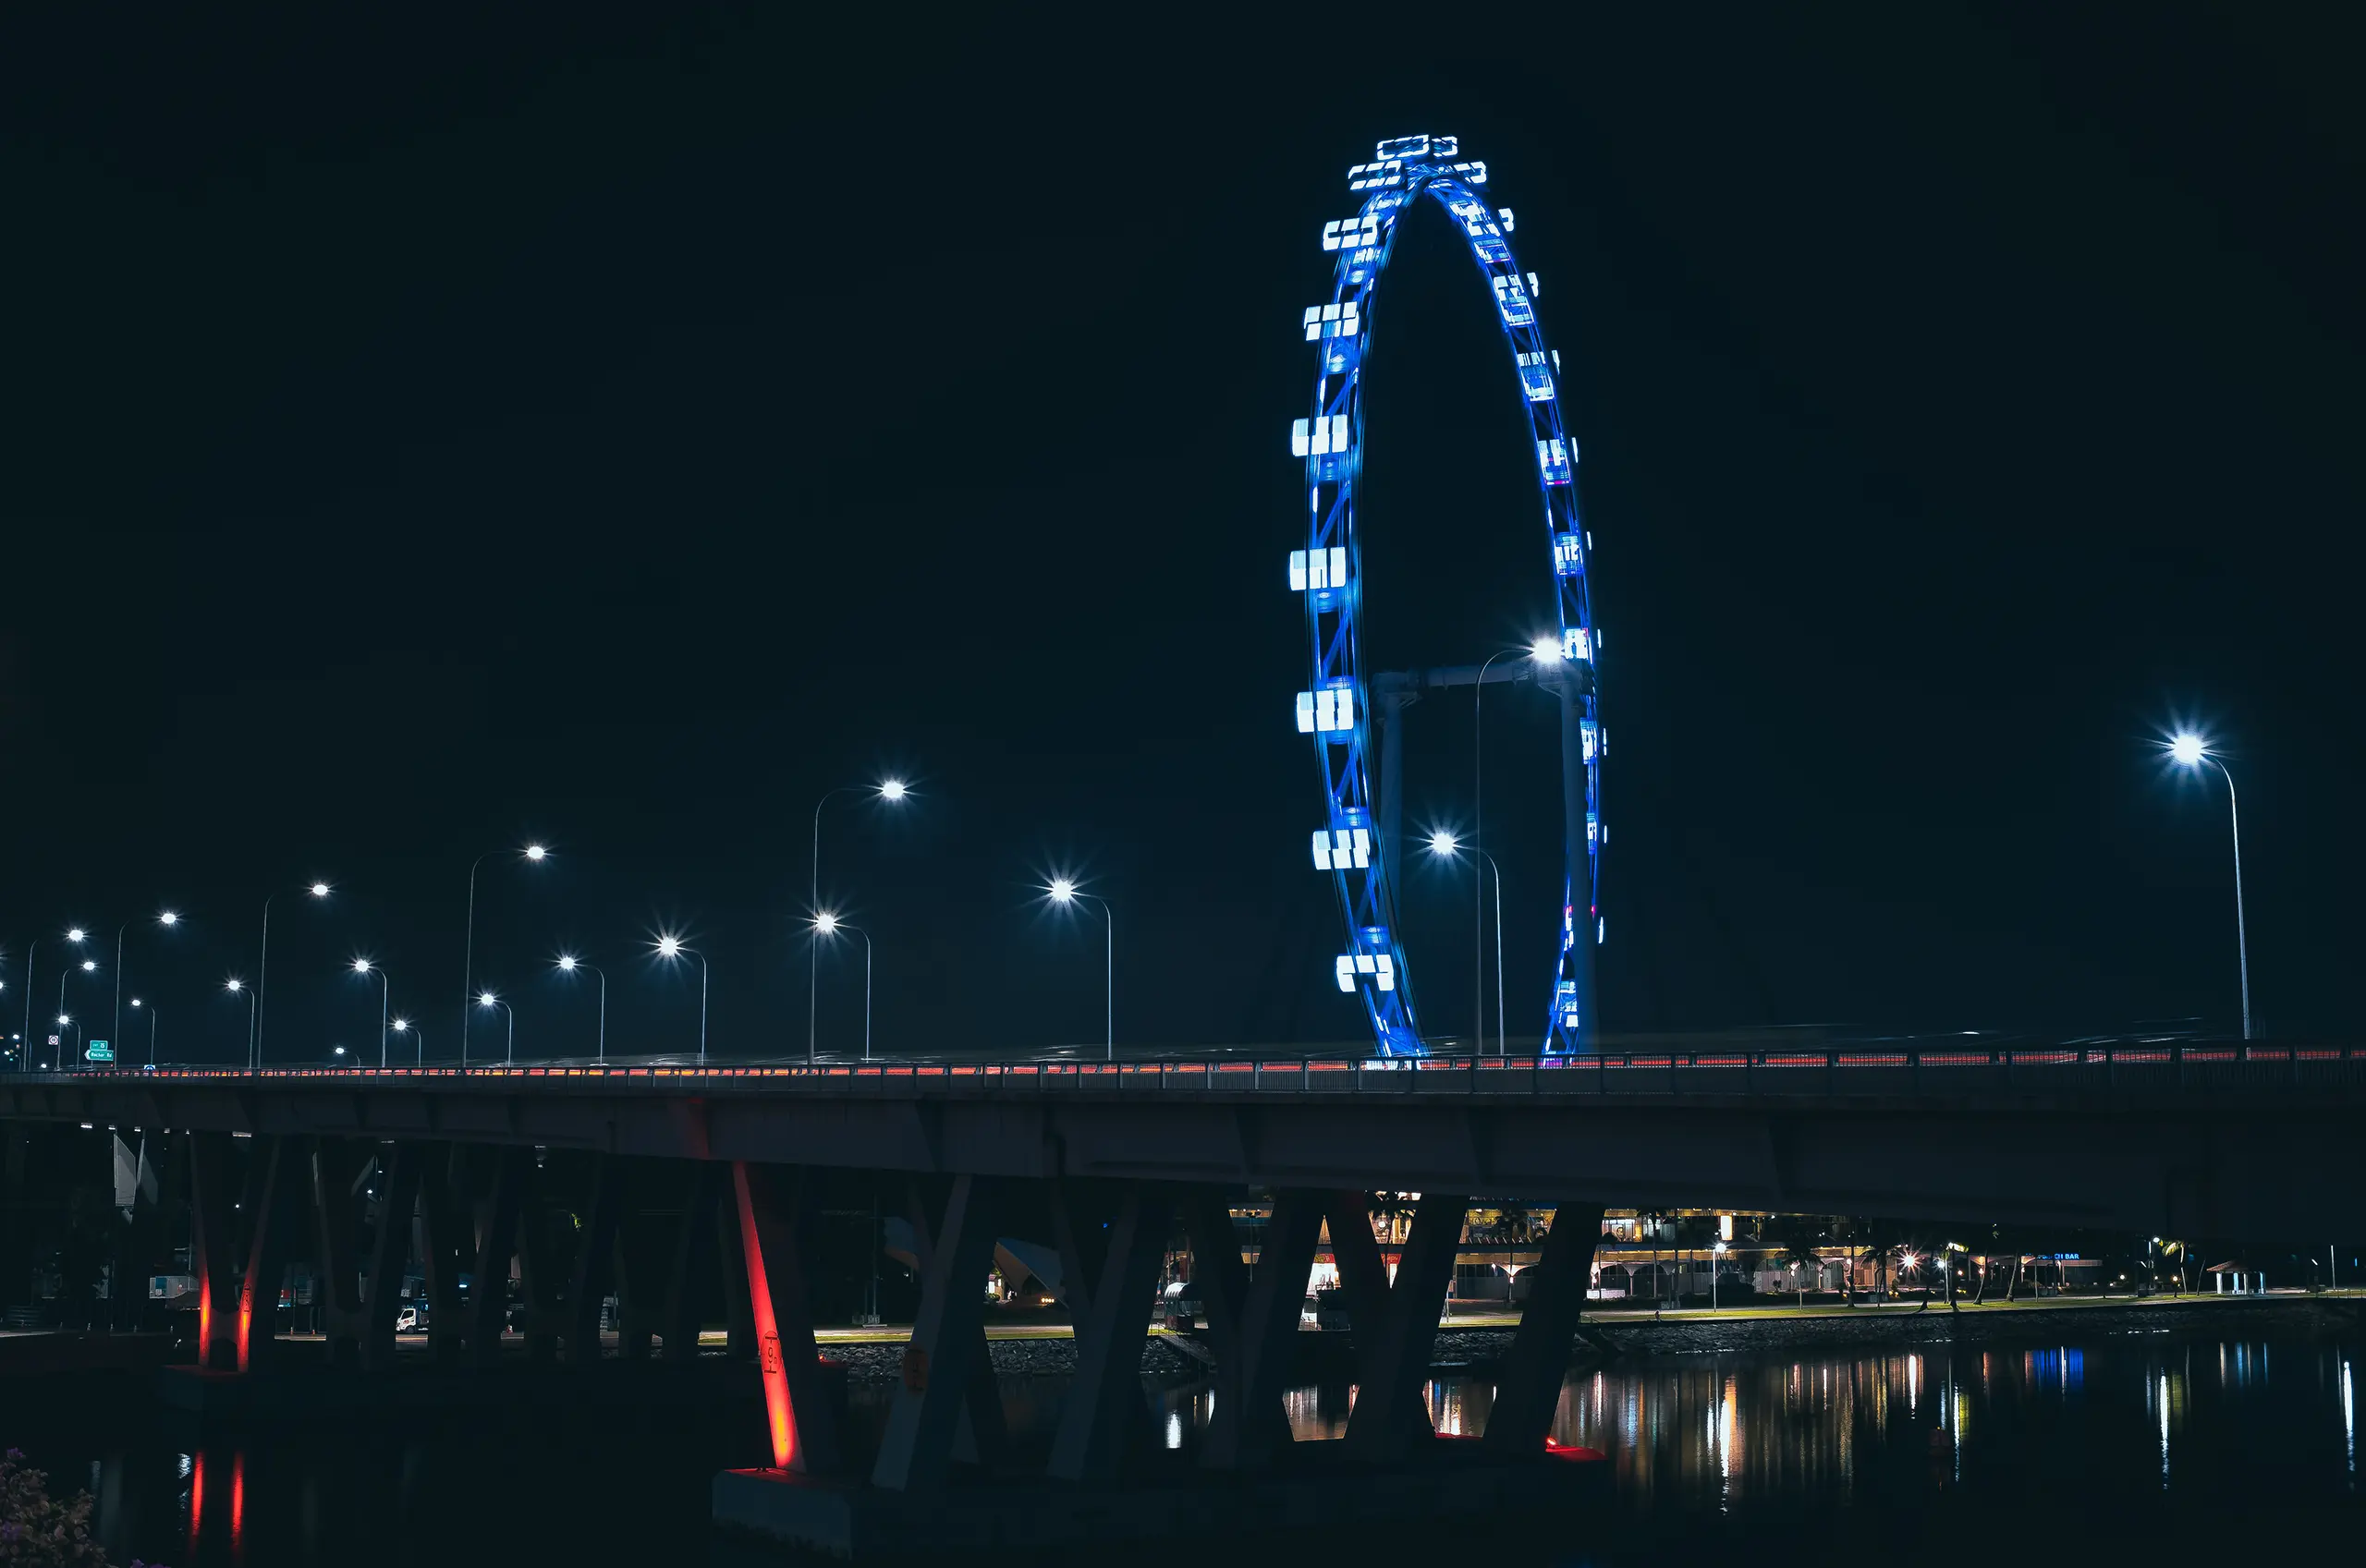
⏰ Best Time: Shooting from inside the capsule - Sunset (6.30 PM onwards) to capture warm and soft lighting. Then transition into blue hour for stunning city lights that showcase a perfect blend of natural and artificial light, enhancing both the capsule interior and the view outside.
📷 Shooting Tips:
Go close to the glass of the capsule to prevent reflections to shoot the panoramic cityscape. Use a rubber lens hood, if you have one to reduce lens glare and flare. Also it won’t cause damages to the glass and protect your lens too.
Use a zoom lens, if you have one, for skyline close-ups.
Shoot at different heights. Capture progressive shots as you go higher for a storytelling effect.
Frame the shot with the capsule window. Use the concept of "frame within a frame", using curve of the window as a frame.
Include other capsules to add scale and depth to your composition.
Capture both daytime and twilight views to showcase the city’s transformation from natural to ambient lit splendour. 🚫 Tripod is not allowed in the capsule. Make sure to have your camera set for handheld low light shot. Suggested camera settings for this would be between f/2.8 – f/4, 1/60s – 1/200s, ISO 800 – ISO 3200 to maximise light intake and stabilise your shot for a clear handheld night photography.
The Singapore Flyer is visible from multiple vantage points, from Gardens by the Bay to Marina Bay Sands. For a unique perspective, consider shooting across the Marina Reservoir from Gardens by the Bay, at sunset into the night where you can frame the Flyer with reflections on the water for a stunning composition.
🌐 Website: https://www.singaporeflyer.com
📍4. Merlion Park
✅ Best for: Iconic landmarks including the Merlion, Esplanade Theatre On The Bay, Jubilee Bridge, Fullerton Hotel, Marina Bay Sands, Helix Bridge and Singapore Flyer with reflections, city skyline and light trails at night.

⏰ Best Time: Sunrise (6:30 AM). Late afternoon (4 PM onwards) into sunset to night for city lights and reflections.
📷 Shooting Tips:
Shoot a panoramic view of Marina Bay Sands, ArtScience Museum, Helix Bridge, the Singapore Flyer from the Merlion Park viewing platform and along the waterfront for different angles.
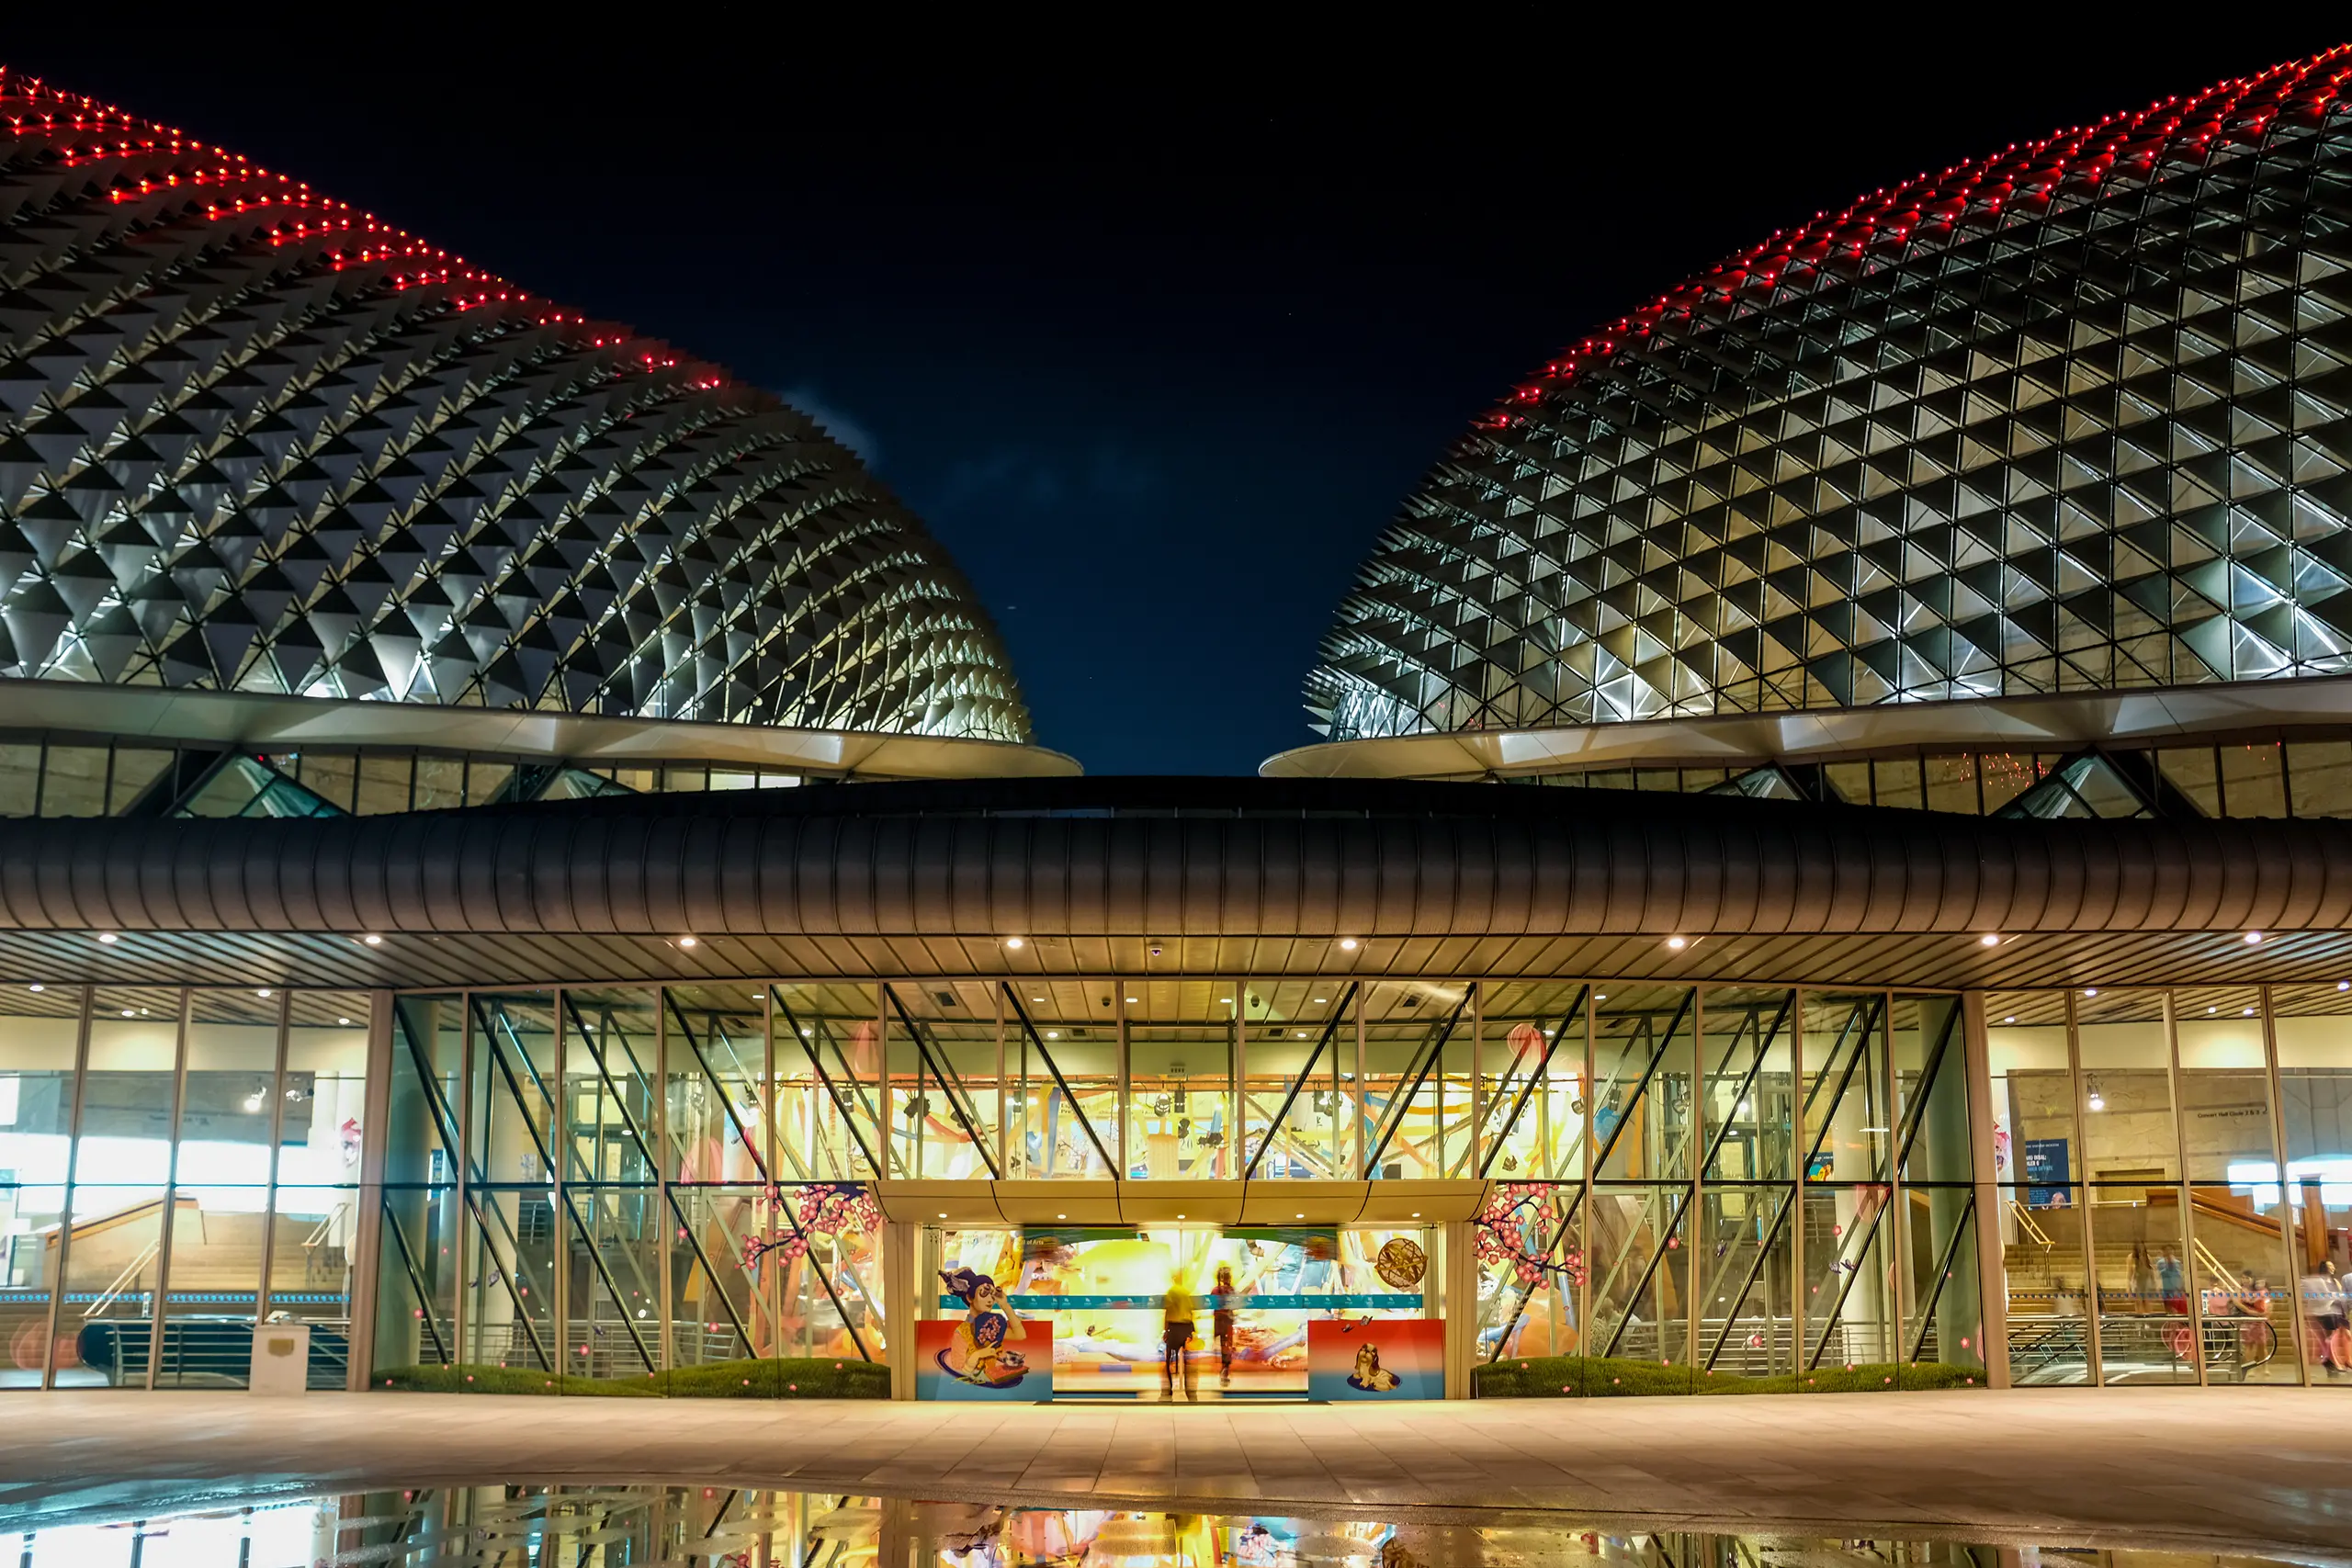
Shoot from the pedestrian walkway on street level of Esplanade Drive to get an elevated view of the Marina Bay skyline and unique compositions with the Merlion. Also shoot the Esplanade – Theatres on the Bay from here. It gives a different perspective of the unique durian-shaped architecture.
The Jubilee Bridge on both ends provides great leading lines towards the Merlion and the Esplanade Theatres On The Bay.
From the Jubilee Bridge capture the emblematic Merlion statue with the Central Business District and the historic Fullerton Hotel in the background.
This is a very crowded locations. Long exposure photography would help to ghost out people and create nice motion effects. In the day, you might want to consider using ND filter with at least 10 stops for long exposure effects.
Shoot at sunrise for softer light and fewer crowds. The soft, warm light during sunrise or sunset enhances the iconic Merlion statue and reflections on the water, also Fullerton Hotel, with the golden lights, contrasts beautifully against the modern skyline.
For sunrise photography, the sun rises behind Marina Bay Sands, creating a golden glow over the water. Arrive before 6.30 AM to scout the location for your preferred spot for the best morning light.
🌐 Website: https://www.visitsingapore.com/neighbourhood/featured-neighbourhood/marina-bay/merlion-park/
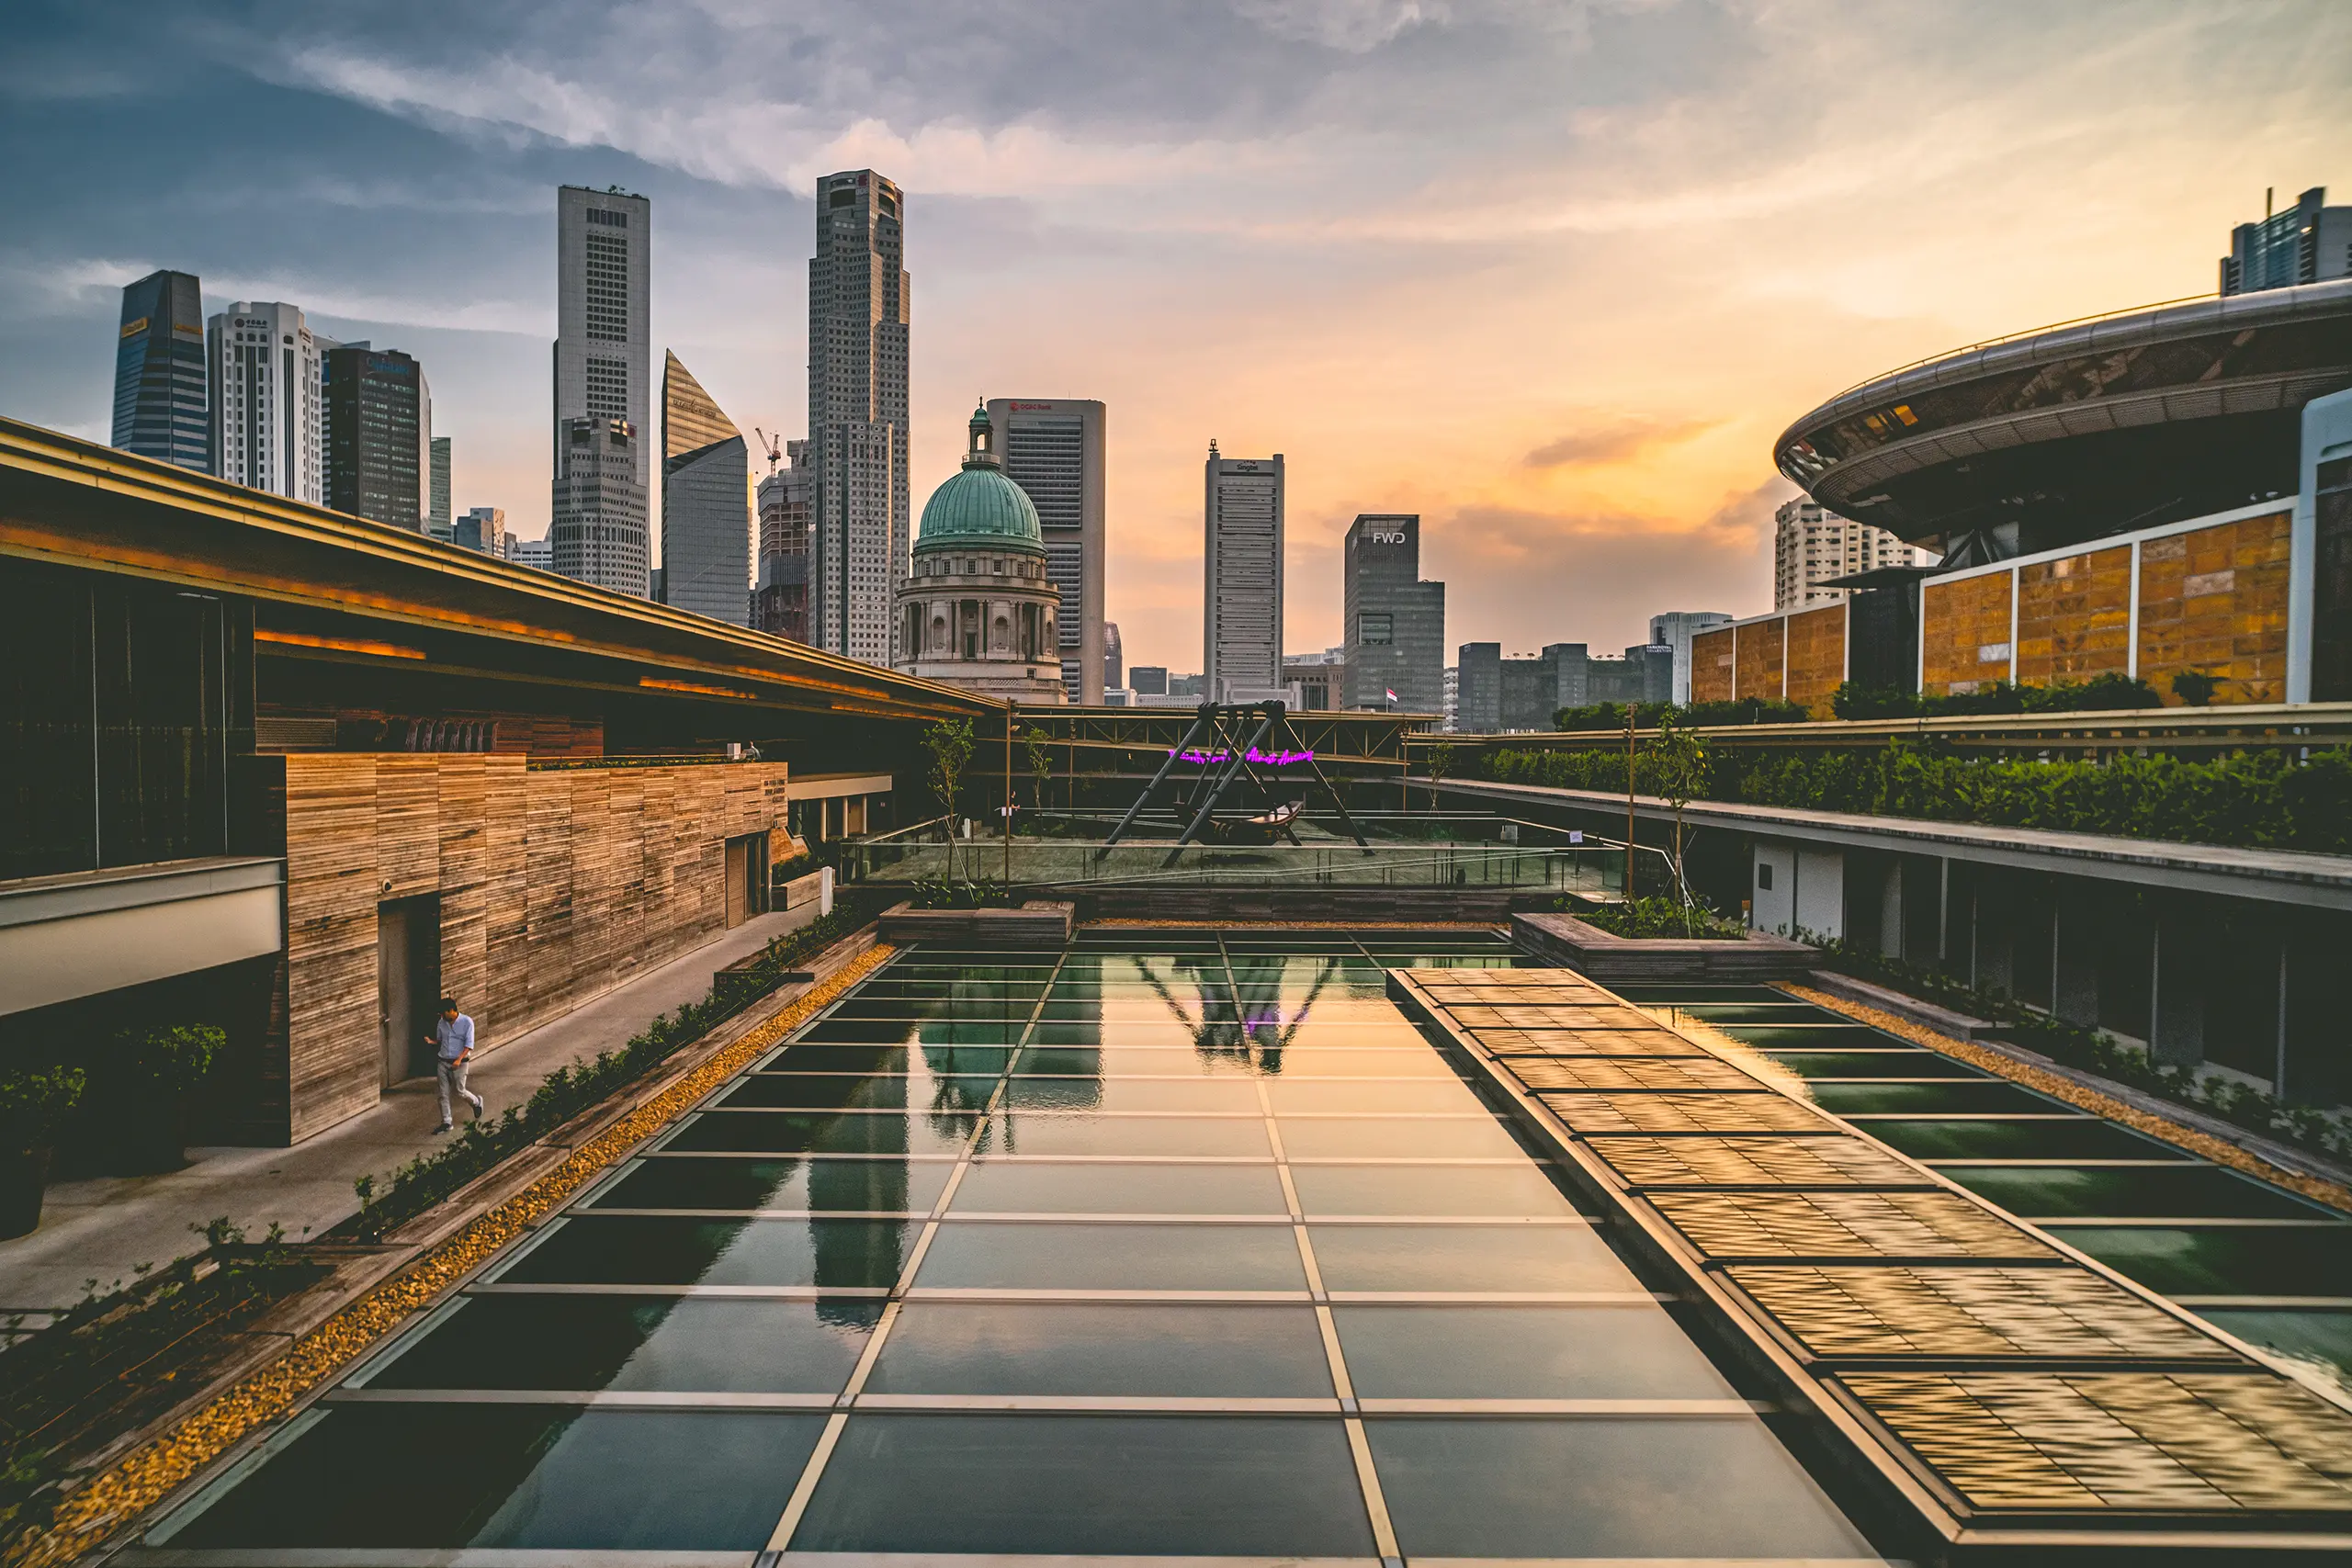
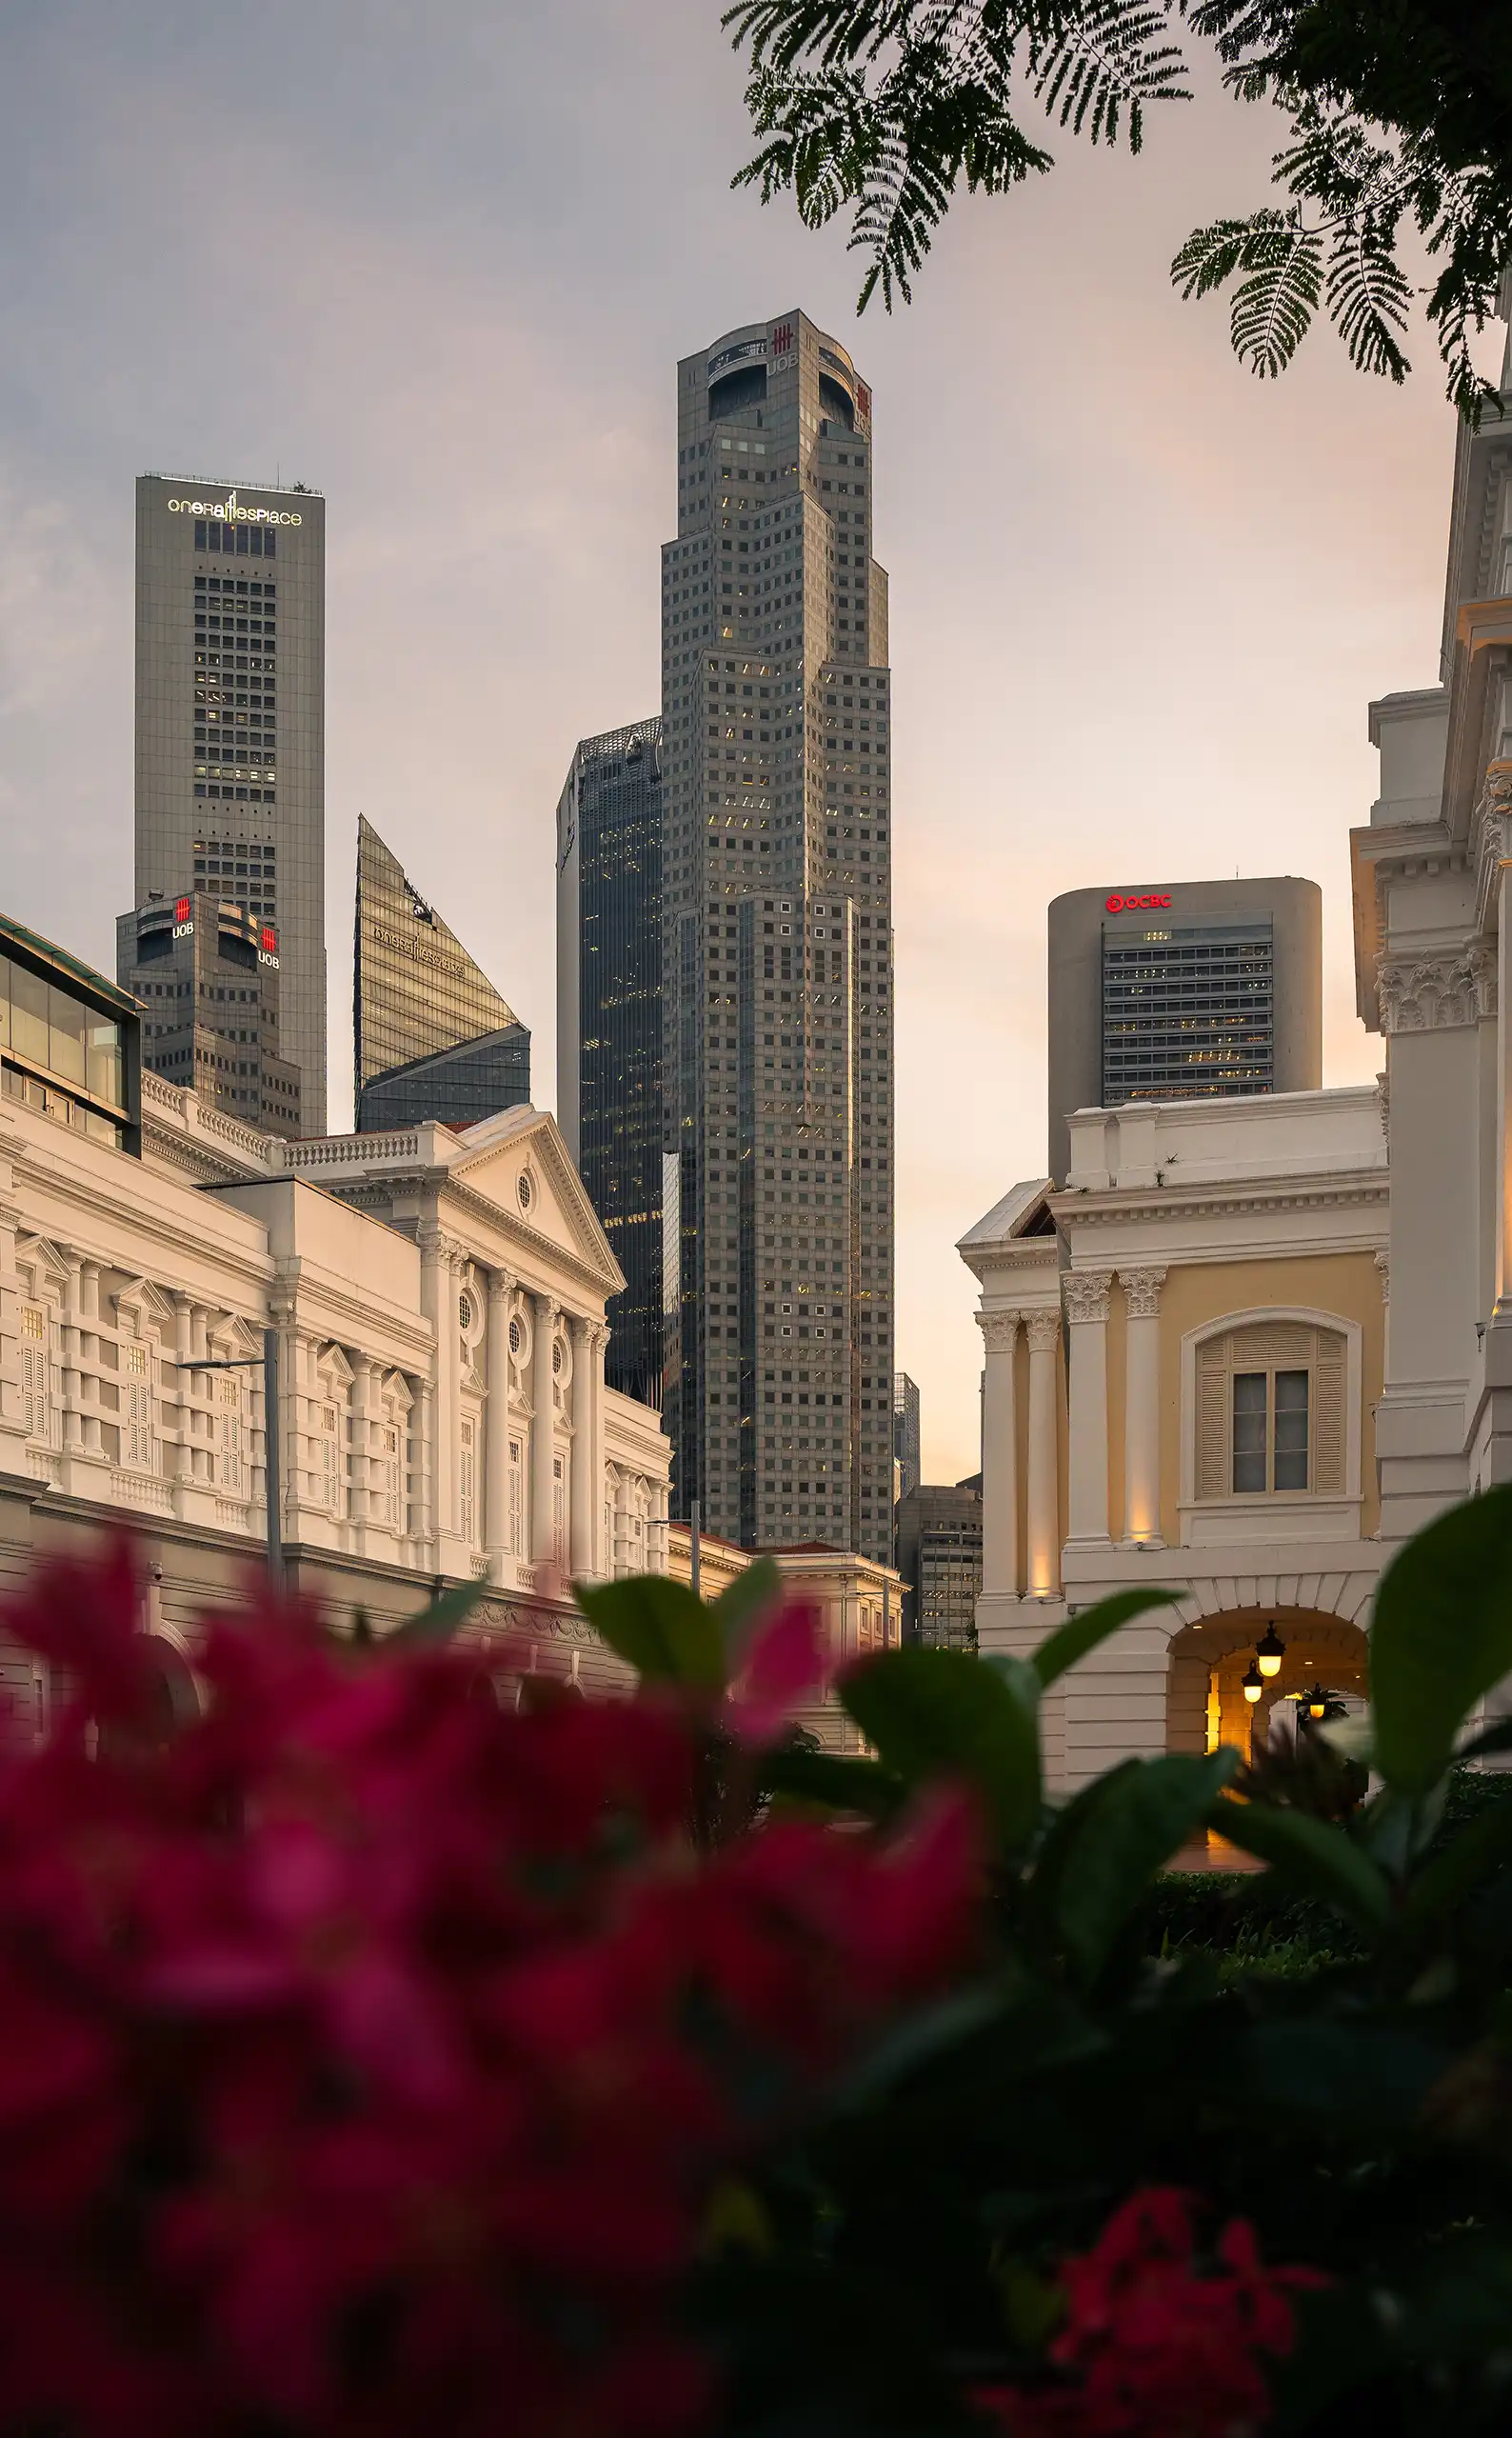
📍5. Civic District
✅ Best for: Showcasing the city's colonial heritage and cultural evolution. Iconic historic landmarks including the Asian Civilisation Museum, National Gallery, The Arts House (Old Parliament House), Victoria Theatre and Concert Hall, Supreme Court Building and The Fullerton Hotel.

⏰ Best Time: Early morning (6.30 AM onwards). Sunset (6.30 PM onwards) are best for capturing warm, soft lighting on white colonial buildings. Night photography at landmarks like Fullerton Hotel and Cavenagh Bridge are beautifully illuminated at night.
📷 Shooting Tips:
Utilise golden hour light for dramatic architectural details and symmetry, and explore both wide-angle and detailed shots. Zoom in for close-ups of modern facades and historic details.
Fullerton Hotel, once the General Post Office, now a luxury hotel with preserved colonial grandeur. Get a wide-angle shot from across the river for a full view of the hotel and Cavenagh bridge, one of the oldest bridges completed in 1869, The bridge and riverside railings also served as a leading line to the luxurious Fullerton Hotel.
Compose shot from Cavenagh Bridge and Anderson Bridge for a nighttime long exposure to capture light trails from passing boats along the Singapore River with Fullerton Hotel at the side. These two bridges will give you interesting perspectives.
The National Gallery Singapore is housed in the former Supreme Court and City Hall buildings. This museum blends colonial architecture with modern art. Wide-angle shot of the grand façade from across the road. Also head up to the rooftop - Coleman Deck for panoramic shots of the Civic District overlooking several historical landmarks like the Padang a historic open field that has witnessed major national events, the Supreme Court, Victoria Theatre clock tower, St. Andrew’s Cathedral, a direct view of Marina Bay Sands, the National Gallery Rotunda and the CBD skyscrapers. Sunset to blue hour offers great captures.
The Padang, a historic open field that has witnessed major national events, surrounded by key landmarks. A panoramic shot capturing the Supreme Court, National Gallery, and Marina Bay Sands in the distance.
The Arts House (Old Parliament House), Singapore’s oldest government building, dating back to 1827 is great capture for its neoclassical architecture. Also capture a blend of this historic landmarks with modern high-rise architecture in the backdrop.
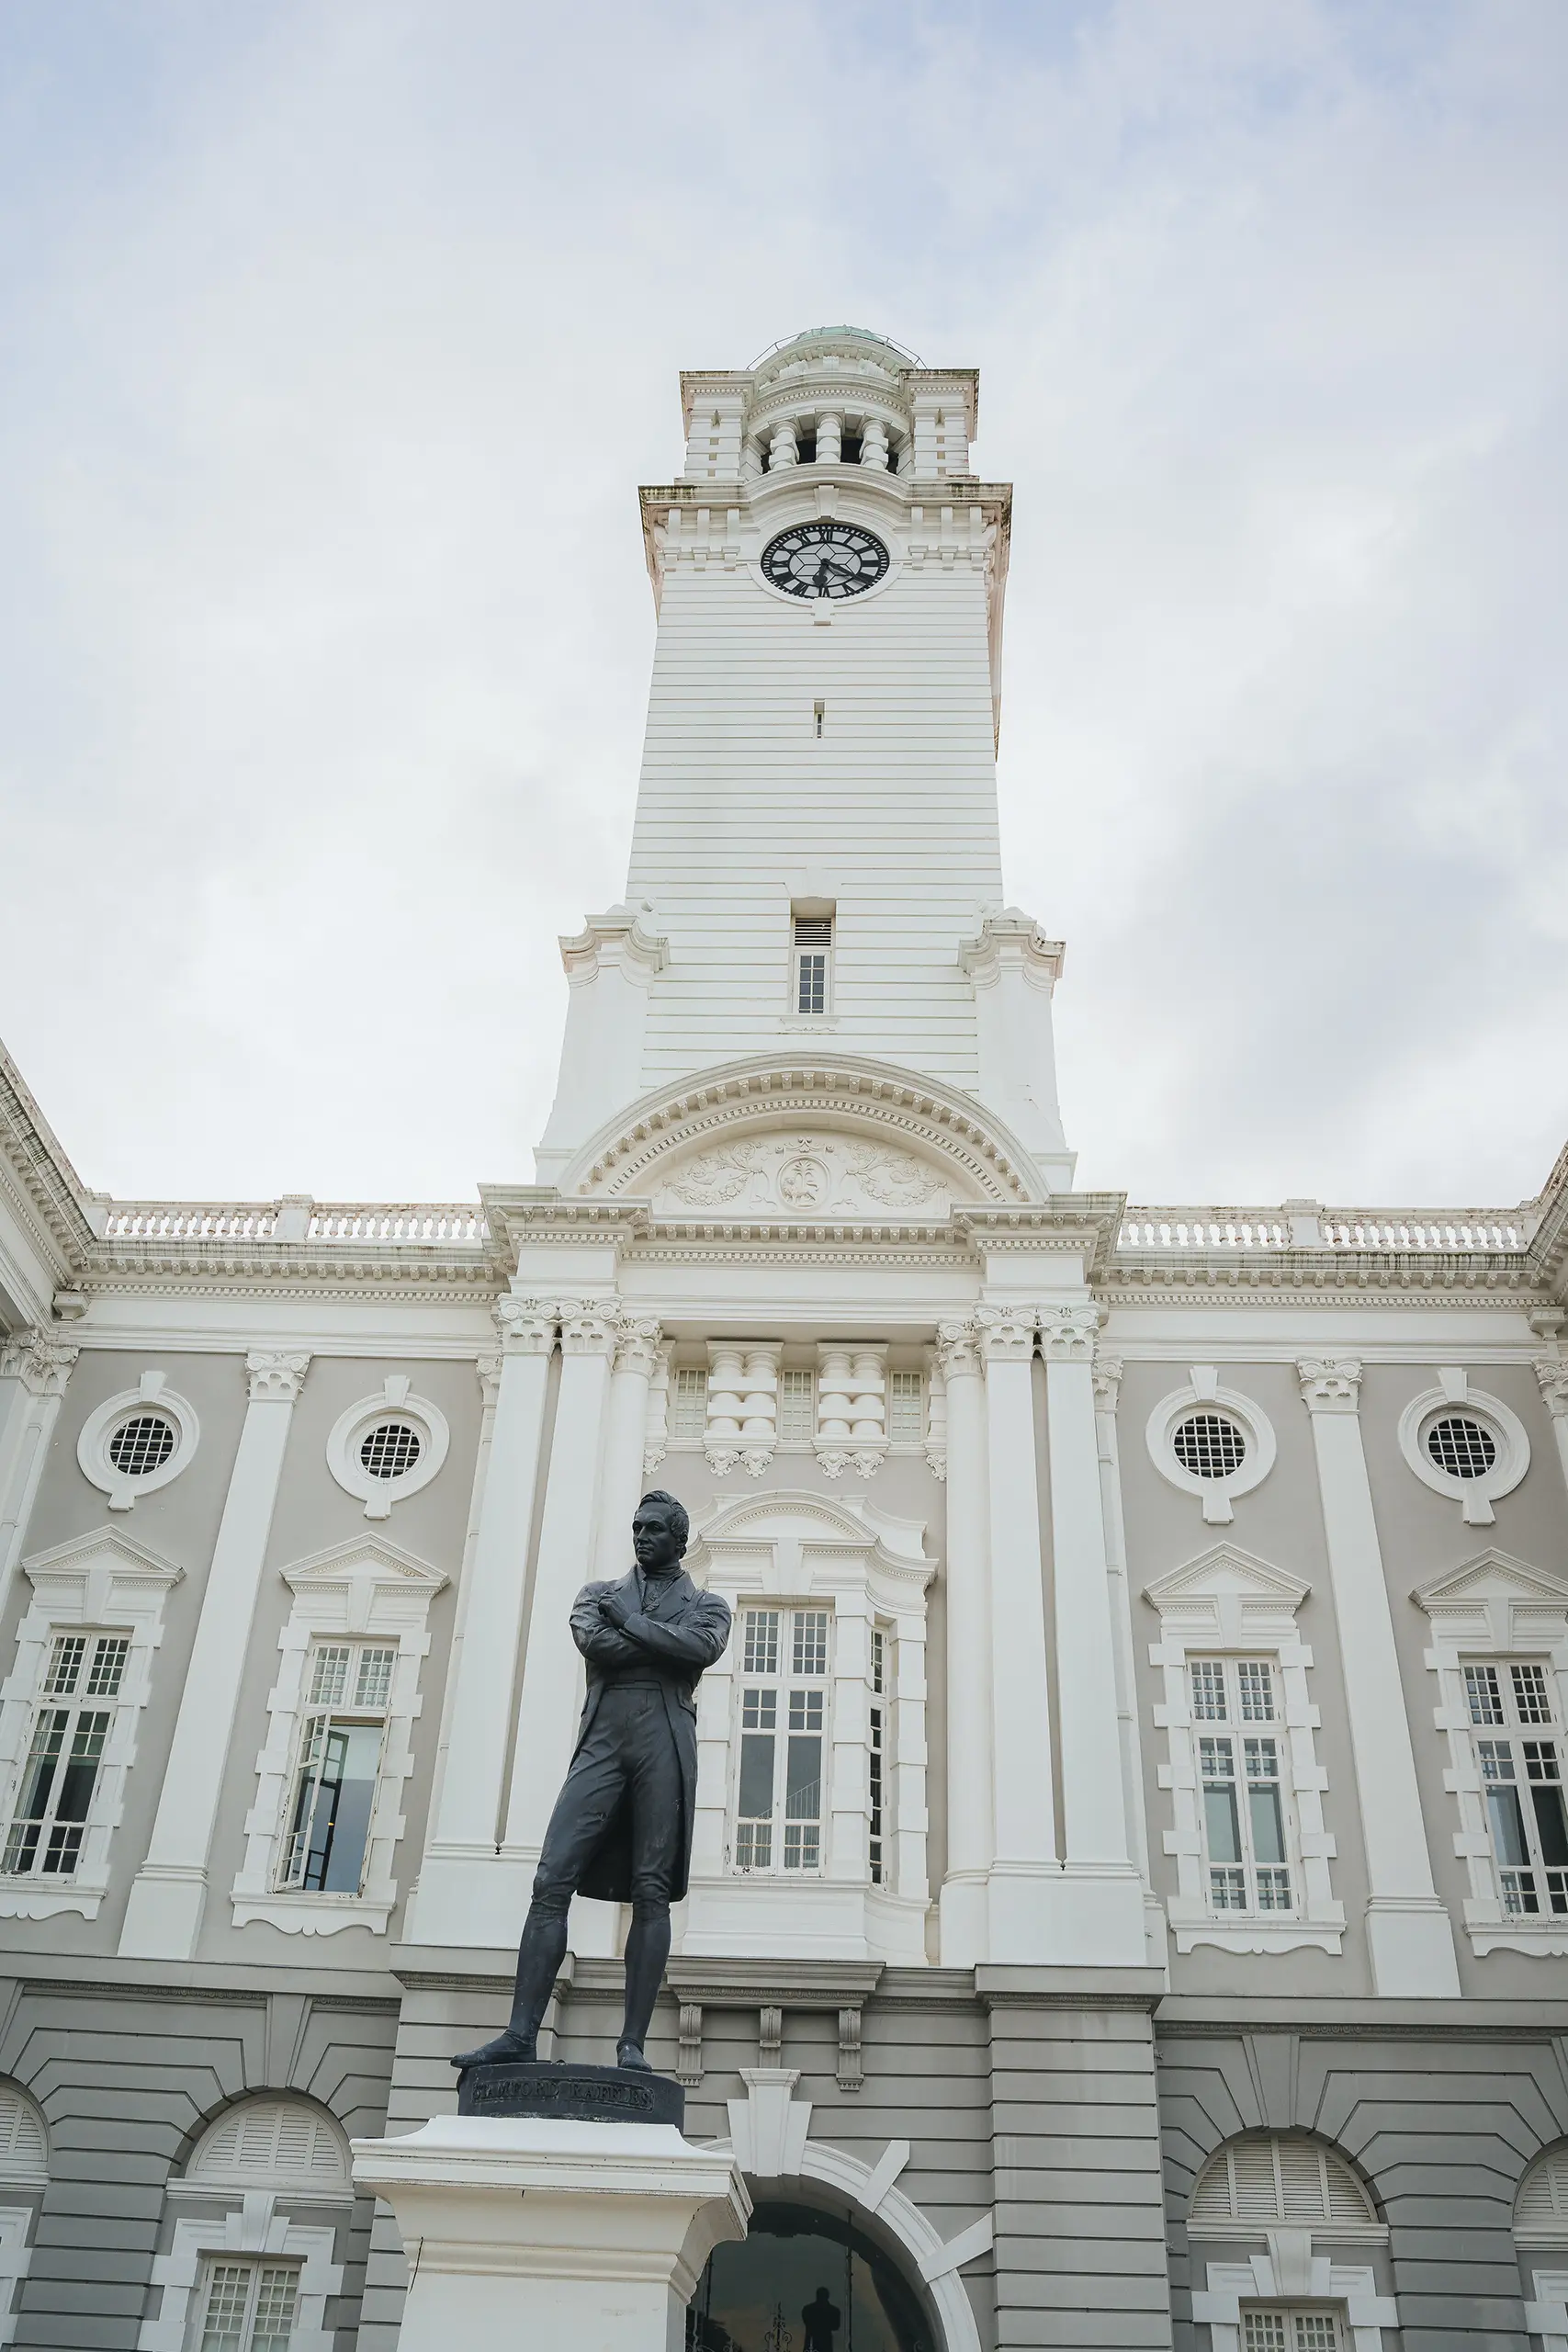
Victoria Theatre and Concert Hall, known for its elegant white colonial façade and clock tower. Symmetrical composition from the front, or a dramatic low-angle shot at night when it's beautifully lit. Capture the statue of Sir Stamford Raffles, founder of modern Singapore, with the Victoria Theatre in the background for a historical contrast. Use wide shots to include the Singapore skyline from here.
Asian Civilisations Museum located along the Singapore River highlights Asia’s diverse heritage. Best captured during golden hour into the night when its elegant neoclassical facade is illuminated against the Singapore River.
The Raffles Landing Site, located along the Singapore River, offers a fantastic contrast between heritage and modernity. The statue of Sir Stamford Raffles—the founder of modern Singapore—stands prominently against the backdrop of towering skyscrapers in the Central Business District (CBD).
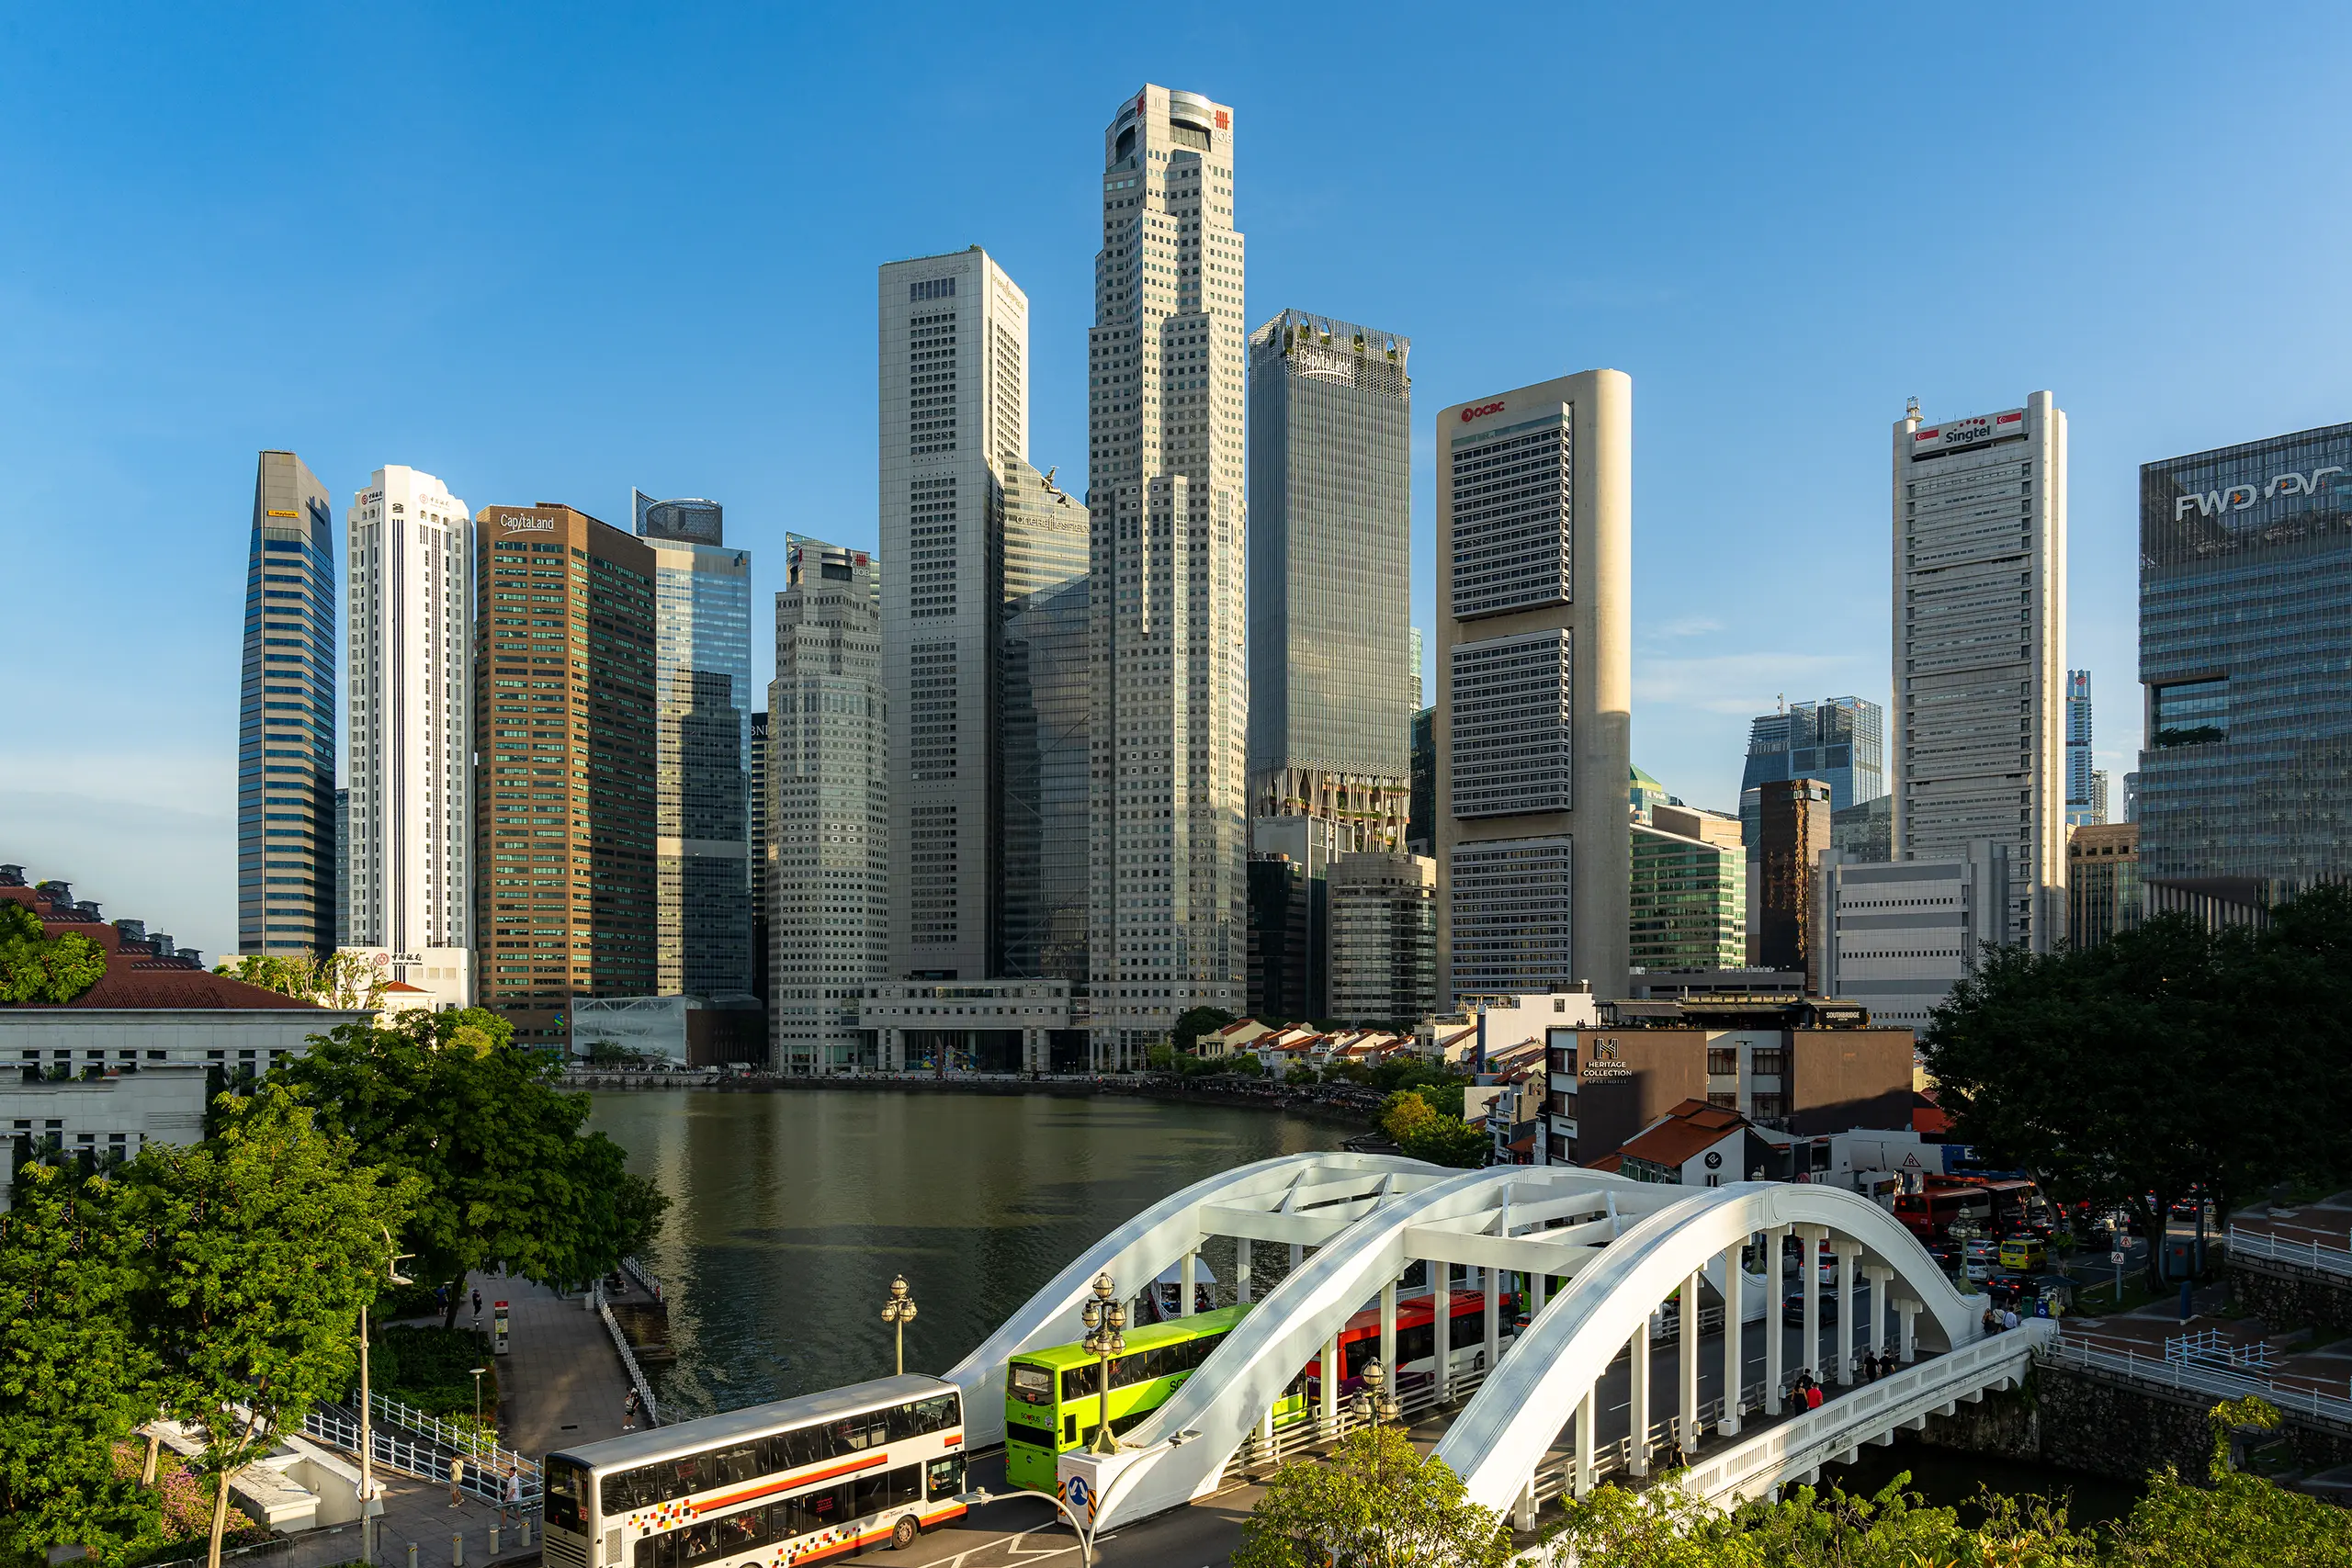
📍6. Boat Quay & Clarke Quay Along The Singapore River
✅ Best for: River reflections, heritage shophouses, city skyline, street photography and long exposure night photography. Both Boat Quay and Clarke Quay are iconic waterfronts along the Singapore River.


⏰ Best Time: Golden hour (5:30 PM – 7:00 PM) for warm light on the buildings, blue hour into the night for city lights reflection and light trails from cruising boats on the Singapore River.
📷 Shooting Tips:
From Elgin Bridge, capture the contrast between colourful heritage shophouses on Boat Quay and the modern skyscrapers of the Central Business District with passing boats on the Singapore River at any time of the day. The best time is still sunset for balance light and the warm hue and night photography for reflections and light trails.
Reflections on the Singapore River is best captured at sunset to the night. The water reflects the city lights beautifully with light trails from boats.
Capture street scenes at Boat Quay and Clarke Quay with its alfresco dining by the riverside, bustling with people at night, great for candid street shots.
Shoot from Coleman Bridge and Read Bridge for different panoramic views of Clarke Quay. Another location is the riverside steps outside Clarke Quay Central (near Read Bridge). These steps are right by the river and give a low-angle perspective of Clarke Quay’s colourful heritage shophouses.
At night, using long exposure technique, capture the symmetrical reflection of Clarke Quay’s colourful shophouses in the river.
Boat light trails along the Singapore River can be captured from Coleman Bridge and Read Bridge at either one of these quays. River boats create dynamic light streaks at night. The last boat leaves at 9 pm. It takes about 40 minutes for the entire route to Marina Bay and back. Therefore time your shoot accordingly for river light trails.
Vehicle light trails along this route is also great. Focus on those double deckers to give you a more dynamic long and taller streak of lights.
If you take a boat ride, you’ll get unique views of Clarke Quay, Boat Quay, and Marina Bay. The best times depend on the lighting and mood you want to capture. Sunset to night would be capturing glowing warm sunset hues to illuminating light of the Marina Bay skyline. Shoot with a wide angle and fast shutter speed to avoid motion blur due to the boat's movement. 🚫 Tripod is not allowed on the boat. Here are some camera settings suggestions for a clear handheld low light and night shoot when on a moving boat - 1/200 sec, f/2.8 to f/4, ISO 2000. If the scene is very dark, try this 1/100 sec, between f/2.8 to f/4, ISO 3200.
Next to Clarke Quay, capture the Old Hill Street Police Station from Coleman Bridge (above the Singapore River) for a wide-angle shot of the entire building. This is one of the iconic colonial architecture with 927 multi-coloured shutters. On weekend nights, the building is lit with warm lighting. Great for night and low light photography that with contrast against the dark sky with vehicle light trails.
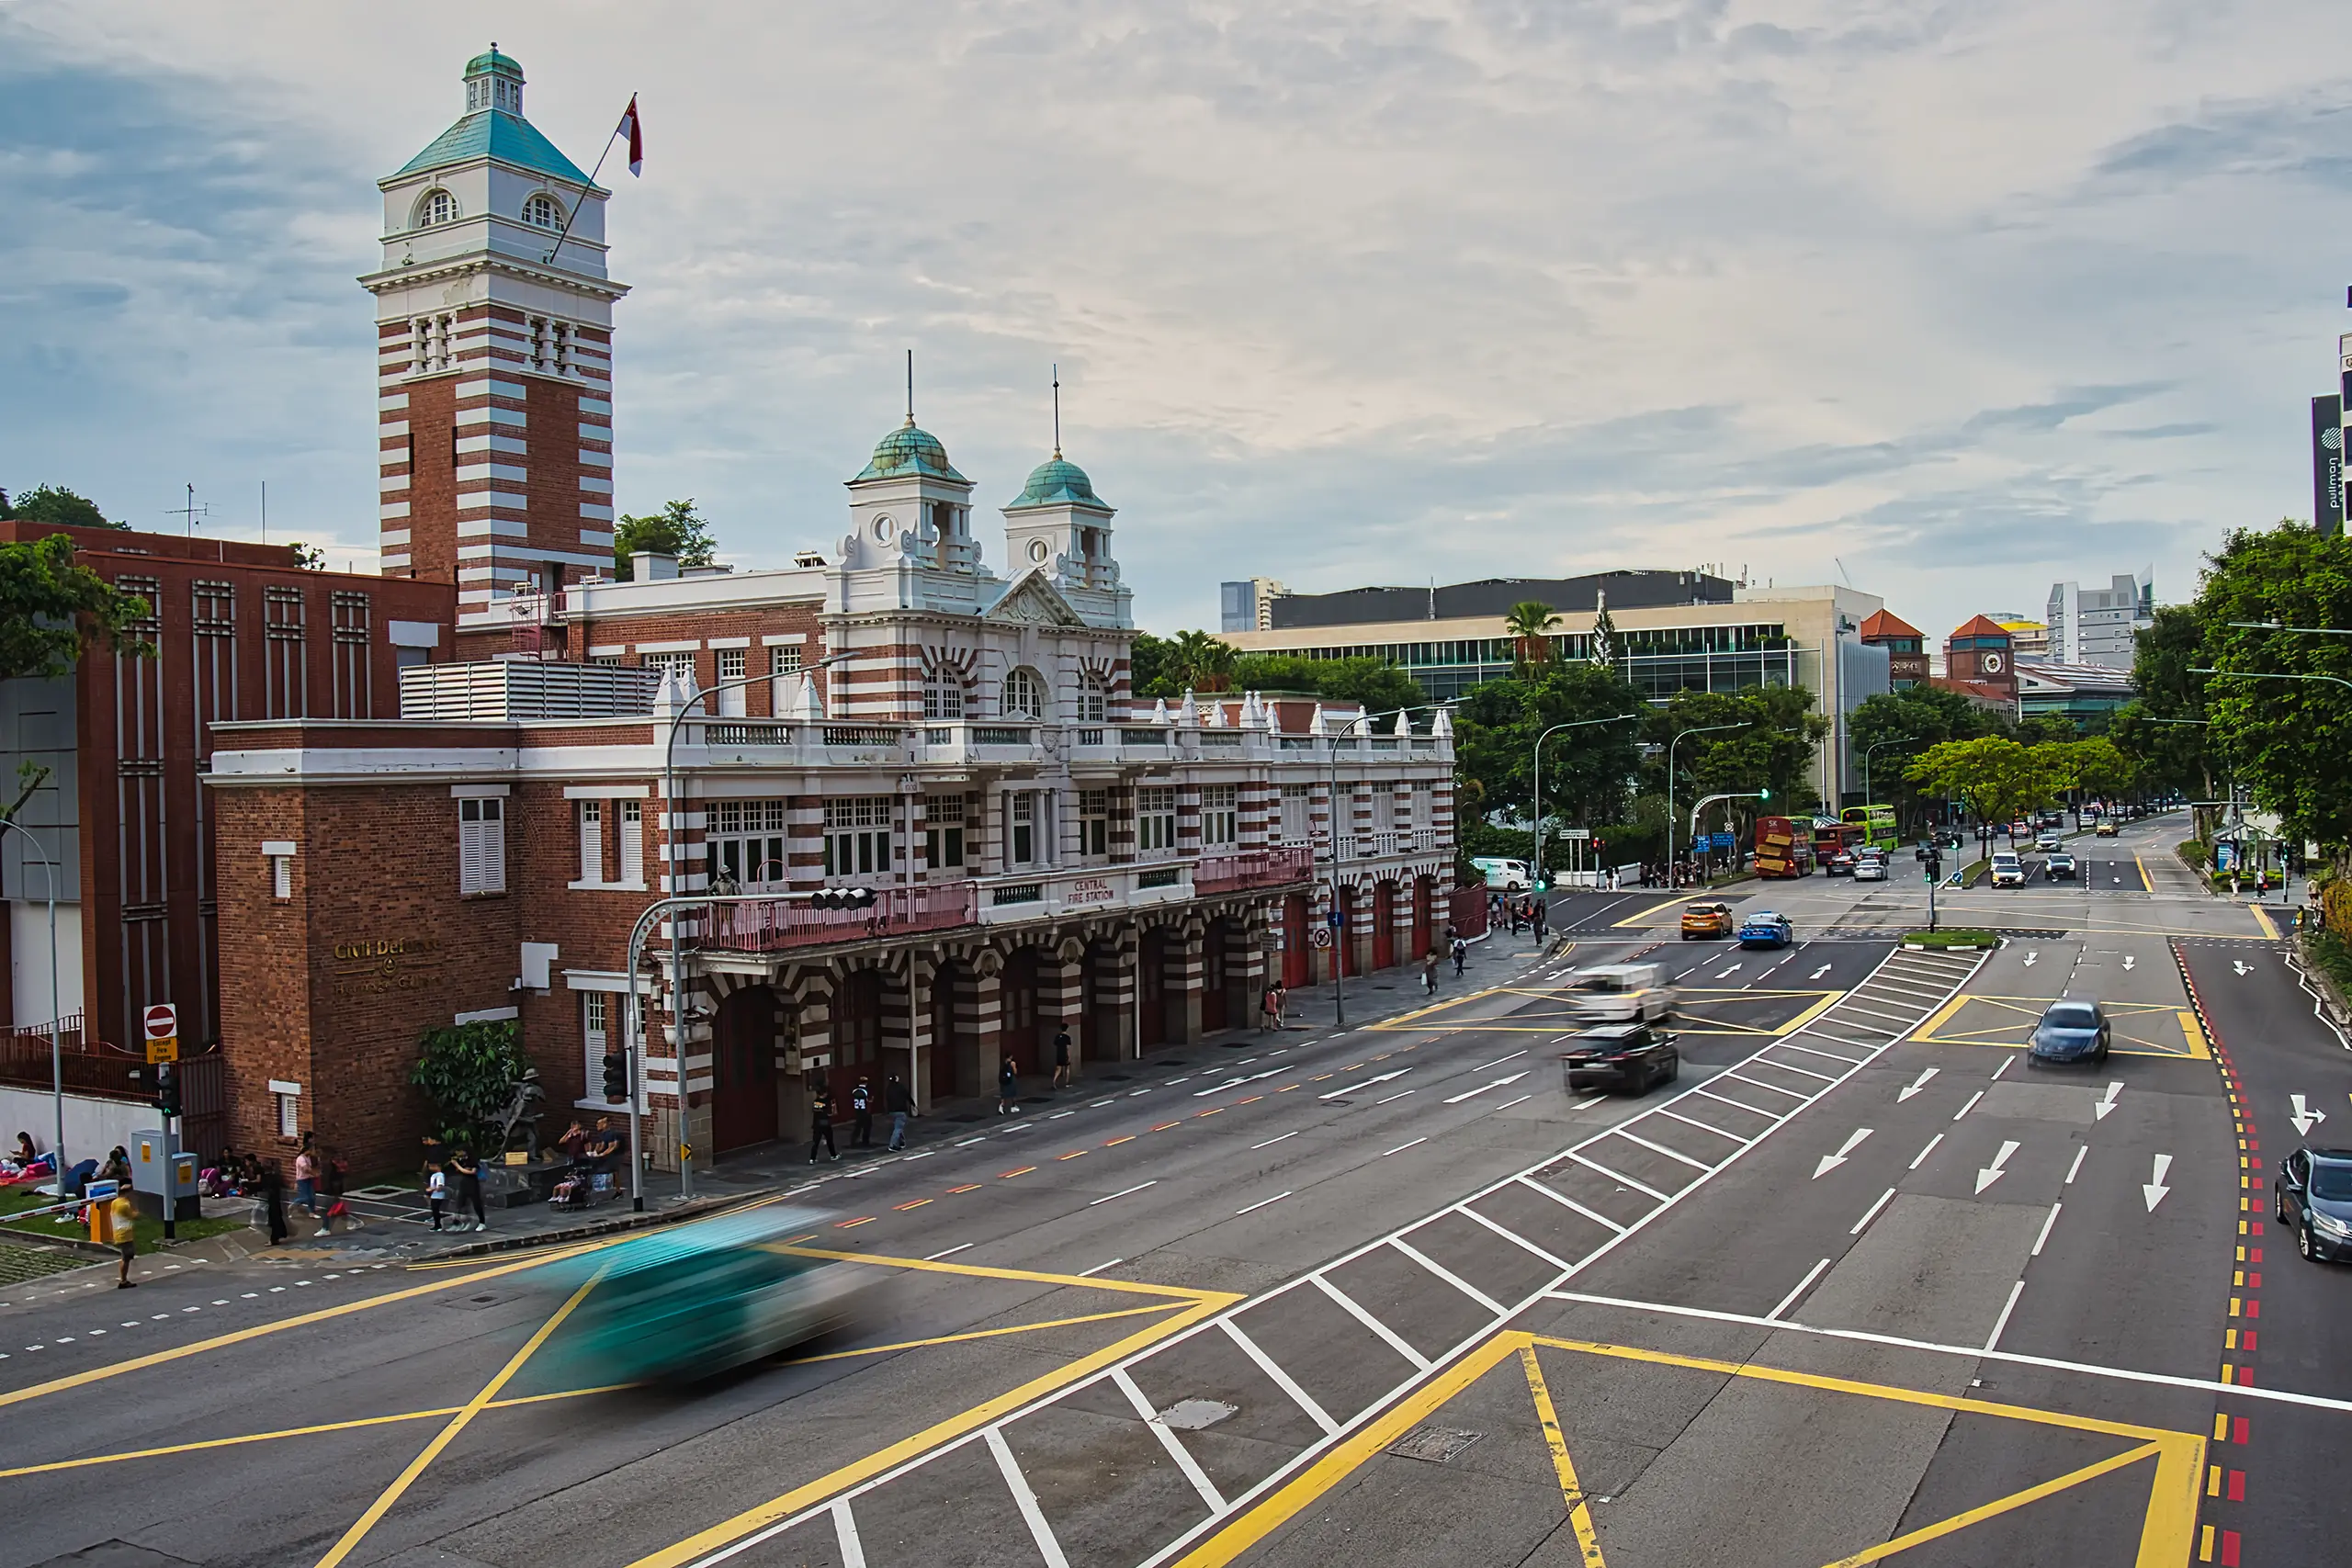
Walk a few meters down Hill Street to capture the Central Fire Station, Singapore’s Oldest Fire Station built in 1908. Shoot from the overhead bridge near Funan Mall to get a clear, elevated perspective of the fire station. Great spot for night long exposure photography.
📍7. Chinatown
✅ Best for: Heritage architecture, colourful street markets, temples and modern contrasts.

⏰ Best Time: Morning (6:00 AM – 10:00 AM) – soft light and locals going about their daily routines; Late afternoon, Golden hour (6:30 PM – 7:30 PM) – Chinatown’s colourful shop facades, bustling street vendors and hawker centres; Warm golden light on historic architecture and vibrant street life; Blue hour cityscapes, glowing lanterns, golden temple lights; Night (7:30 PM – 10:00 PM) – Chinatown’s nightlife, vibrant neon signs, long-exposure photography.
📷 Shooting Tips:
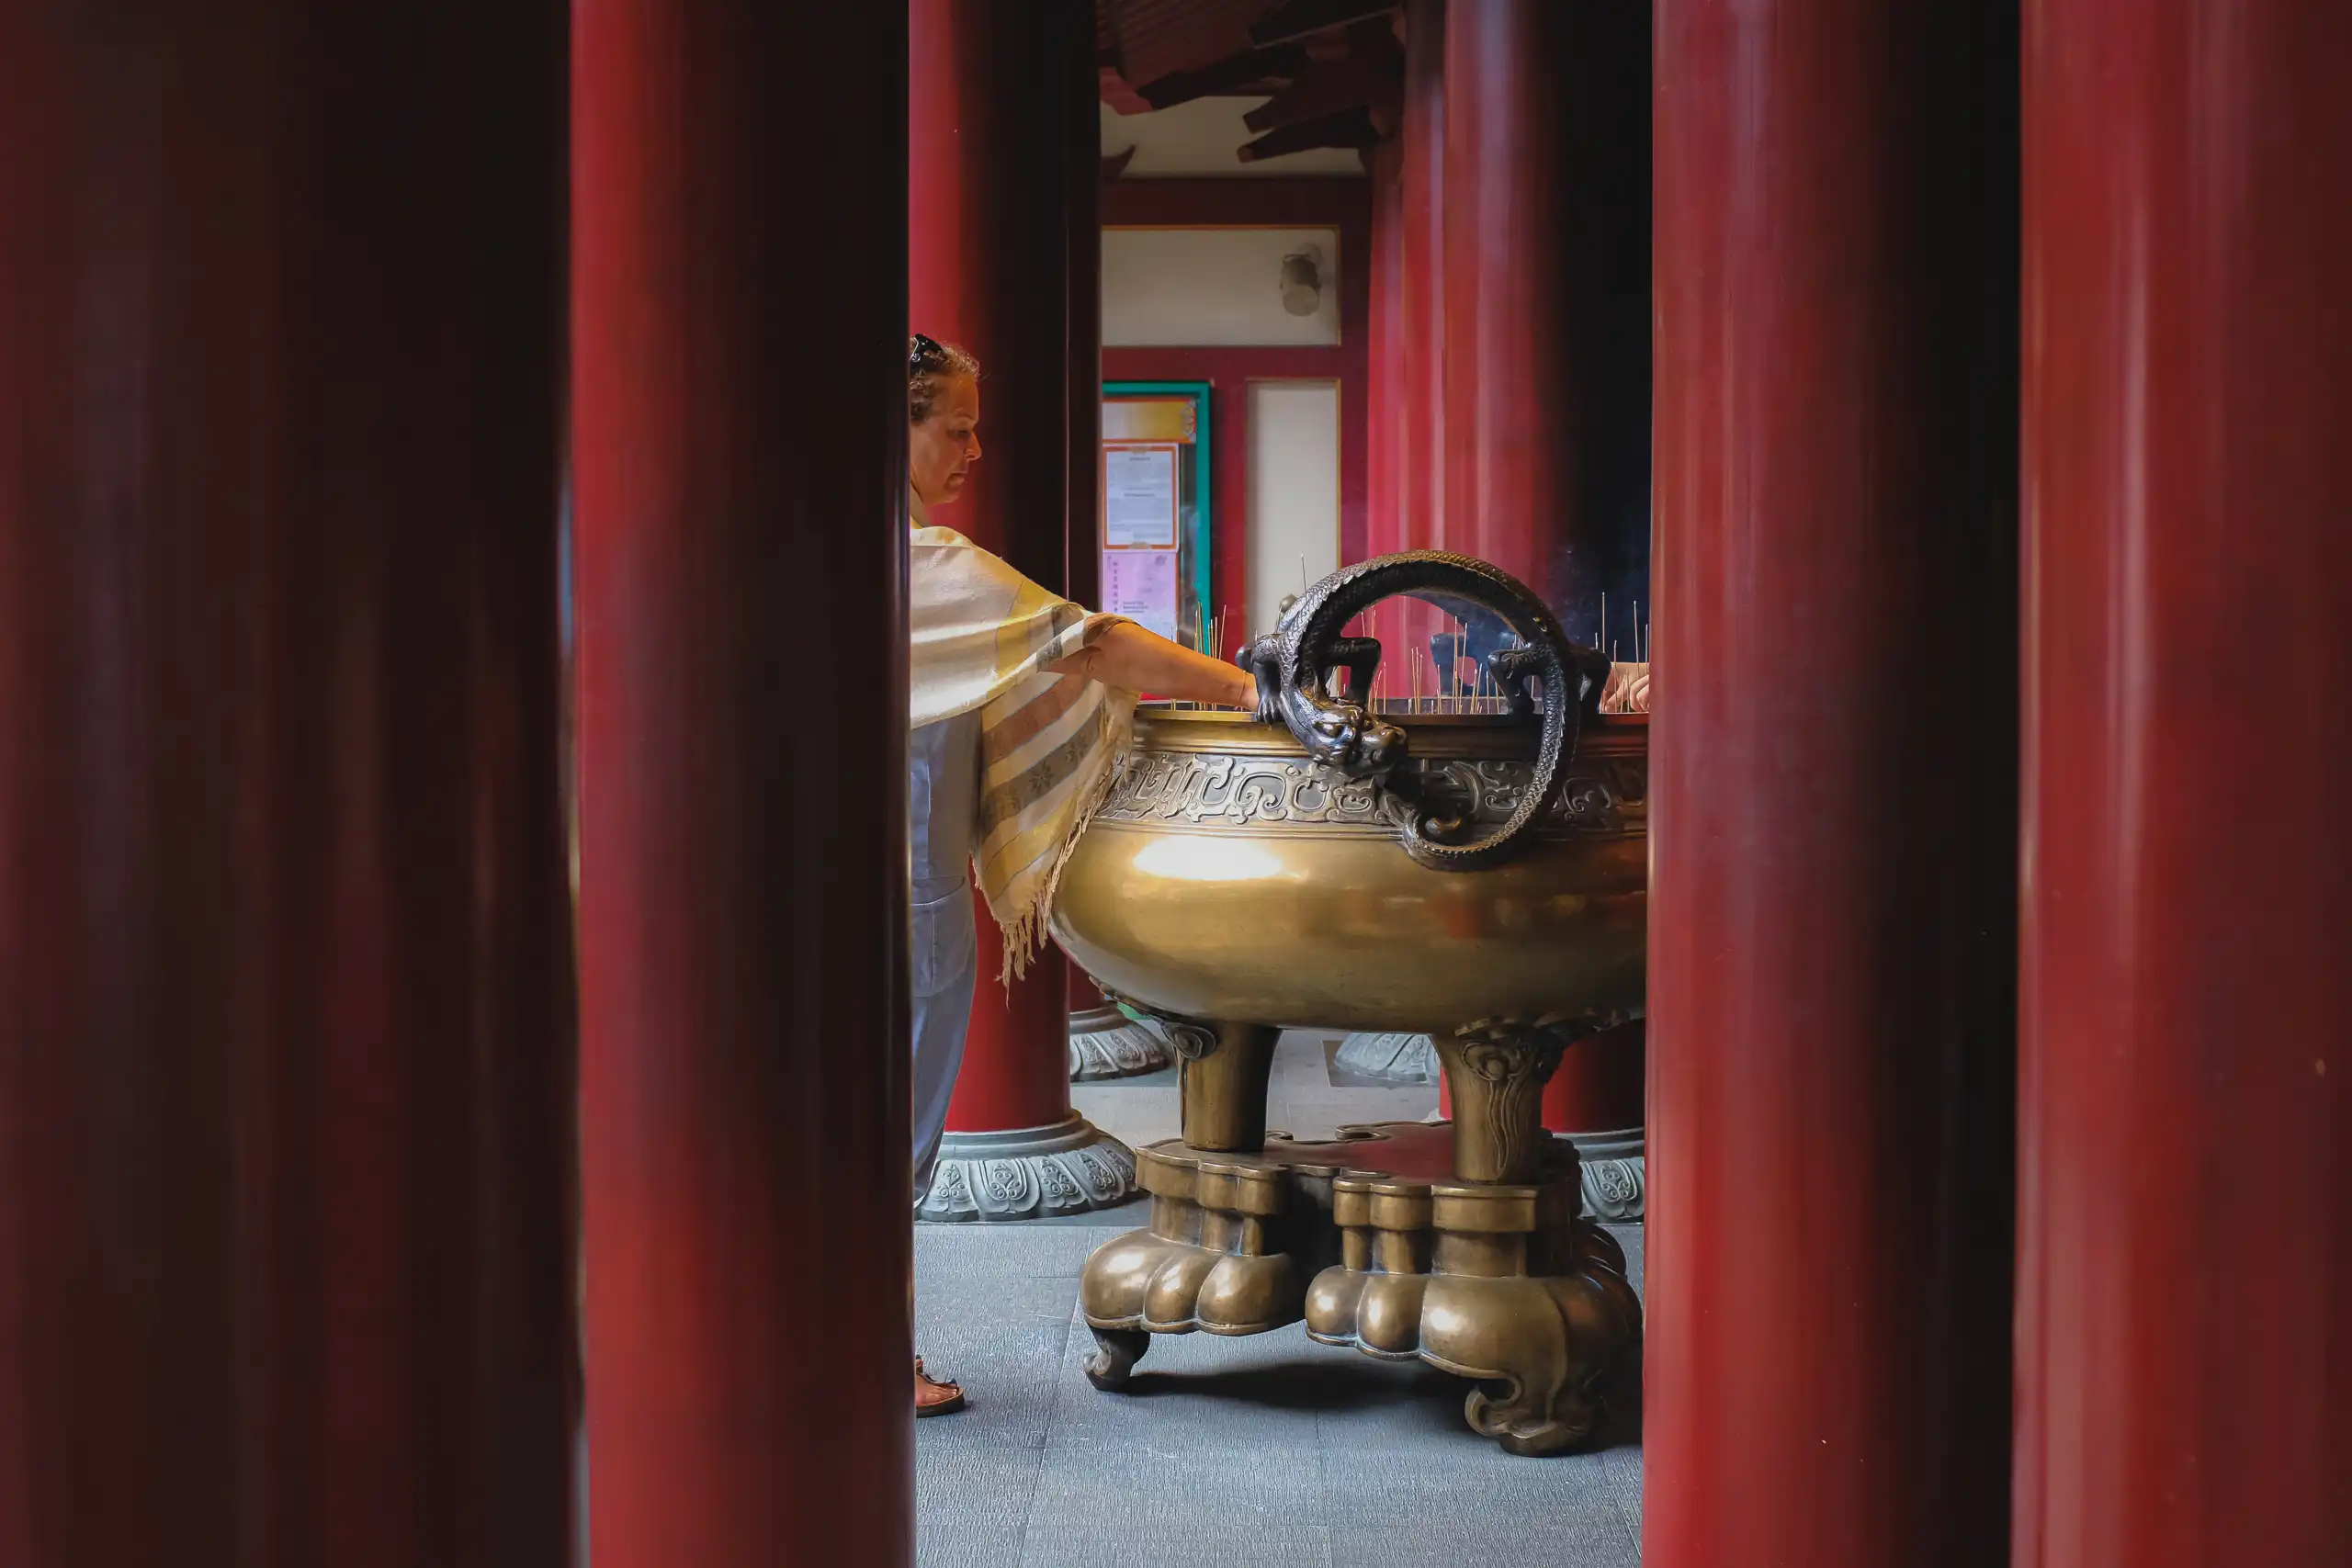
For a unique top-down view of the Buddha Tooth Relic Temple against a backdrop of the modern high rise cityscape, shoot the temple from the balcony of the opposite building on Level 3 along Banda Street 5 (shophouses with eateries on the ground floor).
Photography is allowed inside the Buddha Tooth Relic Temple’s halls. 🚫 No flash photography, avoid disturbing worshippers, no photography in certain prayer areas - look out for signs. Dress code - 🚫 No sleeveless tops, spaghetti straps, shorts. The temple provides shawls and wraps at the entrance for visitors to cover up.
Capture Chinese lanterns hanging above the streets at dusk to give a sense of place.
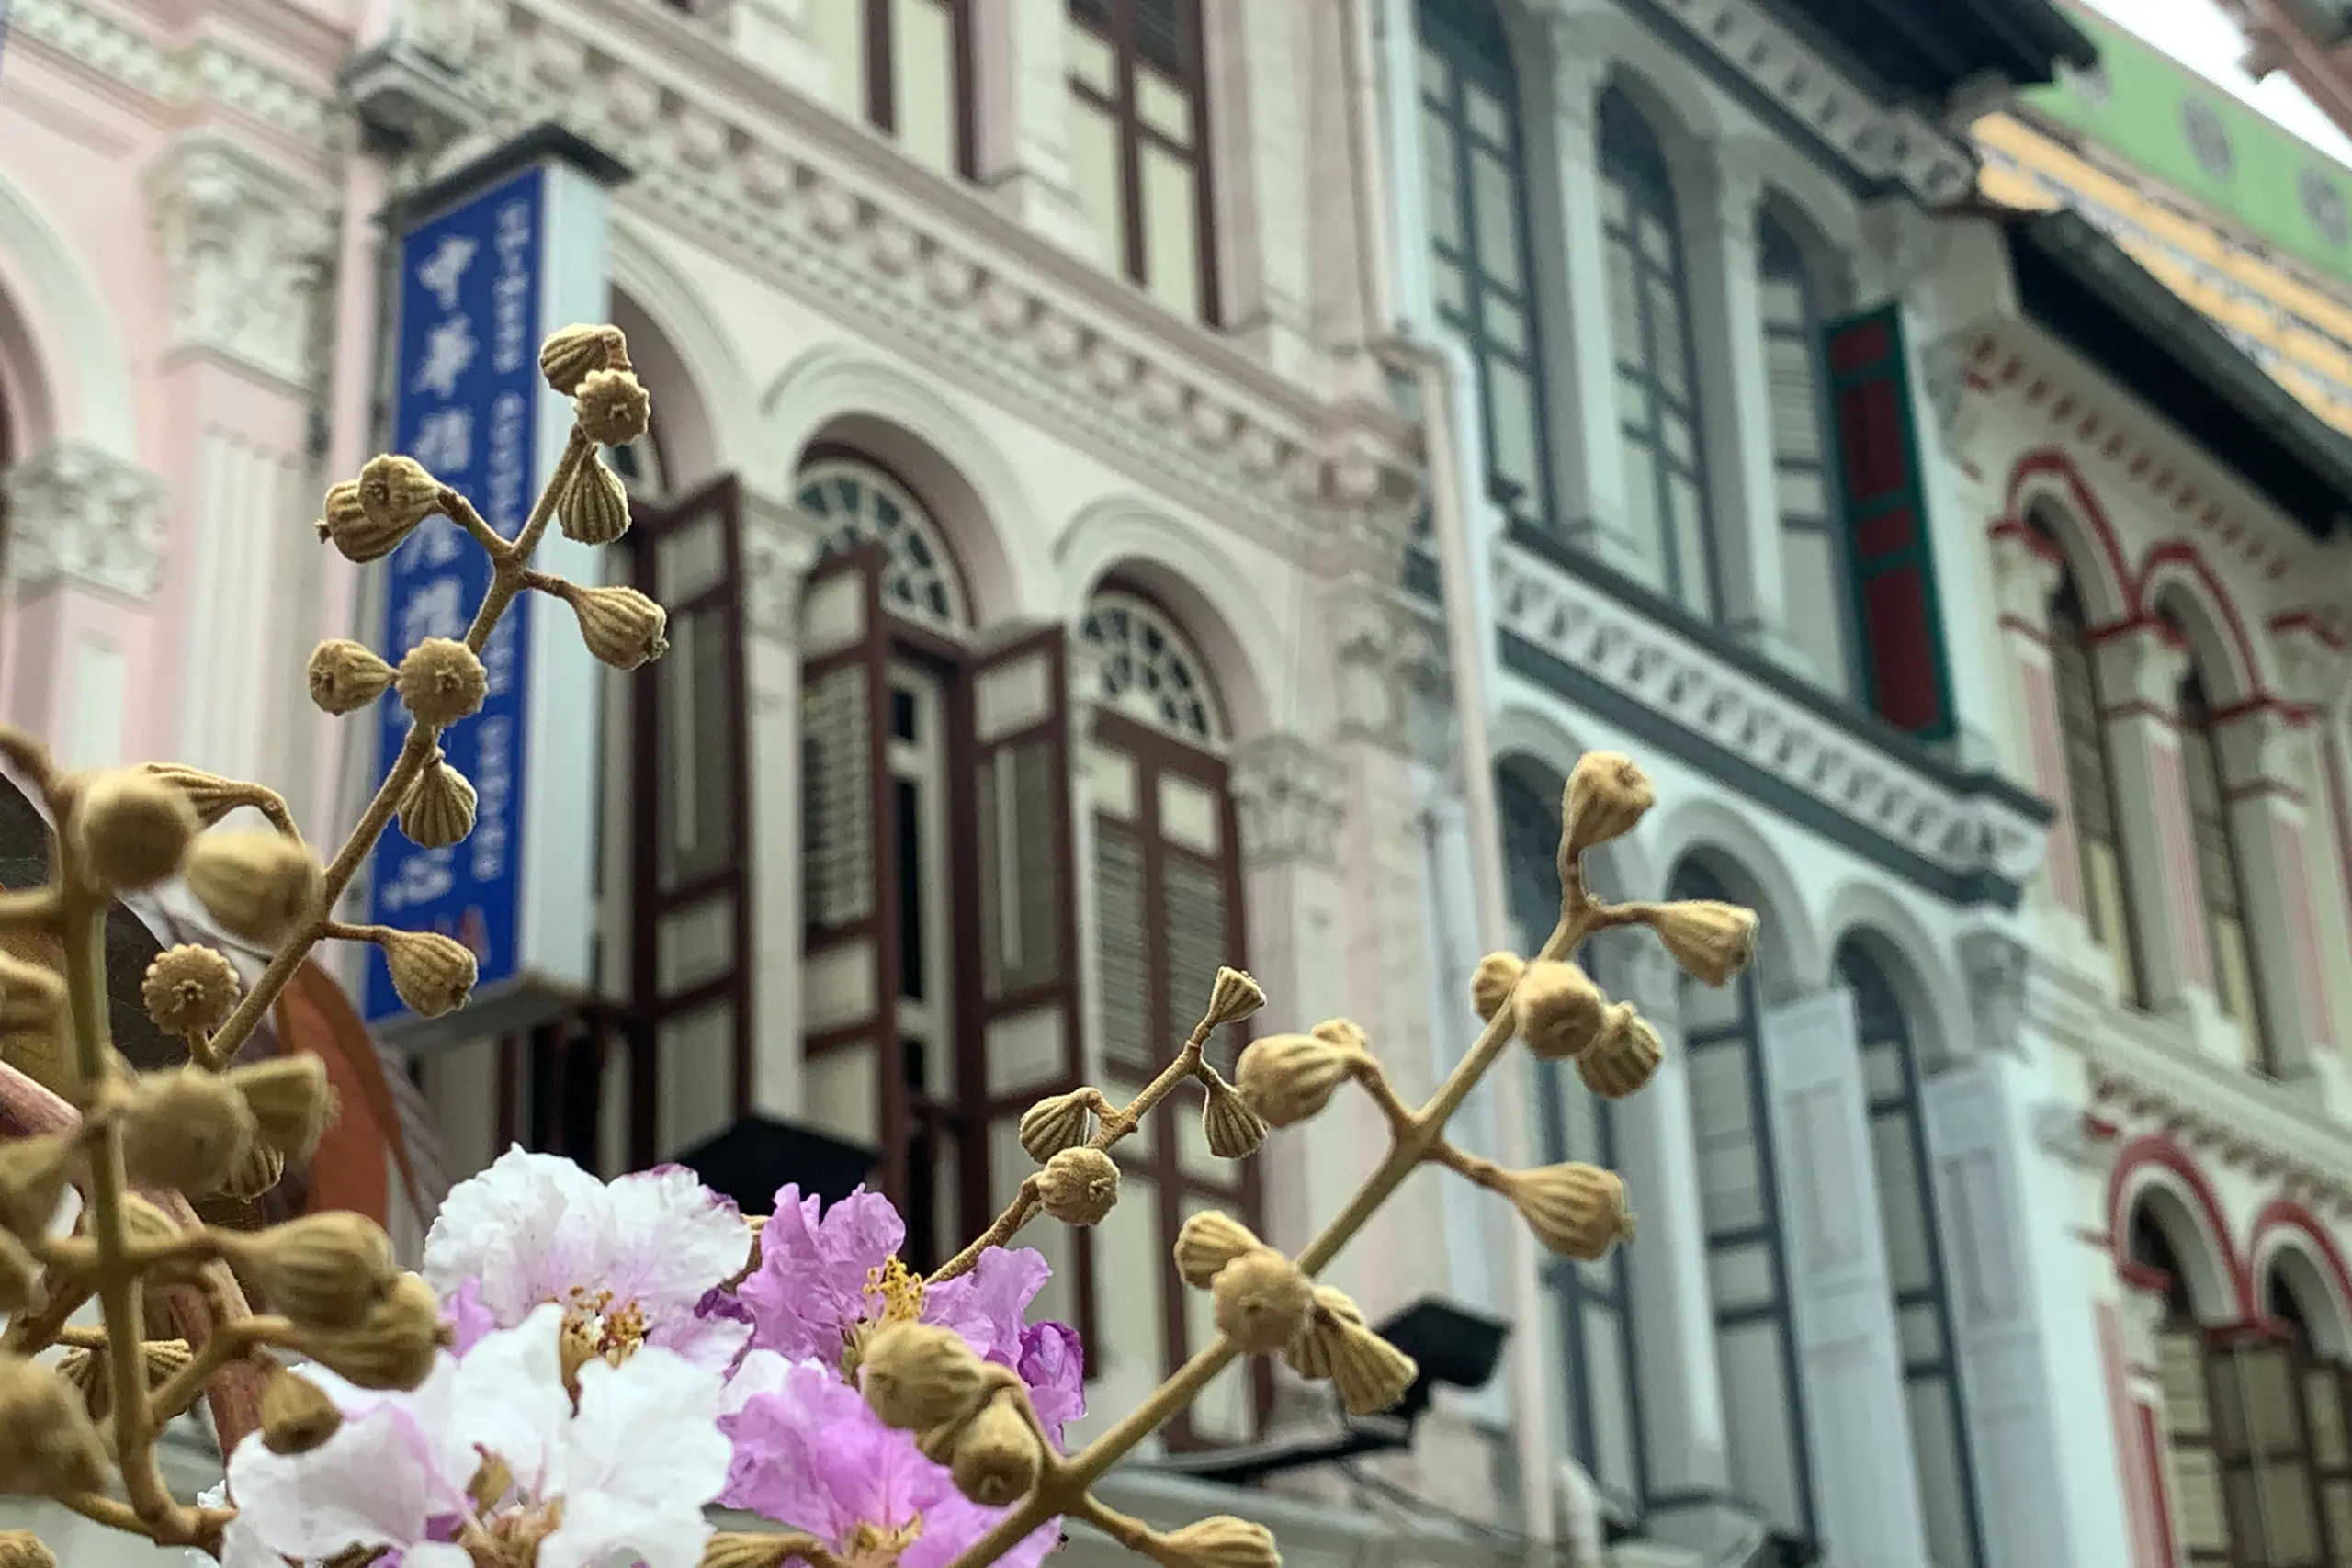
Shoot with a wide-angle lens to capture the colourful rows of shophouses at Pagoda Street. Look for symmetry and leading lines in the street, shop signages and even traditional wooden frame windows with carvings.
For a modern contrast, capture old shophouses with skyscrapers behind them.
From the Chinatown MRT Exit shoot upward to against traditional shophouses.
At the Chinatown Food Street (Smith Street), Maxwell Hawker Centre (across Buddha Tooth Relic Temple) capture steaming bowls of laksa, satay and chicken rice in close-up shots. Most hawkers are fine with you photographing them while they prepare those dishes but do ask permission prior.
Use Chinatown’s narrow alleys and shopfronts for strong compositions.
Capture senior citizens playing Chinese chess in public spaces, near Buddha Tooth Relic Temple. Shoot at eye level to capture emotions and reactions.
Use different focal lengths - 50mm or 85mm lens for candid shots of street life, portraits & close-up details. Wide-angle (16-35mm) for temples and street shots. 50mm or 85mm for portraits & close-up details.
Go across the road to Ann Siang Hill and Club Street to capture the colourful street arts and murals along the walls.
Frame a shot of the Sri Mariamman Temple through the entrance archway for depth. If you have telephoto lens (70-200mm), capture the detailed carvings on the temple tower. You can enter the temple. 🚫 No shoes inside and avoid disturbing worshippers. Interior photography requires permission from temple staff.
At night take a long exposure shot of light trails from passing cars.
For light trails photography, shoot with a wide angle and a tripod. Here are some suggested settings for a dark scene - Shoot in Aperture Priority Mode, between f/11 to f/18, ISO 100, 5-10 sec (camera speed will be adjusted by the camera). Higher ISO for low light, depending on noise tolerance.
🌐 Website: https://chinatown.sg/
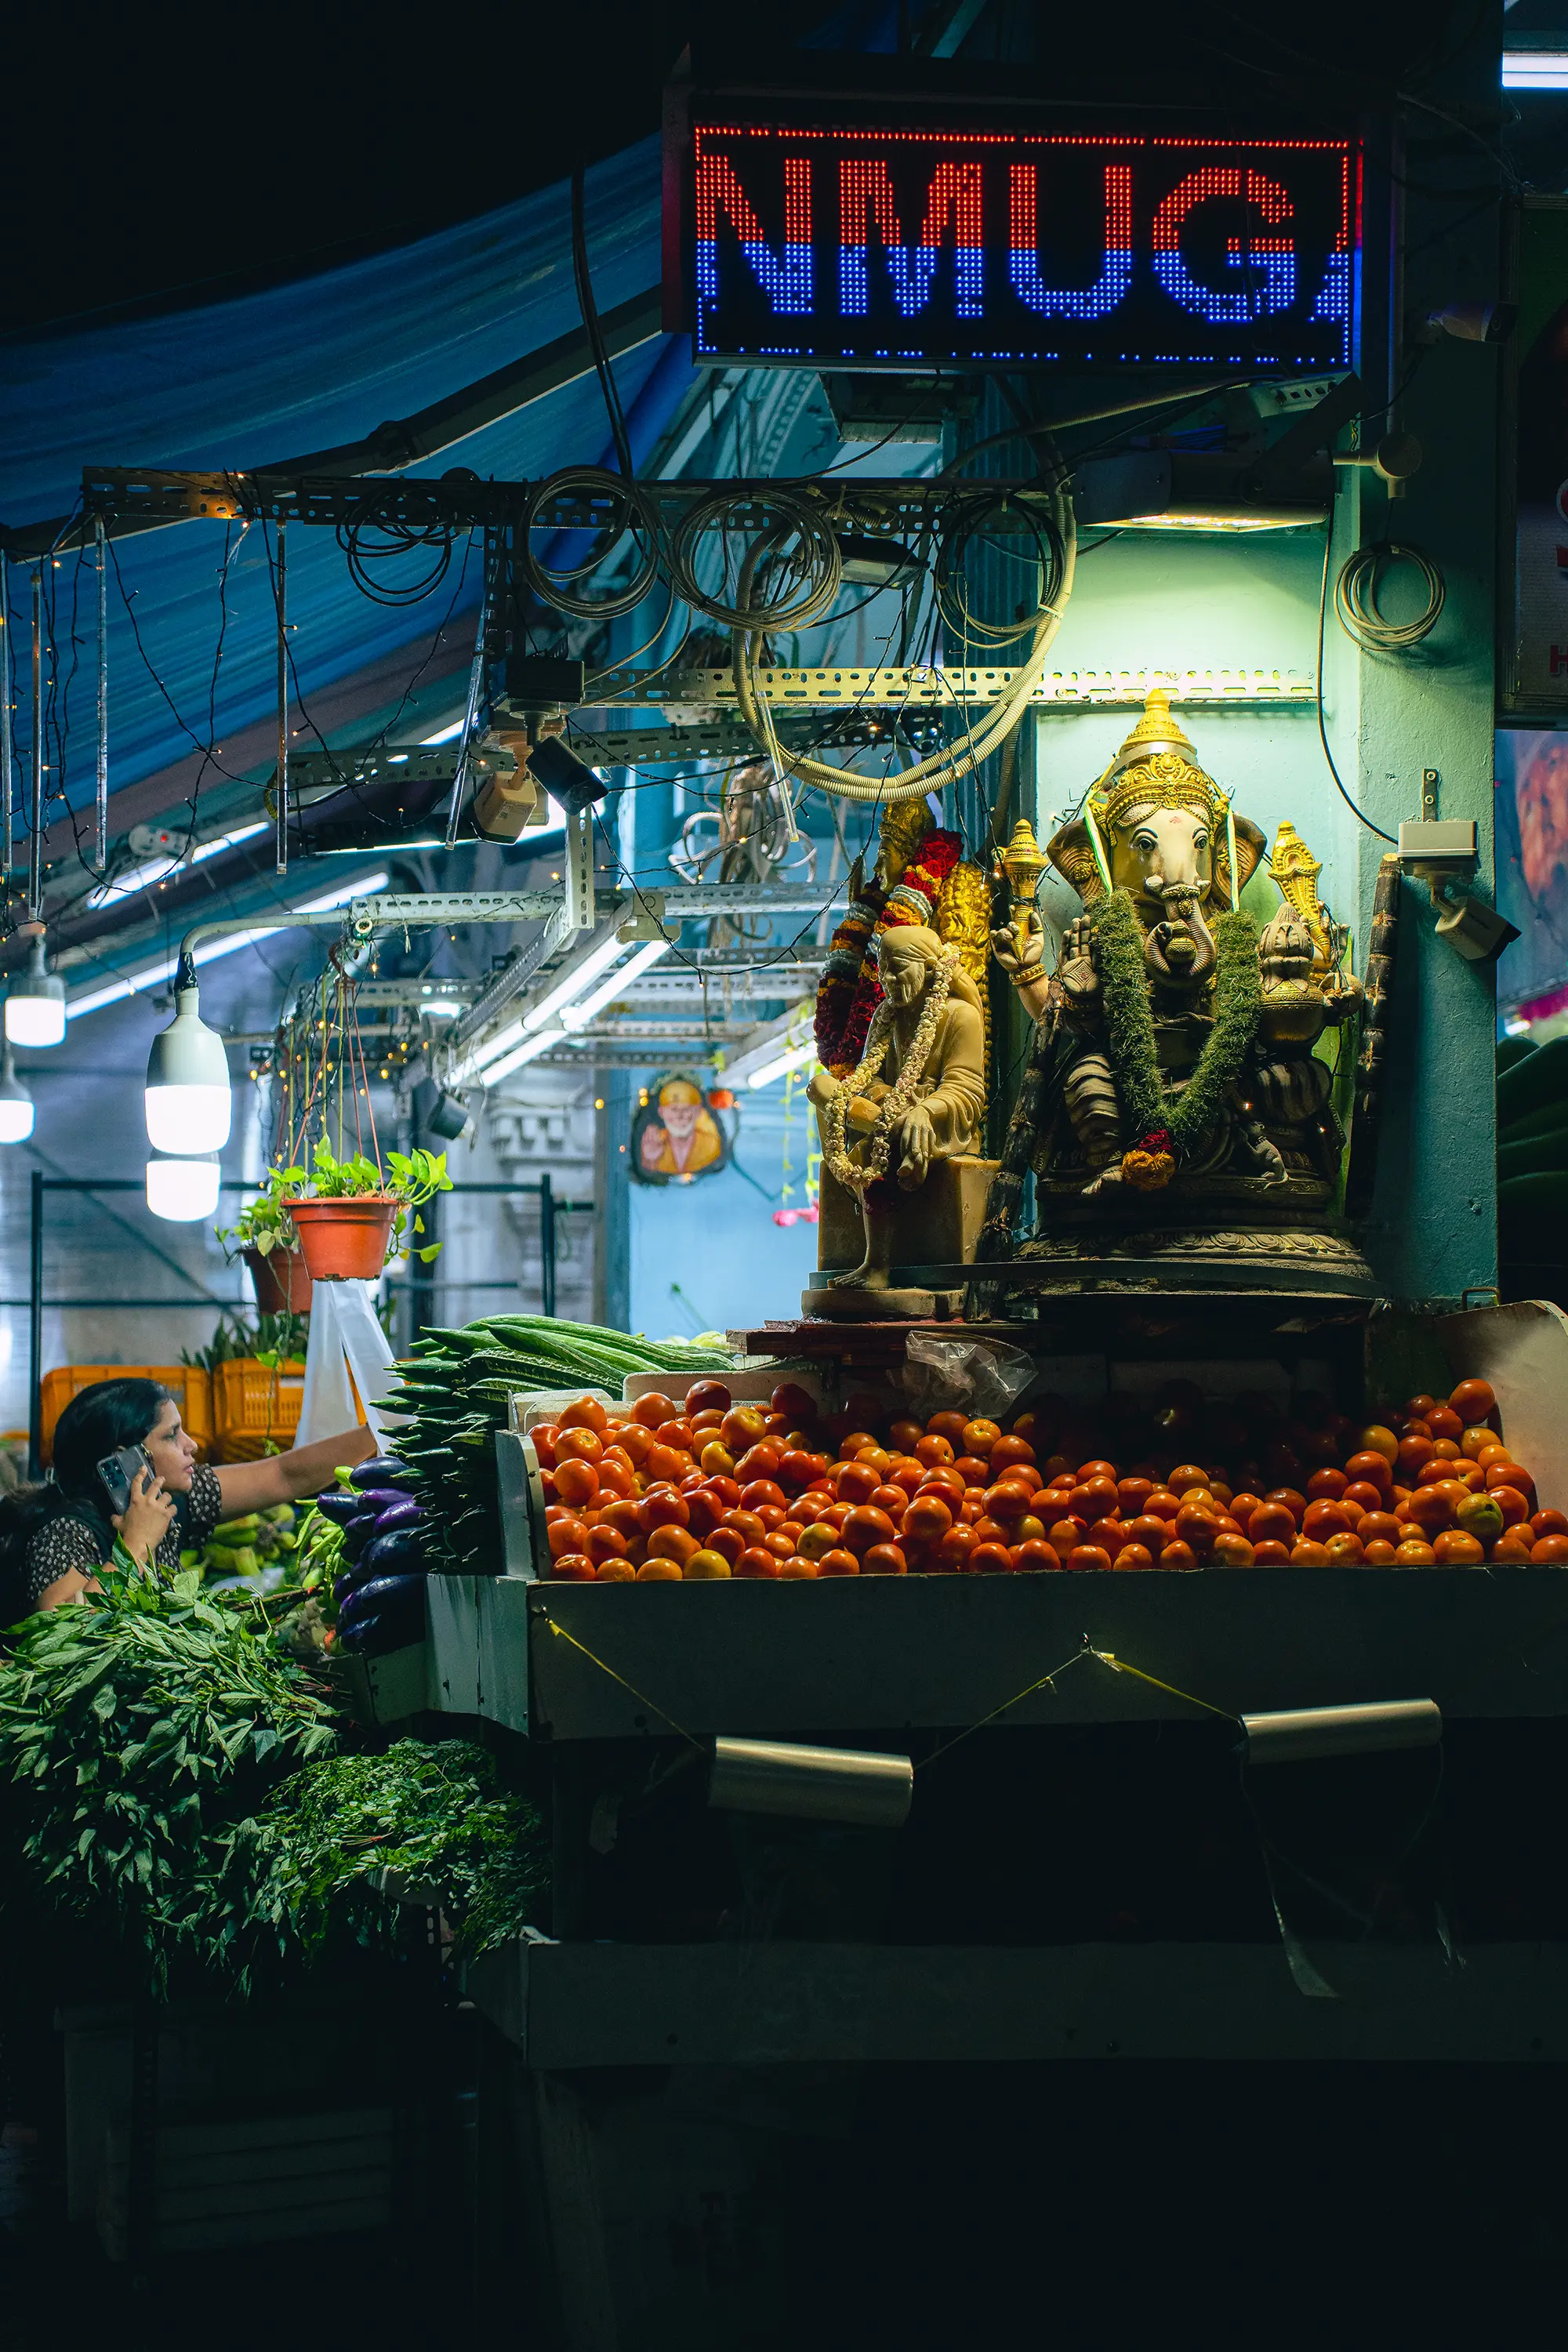
📍8. Little India
✅ Best for: Colourful Street Art, Streets and Culture. Little India is one of Singapore’s most colourful and vibrant districts, filled with heritage buildings, street markets, temples, and murals.

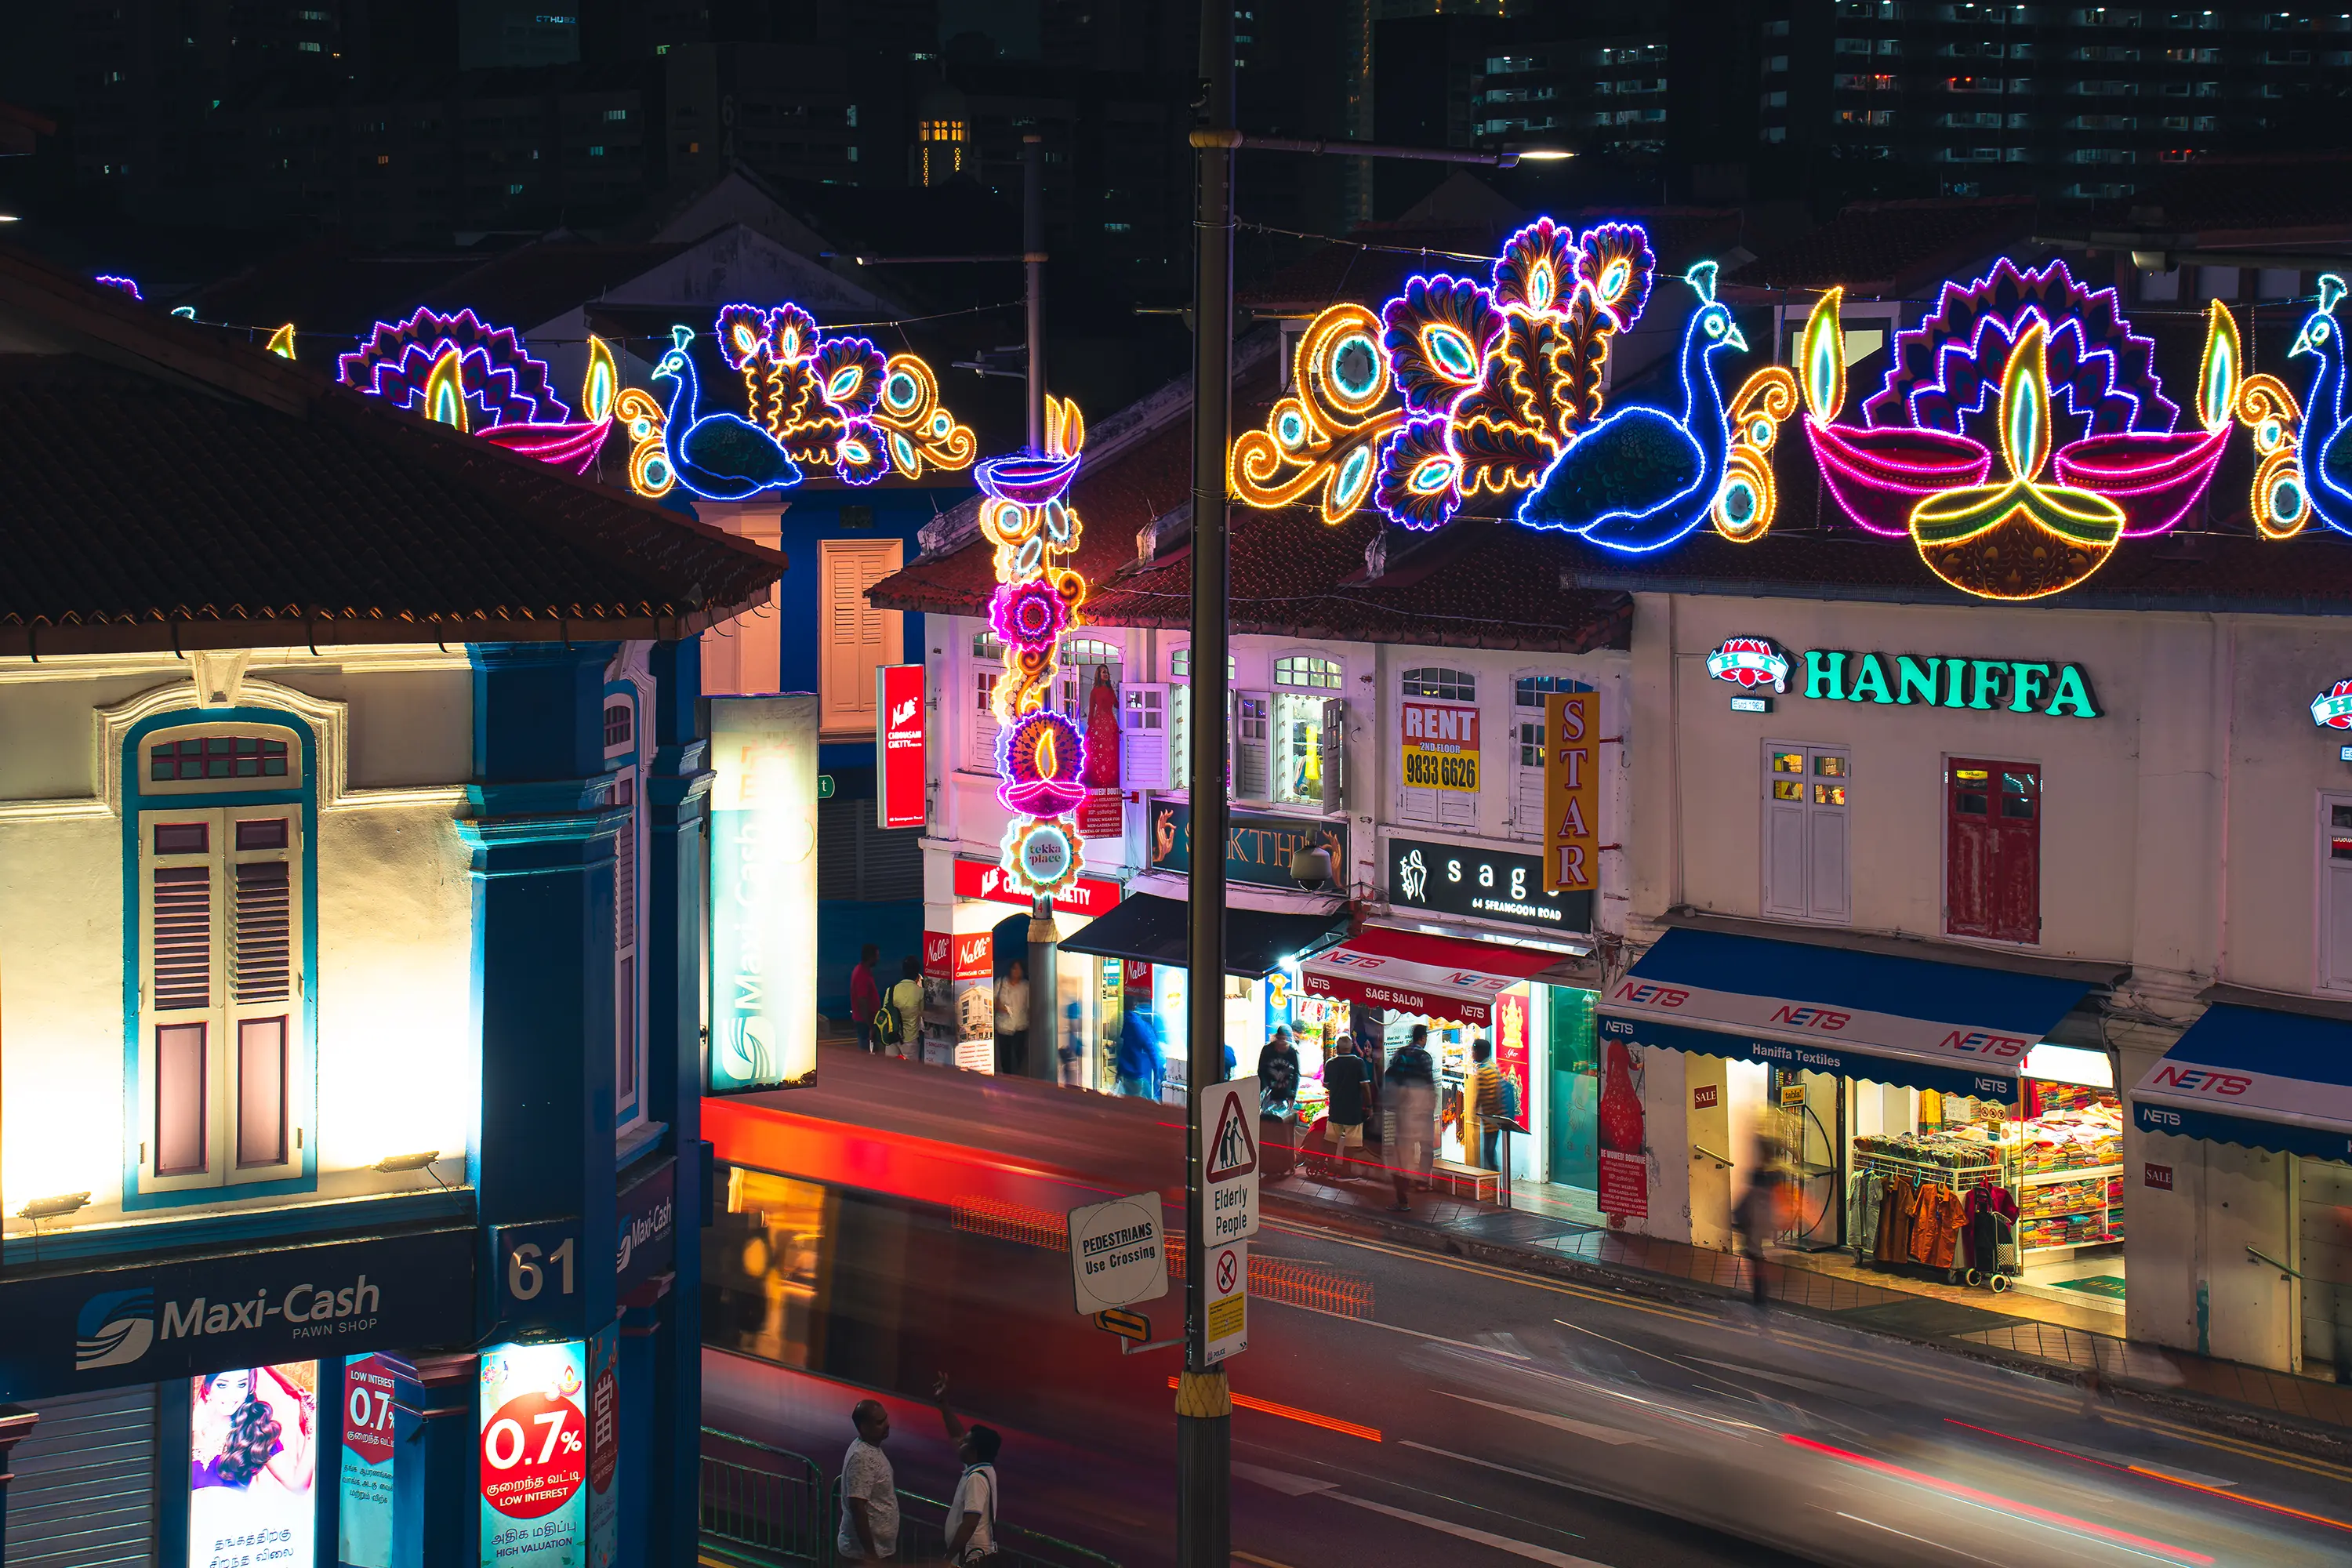
⏰ Best Time: Morning (7 AM – 10 AM): Soft light, market action and temple prayers. Afternoon (3 PM – 6 PM): Deep shadows, vibrant textiles and murals. Evening (6 PM – 8 PM): Golden hour glow on colourful buildings. Night (8 PM – 11 PM): Light trails and bustling night markets.
📷 Shooting Tips:
Capture bustling market scenes at Tekka Centre in the morning. Use a wide-angle lens to capture the vivid street murals and lively market scenes.
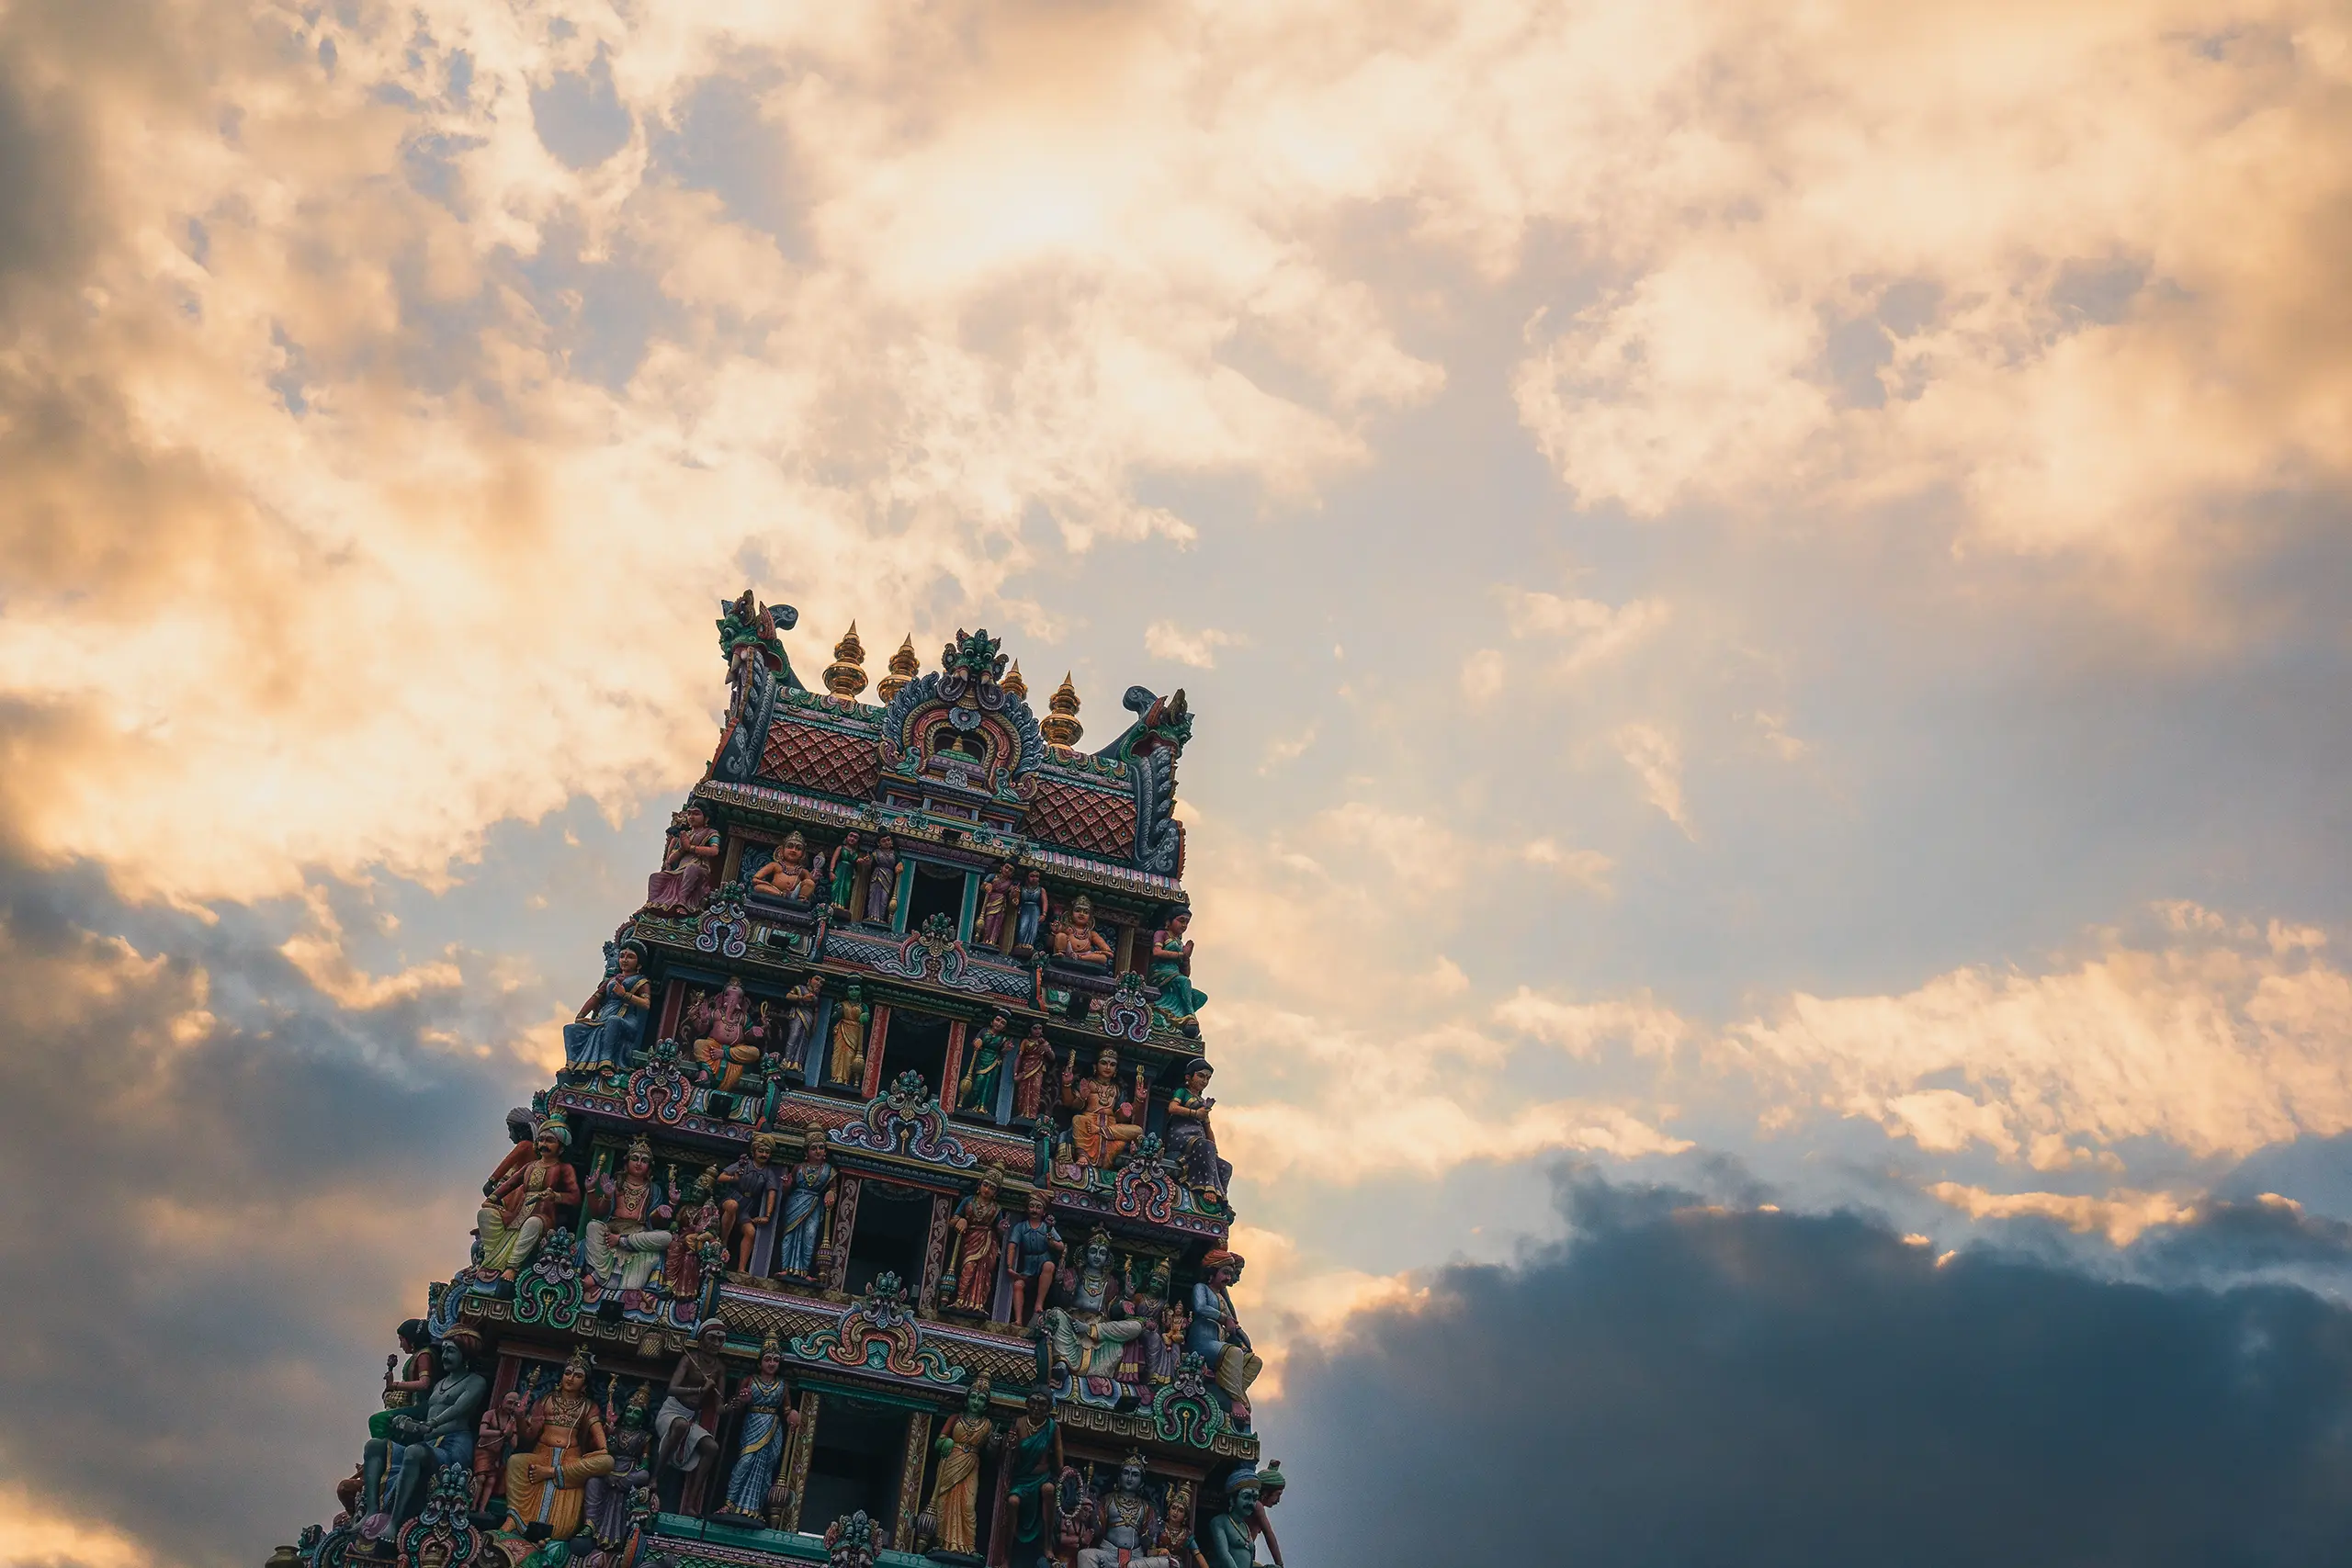
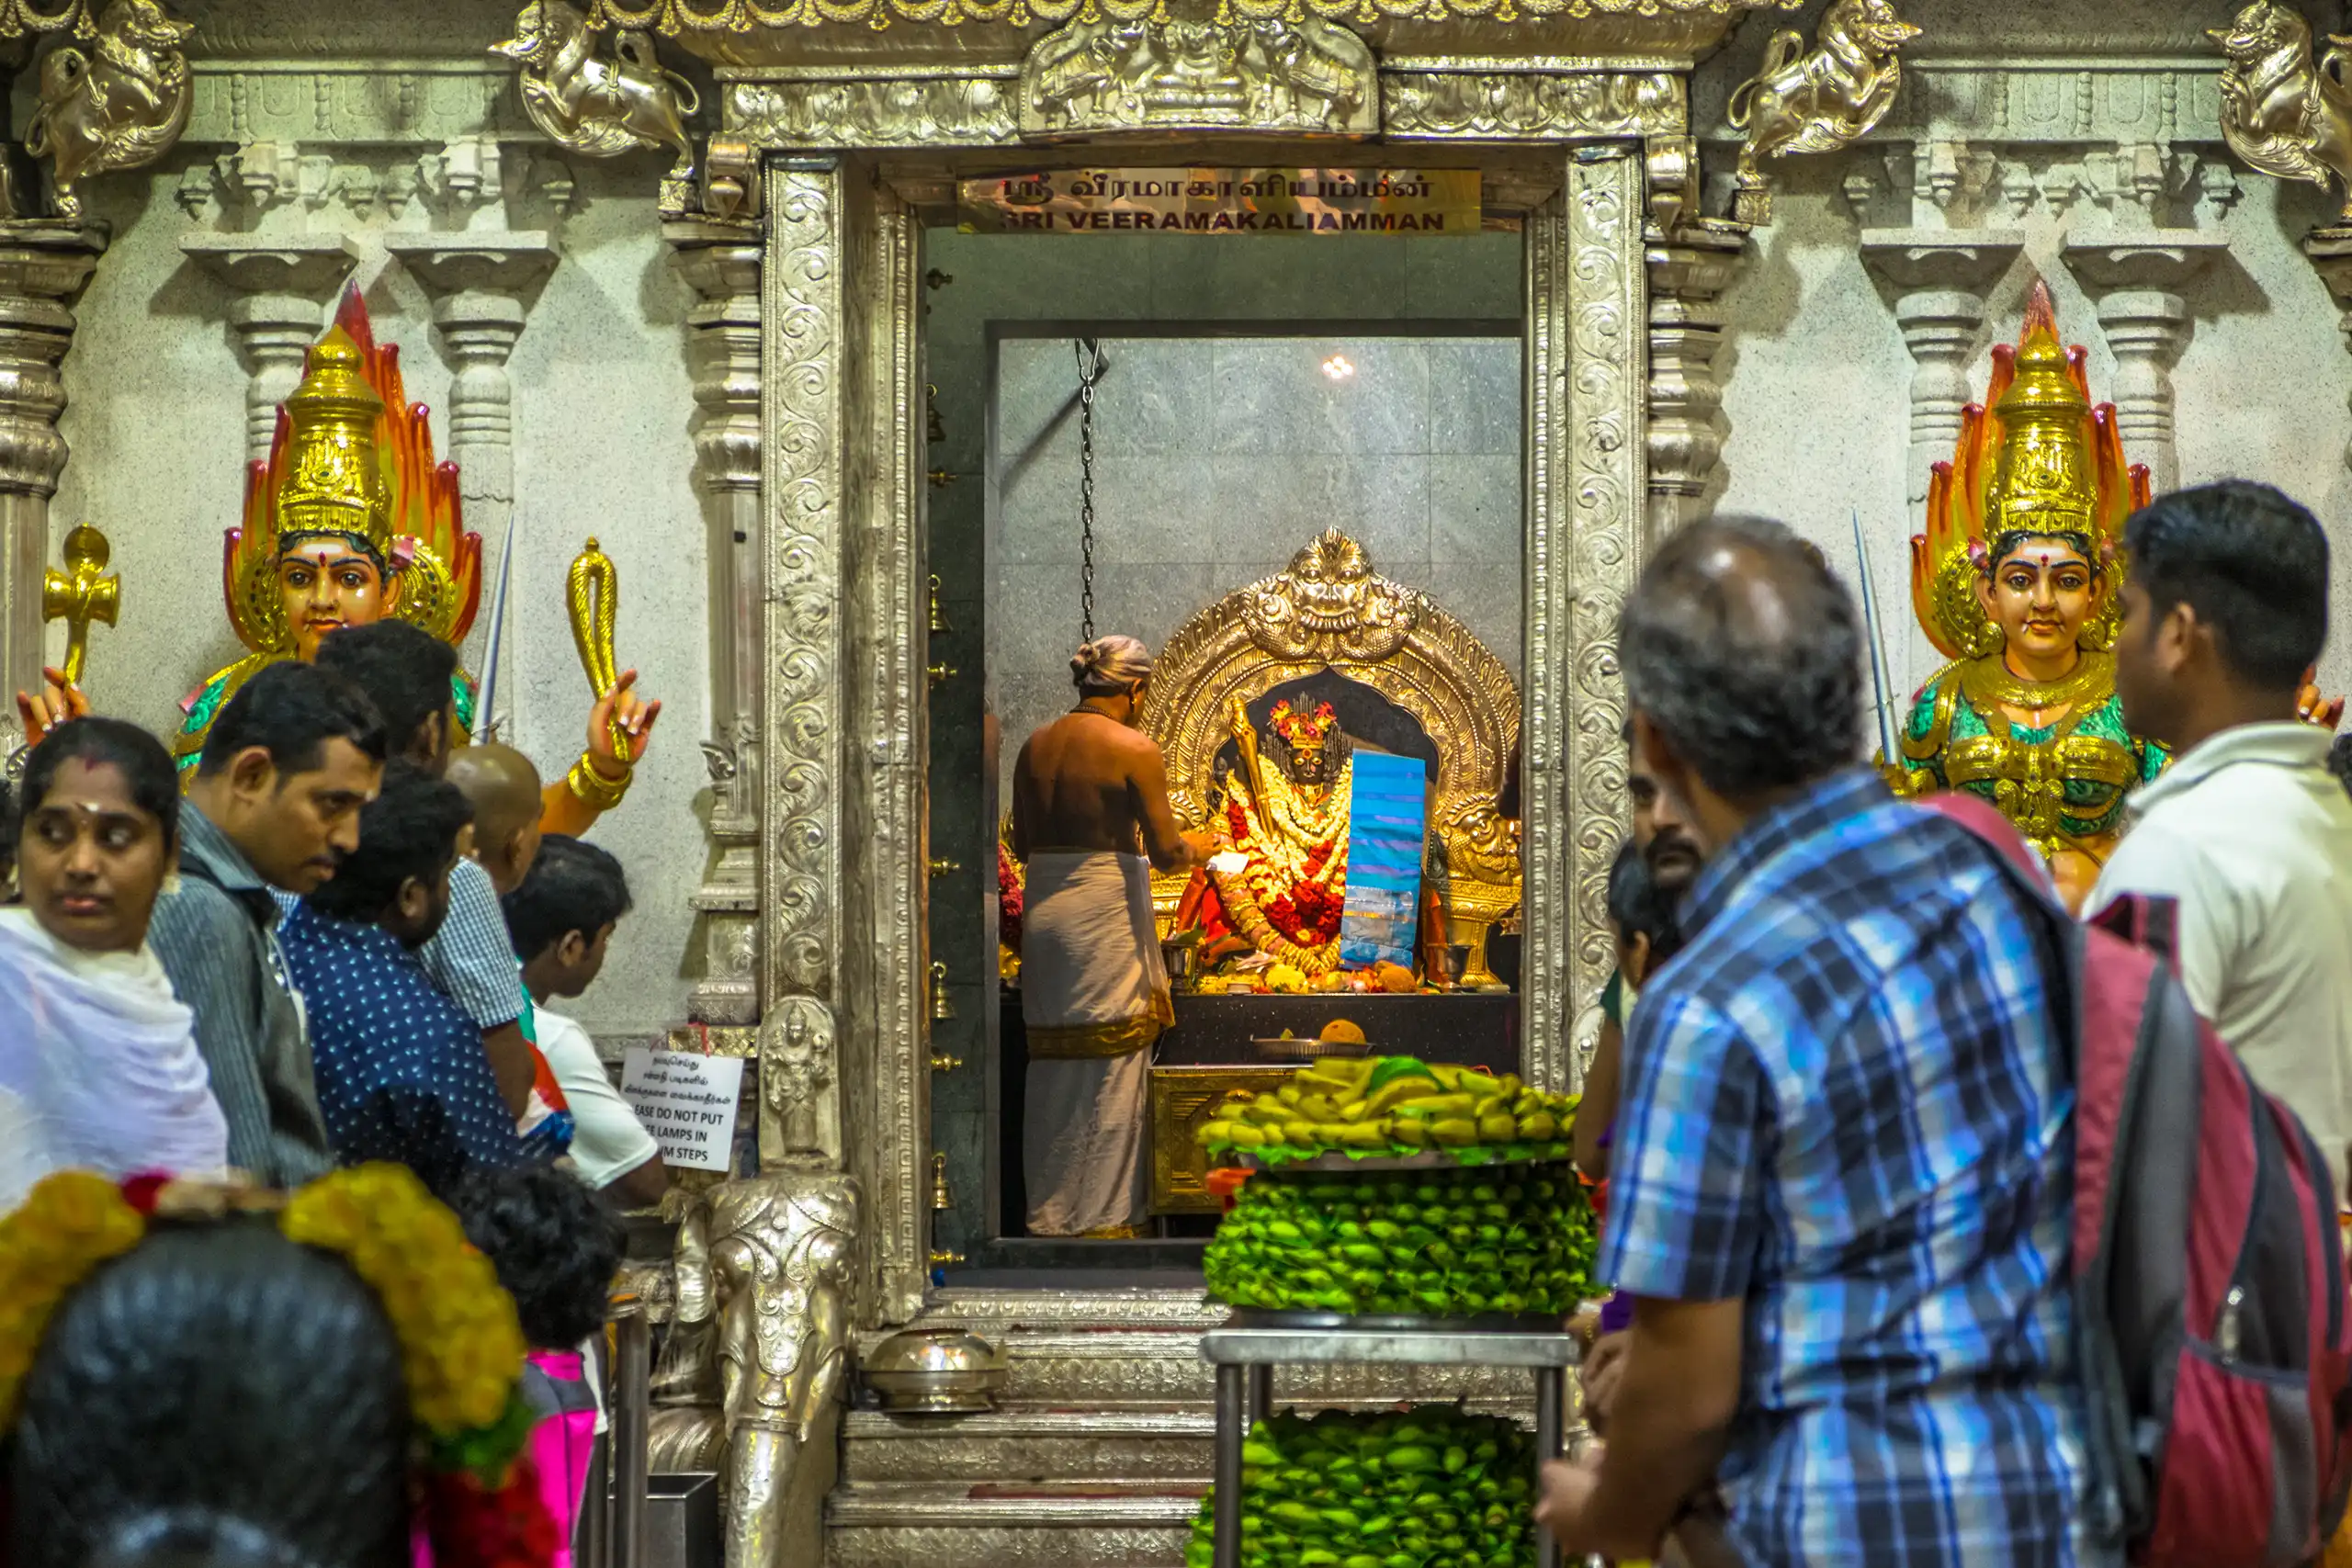
At Sri Veeramakaliamman Temple capture the ornate entrance, filled with intricately carved Hindu deities and mythological figures.❗️Interior photography is generally allowed but it’s best to ask temple staff for permission first. 🚫 No shoes inside and avoid disturbing worshippers. During Deepavali festival (between October and November), the temple and Serangoon Road is beautifully decorated with lights, making it a great time for night photography.
Delve into smaller streets and alleys to capture street life with a shallow depth-of-field, drawing attention to people and cultural details. Great for street portraits too of vendors selling garlands and Indian delicacies.
Shoot the House of Tan Teng Niah at low-angle shots to make the house look grand.
Capture the activities around the late night market such as candid street portraits of late-night shoppers, motion blur of people moving past vegetable stalls using a slow shutter (1/15s), stacks of fresh vegetables and exotic spices, workers unloading and arranging fresh produce,
Capture light trails from passing cars using slow shutter speed against a stretch of colourful shophouse. Look for dramatic lighting and shadows.
Use different focal lengths - 50mm or 85mm lens for candid shots of street life, Wide-angle (16-35mm) for temples & street views, 50mm or 85mm for portraits & close-up details.
Shoot night street photography handheld so you have the flexibility to move around the stores and streets. Shoot with a wide angle and fast shutter speed to avoid for sharp images in low light. Here are some suggested settings for a dark scene - In Aperture Priority Mode (to control the depth of field), between f/2.8 to f/4, ISO 3200 or higher ISO for low light, depending on your camera’s noise tolerance. The camera will set the speed accordingly.
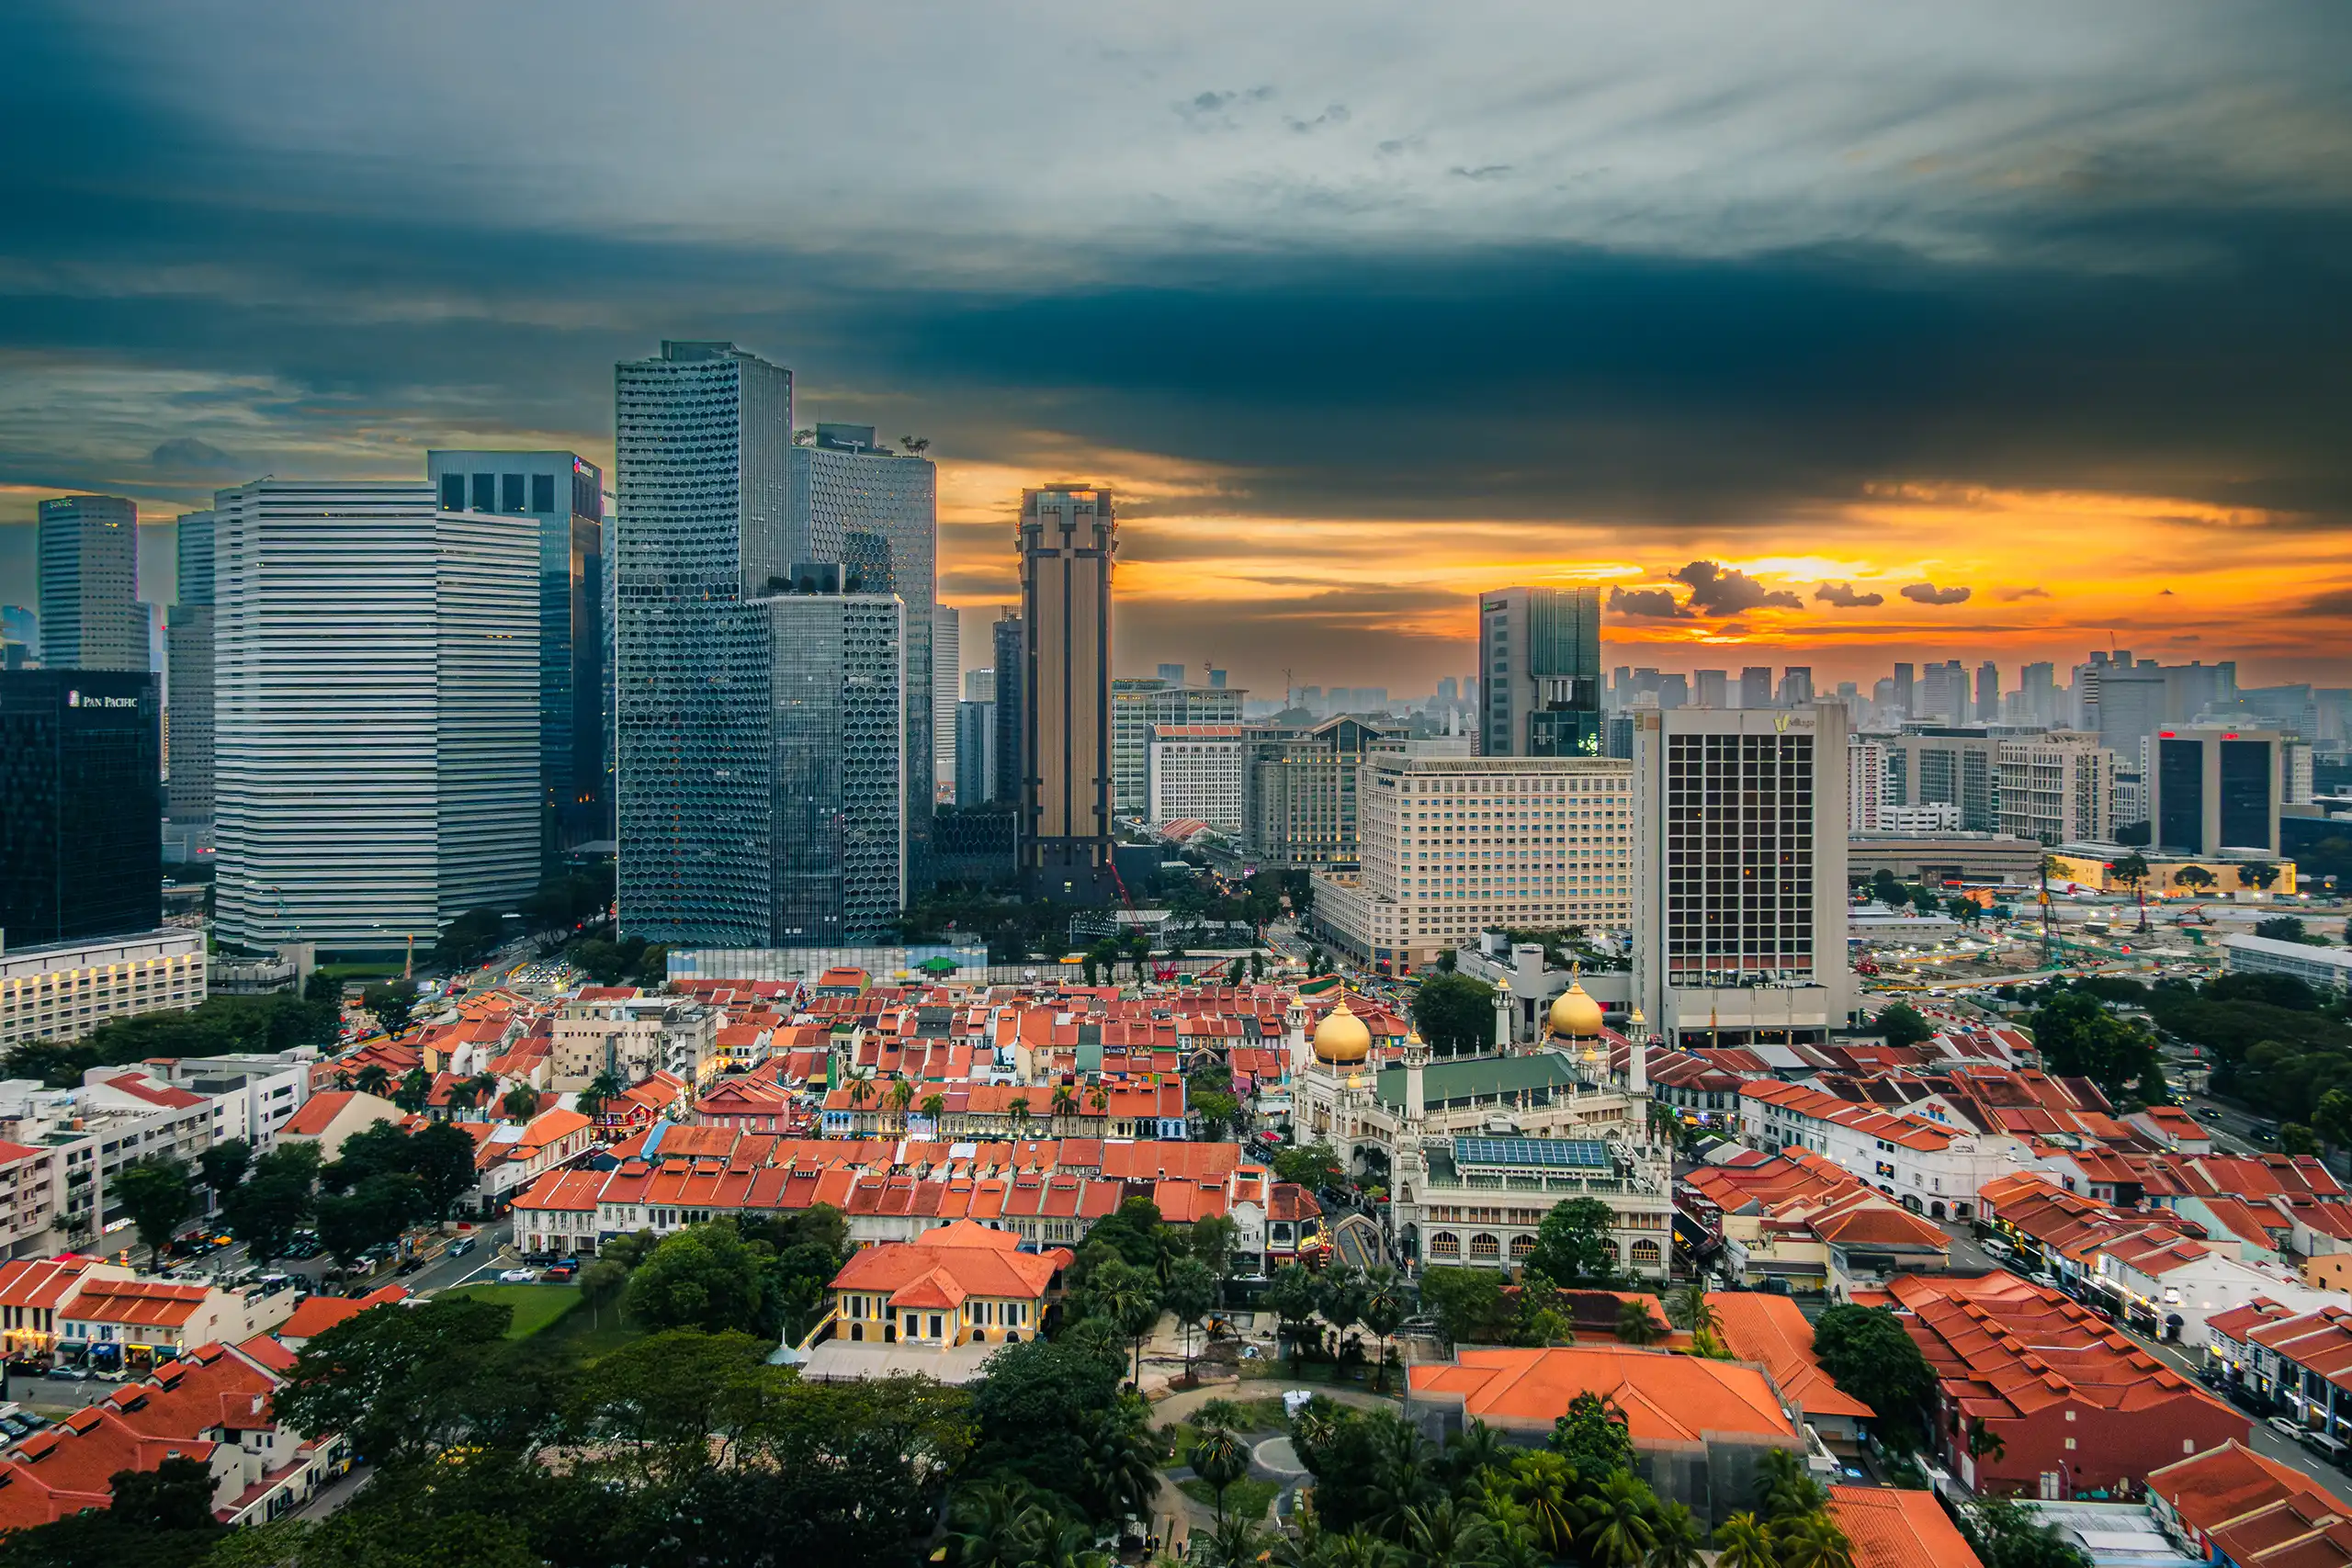
📍9. Kampong Gelam
✅ Best for: Islamic architecture, quirky street art, hip cafes and traditional Malay architecture making this district a great location for creative urban photography.


⏰ Best Time: Morning (7 AM – 10 AM): Soft light, empty streets, golden mosque. Afternoon (3 PM – 6 PM): Vibrant shopfronts, mural colors pop. Evening (6 PM – 8 PM): Warm sunset glow & café nightlife. Night (8 PM – 11 PM): Light trails, neon reflections, street portraits.
📷 Shooting Tips:
Use 50mm or 85mm to get detailed shots of murals.
Capture leading lines of the alleyways.
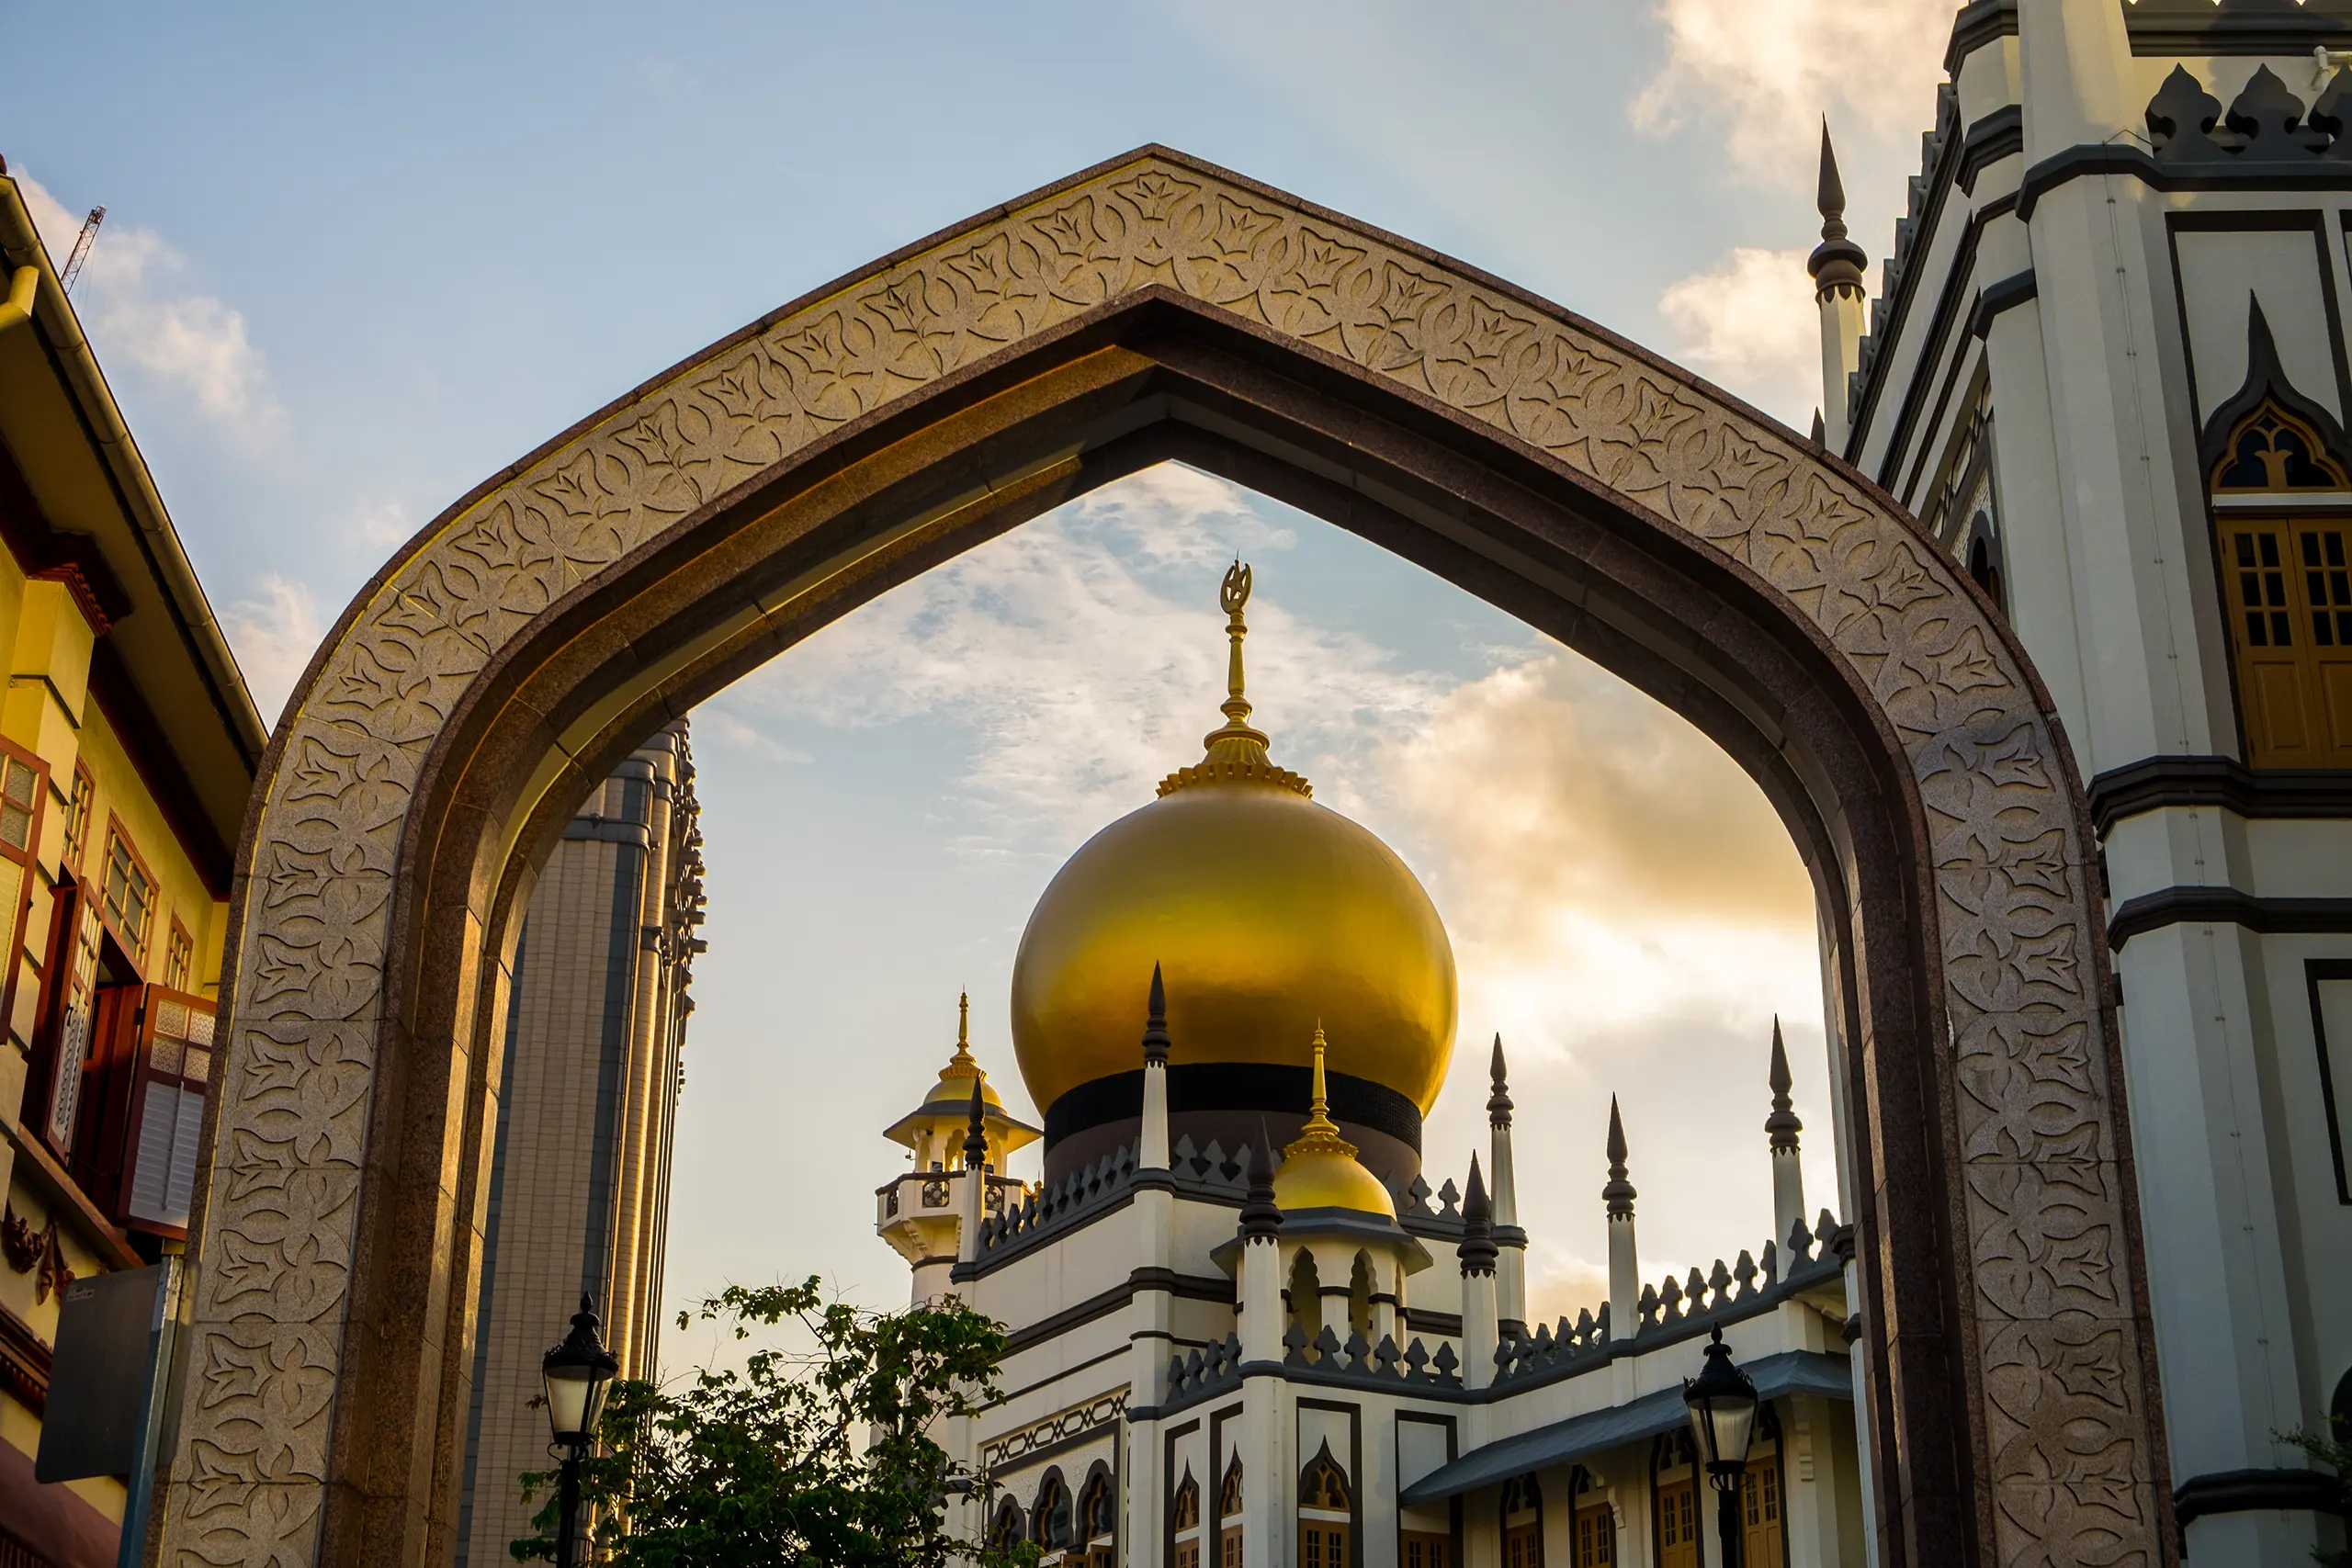
Sultan Mosque is best with low-angle shot to make the golden dome look grand. Capture the mosque framed by palm trees along Bussorah Street. Morning (soft light) or Golden Hour (5 PM – 6 PM).
Shoot from the middle of the Bussorah Street for a symmetrical view and leading line with shophouses on both sides towards Sultan Mosque. Capture street life, such as people walking on the streets and open-air dining.
Use the archway at the entrance of Muscat Street as a perfect leading line towards Sultan Mosque.
Colourful artsy Haji Lane to capture full mural artworks and portraits with the murals as creative backdrops.
Capture colourful textile vendors, carpets and exotic details at Arab Street. Best to capture with warm light filtering through colourful glass lamps.
Shoot Kandahar Street with long exposure (at least 5 sec) for light trails from passing cars against a backdrop of traditional versus modern contrast architecture.
Use wide-angle (16-35mm) for street views.
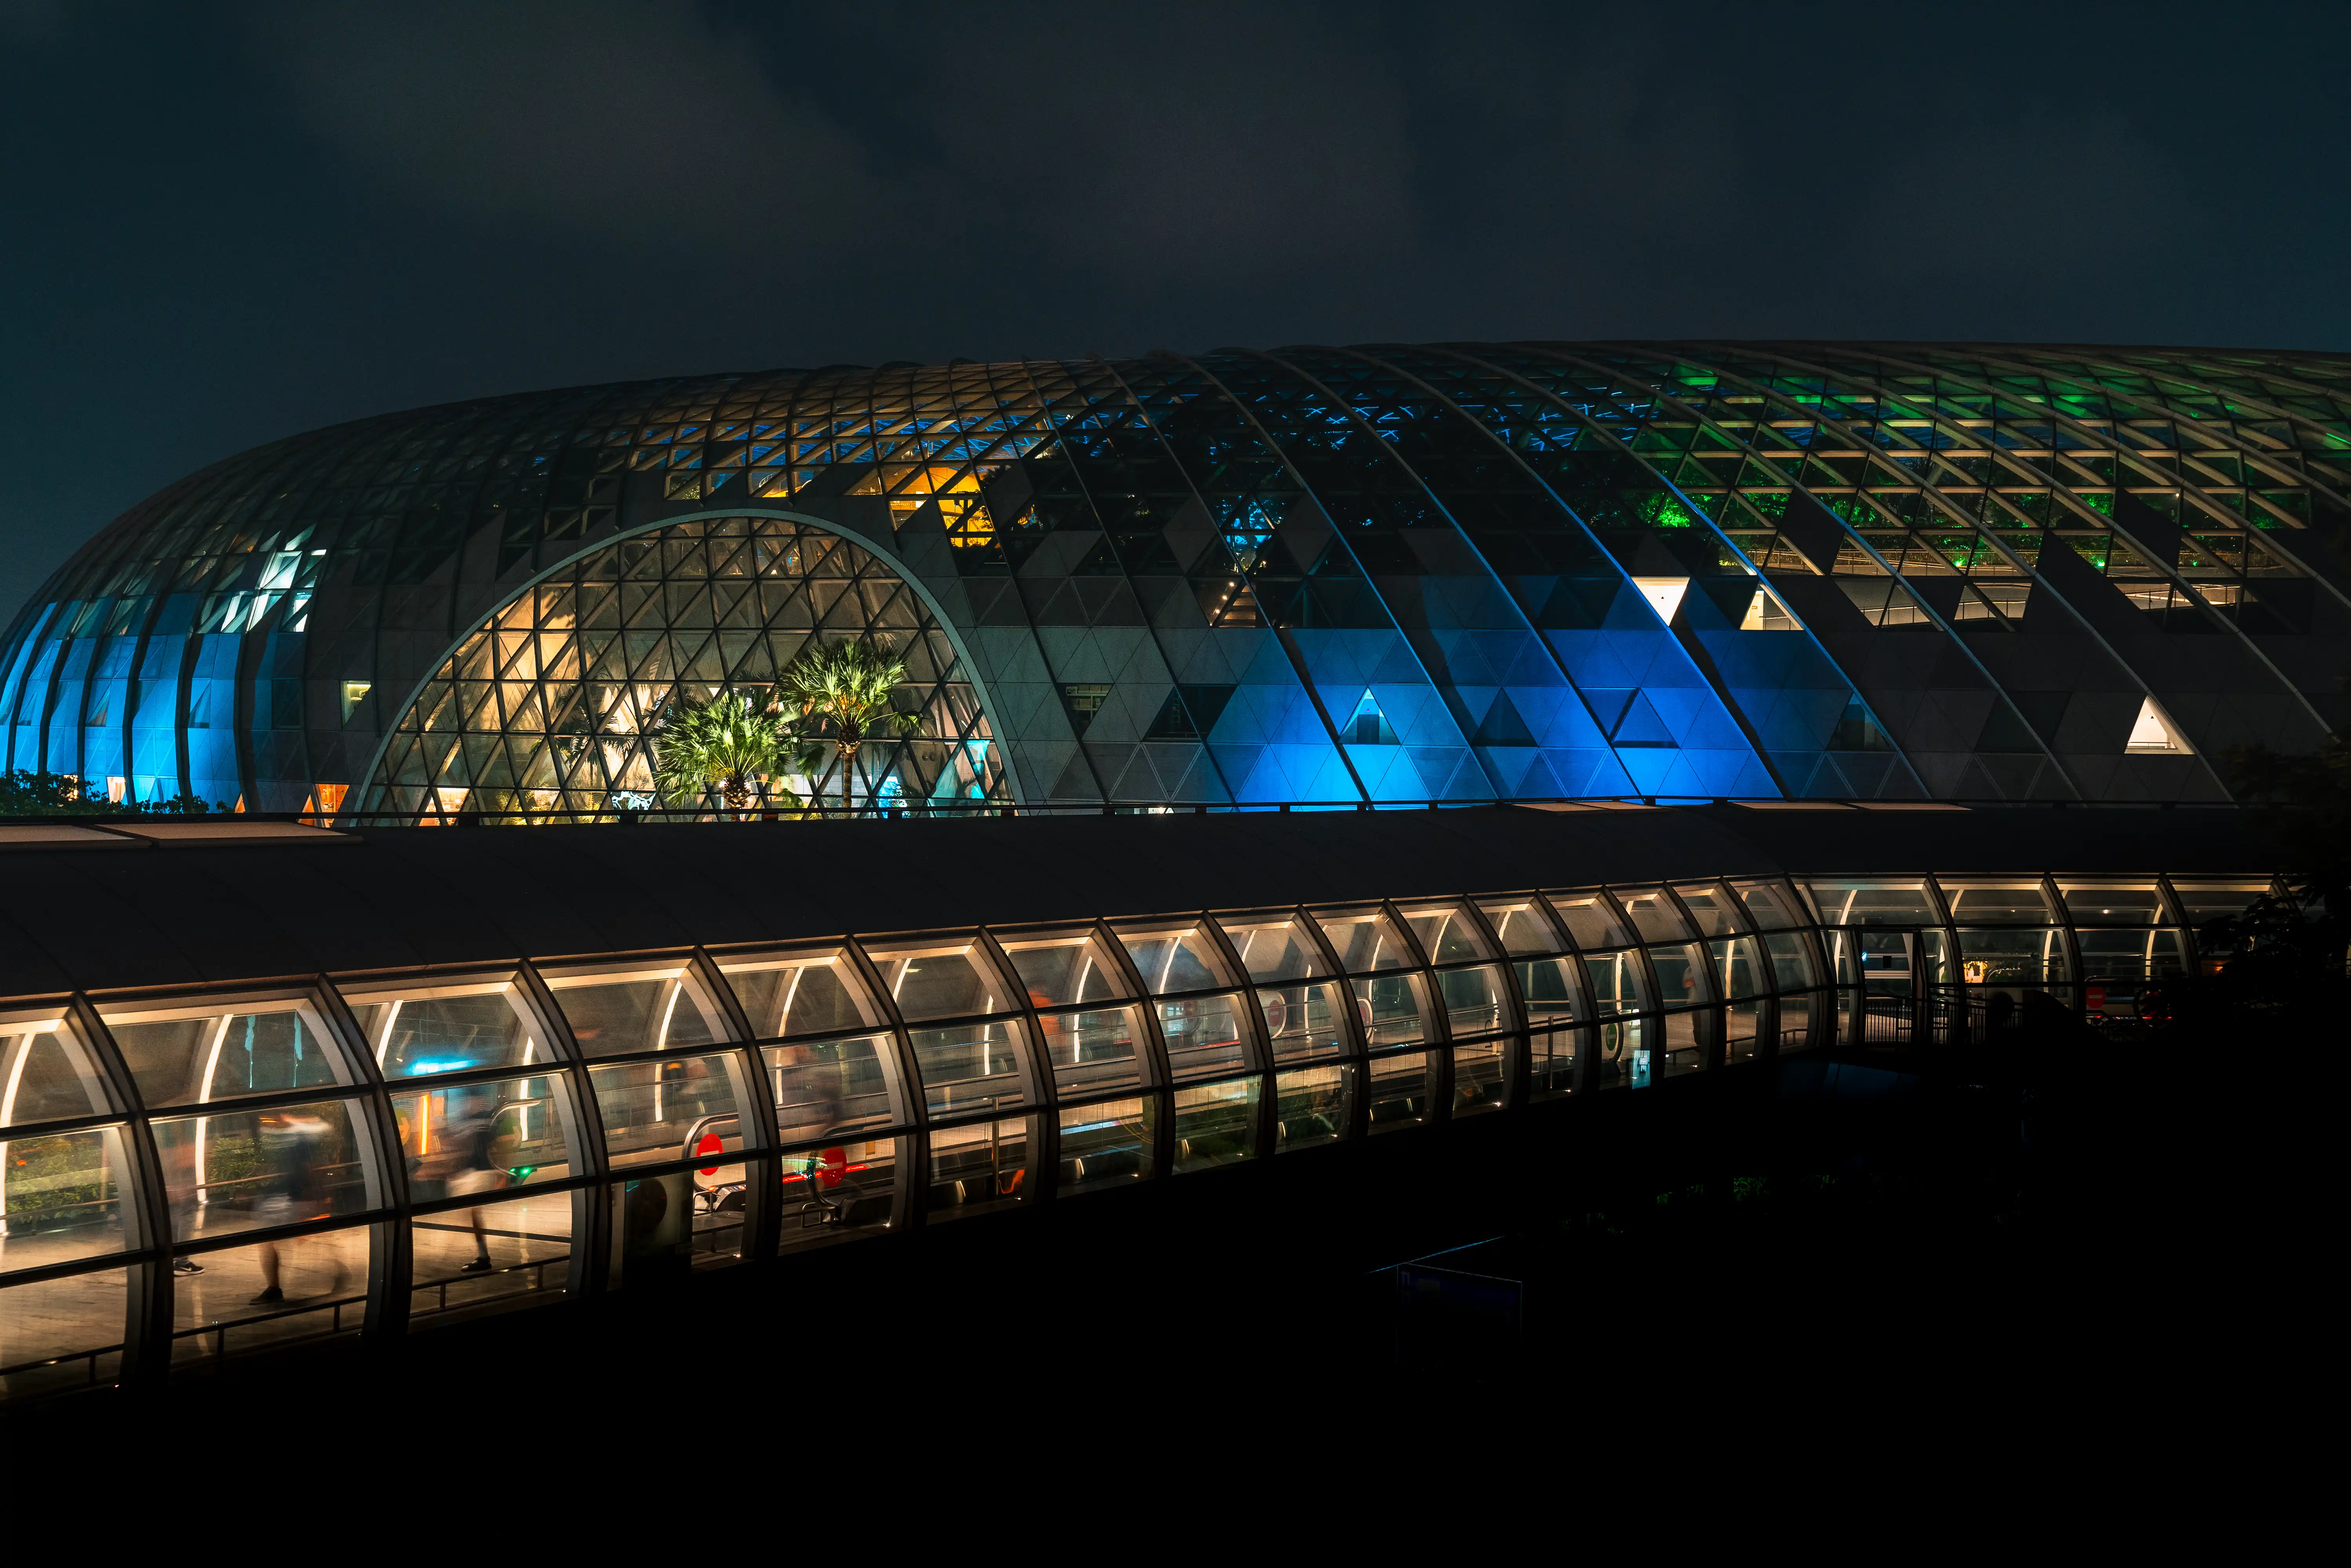
📍10. Jewel Changi Airport
✅ Best for: Futuristic architecture, 4-story indoor forest with walking path, indoor waterfall with mist effects, unique lighting conditions with a mix of natural sunlight and illuminated lights (at night).


⏰ Best Time: Daytime (10 AM – 4 PM): Sunlight filtering through the glass roof. Lesser crowd. Night (7:30 PM – 11 PM) with the Light and Music Show at 8 PM & 9 PM (with an extra 10:00 PM show on weekends and public holidays).
📷 Shooting Tips:
HSBC Rain Vortex (40 meter) is the world’s tallest indoor waterfall best shot at each level for unique perspective of the waterfall.
Basement 2 (Up-close shot of the waterfall impact zone).
Level 1 (Eye-level full view of the Rain Vortex).
Level 2-3 (Best panoramic angles of Jewel’s interior).
Level 4-5 (Top-down perspective of the entire Jewel dome).
Use a long exposure from Level 1 or Basement 2 for a dreamy waterfall effect.
Shoot in portrait orientation to emphasise the height of the waterfall.
At night, the Rain Vortex is lit with colourful LED lights—use a longer exposure (1-2s) for a dramatic effect.
Generally, tripods are not allowed, but handheld long-exposure techniques work. IBIS (In-Body Image Stabilization) and Optical Stabilization (OIS/VR/IS) on the lens allows you to shoot handheld long exposures without a tripod, reducing motion blur caused by hand movement. Try this suggested settings - Shoot in Aperture Priority (to control the depth of field), between f/2.8 to f/4, ISO 3200 or higher ISO for low light, depending on your camera’s noise tolerance. The camera will set the speed accordingly.
Combine photography and videography of the nightly Light and Music show.
A moving shot of the Skytrain passing in front of the waterfall. Take the Skytrain between Terminal 2 & 3, and position yourself toward the front or back of the train for a perfect angle.
Airport control tower framed with the HSBC Rain Vortex, use the Jewel Skytrain bridge to frame the airport control tower. Wait for the Skytrain to pass through the scene for an epic composition.
Jewel’s exterior at night with it futuristic glass dome reflecting the night lights. Best to shoot at blue-hour into the night. Use leading lines from the entrance pathway to add depth to your shot.
🌐 Website: https://www.jewelchangiairport.com
Need help with camera settings? Check out our other blog here.
Ready to Capture Singapore Through Your Lens?
If you’re excited to explore Singapore's iconic spots and more, contact us for either a custom private photography workshop with photo tour combined or checkout our ready-made programmes. Our expert photographers provide insider access, professional photography tips, and the perfect itinerary to build your travel photography portfolio.
Need a photography itinerary to do it on your own? No Problem!
We understand that some photographers prefer to explore at their own pace. That’s why we offer a customisable photography itinerary designed around your interests. For a fee, you'll receive a DIY photography guide that leads you to Singapore’s most photogenic spots, including hidden spots to get a different perspective —from the stunning Marina Bay skyline to the rich heritage of the Cultural Districts. Capture the city your way, on your own schedule. Contact us to get started!
Notice:
This blog will be periodically updated with new information, developments or insights whenever it becomes available. Be sure to check back regularly for the latest updates.
-----
Disclaimer:
The information provided on this blog is for general informational purposes only. While we strive to ensure the accuracy and reliability of the content, including offering suggested photography tips and techniques, we are not responsible for any mishaps, damages, or mishandling that may arise from using the information shared.
By reading and using this blog, you agree that we are not liable for any legal claims or issues that may result from your actions based on the content.

Comments